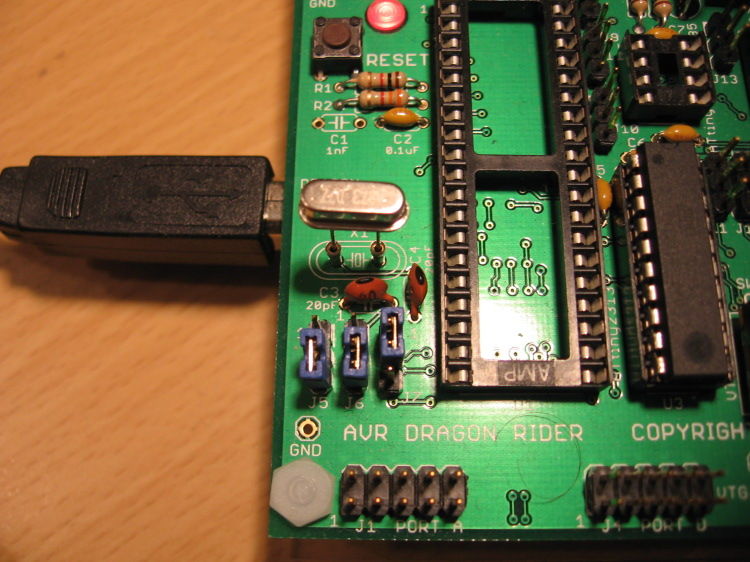
This instructable is a crash course in how to use some of the features of the Dragon Rider 500 from Ecros Technologies. Please be aware that there is a very detailed User’s Guide available on the Ecros website.
The Dragon Rider is a interface board for use with an AVR microcontroller programmer called the AVR Dragon by Atmel.
For more information:
Atmel’s Wesite:
http://www.atmel.com/
AVR Dragon link:
http://www.atmel.com/dyn/products/tools_card.asp?tool_id=3891
Dragon Rider 500 by Ecros Technology:
http://www.ecrostech.com/AtmelAvr/DragonRider/index.htm
Dragon Rider 500 assembly Instructable:
http://www.instructables.com/id/Assembling-the-Dragon-Rider-500-for-use-with-the-A/
Learn all about the AVR microcontrollers:
http://www.avrfreaks.net
This instructable may grow with time so check back now and again!
Step: 1 AVR Dude
You need some programming software in order to use the AVR Dragon for programming. I use AVRdude with the Ubuntu operating system (linux) and I’m very happy with the results.
This instructable will not deal with the intricacies of programming software. If you do not know how to set-up or use programming software, check this instructable out to bring you up to speed:
http://www.instructables.com/id/Getting-started-with-ubuntu-and-the-AVR-dragon/
My guess is that if you have purchased and assembled a Dragon Rider 500 you already know how to program a chip with the AVR Dragon….. onward!
Step: 2 ATtiny2313 – Blink the LEDs
Let’s program an ATtiny2313 which is a 20-pin microcontroller.
The Dragon Rider 500 has sockets for several different sized AVR microcontrollers. These include: 8, 20, 28, and 40 pin sockets. Depending on which socket you use, jumpers on the Dragon Rider board must be set differently.
Jumper Settings
Set the jumpers on the Dragon Rider so that the shunts connect the following pins. (pin4 is the center pin for J22-J-24)
Pins:
J5 – 23
J6 – 23
J7 – 12
J16 – 23
J22 – 41
J23 – 41
J24 – 41
This is a basic setup that allows for ISP (In System Programming).
Blinky Blinky
Programming does no good unless you have something to program. I have written a very short code example to blink the Dragon Rider’s LED’s one at a time.
Use a ribbon cable to connect the LED header (J29) to the PortB header (J2).
Programming
I’ve included the C file as well as a makefile and the hex file. Like I mentioned in the intro, I cannot cover the software side of programming in the Instructable. Program like you would for the AVR Dragon, as the Dragon Rider doesn’t alter the software side of things at all.
Step: 3 Using the LCD Add-on
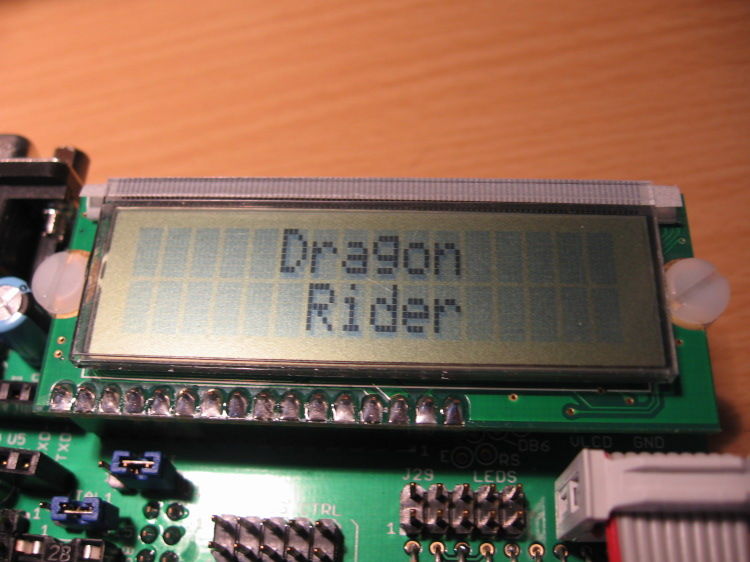
Here’s a simple way to use the LCD Add-on. This will write “Dragon Rider” to the LCD screen.
Hardware:
-
- ATtiny2313
- R/W Jumper: R/W should be connected to “BIT1” on the Dragon Rider Board (See explaination in the Assembly Instructable)
- J23: This jumper must be installed for ISP programming but then removed for the LCD to function properly.
- Connect LCD to PORT B using ribbon cable (J31 to J2)
Software
I am using Peter Fleury’s LCD library to drive the LCD in 4-bit mode. Check out Peter’s Homepage to download the library.
You will need to make sure that lcd.c is compiled with your code and that you make the following changes to lcd.h:
-
- We are using the internal RC oscillator so XTAL needs to be set for 1MHz:
#define XTAL 1000000
-
- Port settings need to be adjusted to PORTB:
#define LCD_PORT PORTB
-
- Pinout for 4 data lines needs to be adapted:
#define LCD_DATA0_PIN 4 #define LCD_DATA1_PIN 5 #define LCD_DATA2_PIN 6 #define LCD_DATA3_PIN 7
-
- Pinout for RS, RW, and E needs to be adapted:
#define LCD_RS_PIN 3 #define LCD_RW_PIN 1 #define LCD_E_PIN 2
The main program is very simple thanks to the work Peter Fleury did in his LCD library.
CODE:
#include <avr/io.h>#include "lcd.h"int main(void){ lcd_init(LCD_DISP_ON); //Initialize LCD with the cursor off lcd_clrscr(); //Clear the LCD screen lcd_gotoxy(5,0); //Move cursor to this location lcd_puts("Dragon"); //Put this string on the LCD lcd_gotoxy(6,1); //Move cursor to this location lcd_puts("Rider"); //Put this string on the LCD for (;;) { // Do nothing forever (Message already displayed on LCD) }}
Code Attached
The code attached includes Peter Fleury’s LCD library (lcd.c and lcd.h) with his permission. Thank you Peter! The only alteration I have made to it is to set the proper pins in the Defines. Please visit his site to download the package: http://www.jump.to/fleury
I have also included a makefile that I use written by Eric B. Weddington and, Jorg Wunsch. I sent a PM to Jorg over at avrfreaks.net but never received a response from him. There are a few changes in the makefile to tailor to using Linux and the Dragon. Thank you to you both, please set me know your preferences on me sharing your work.
Step: 4 28-pin uC ISP Programming (ATmega8)
The next project demontration will utilize an ATmega8 which is a 28-pin avr. Here is the the basic jumper set for ISP programming the 28-pin microcontrollers.
Jumper Settings
Set the jumpers on the Dragon Rider so that the shunts connect the following pins. (pin4 is the center pin for J22-J-24)
Pins:
J11 – 23
J12 – 23
J13 – 12
J16 – 23
J22 – 42
J23 – 42
J24 – 42
Technical Information
- Connecting J11 and J12 in this fashion allows you to use those pins as I/O pins. The alternative would be to route these pins to make a connection with the external crystal.
- Connecting J13 in this fashion allows us to use it as the reset pin. The alternative would route this pin to the PORTC header for use as an I/O pin. (this would have many drawbacks, including the inability to program this chip using ISP).
- J16 & J22-J24 are connected in this fashion to route the appropriate pins (Reset, MISO, MOSI, and SCK) to the ISP header of the AVR Dragon.
For more detail: How to use the Dragon Rider 500 with your AVR Dragon using ATtiny2313 microcontroller


