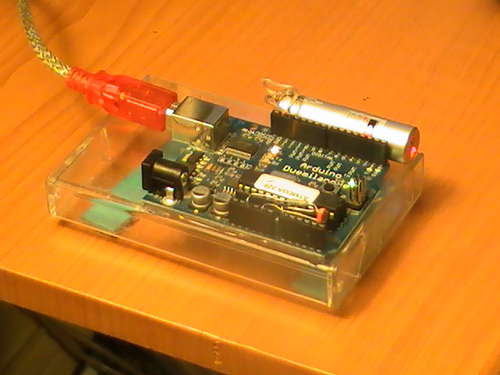
This instructable will show you how to construct a laser tripwire that can twitter and grab an image from a webcam, as well as execute any command you can put in a bash script.
This instructable is actually quite simple and is even suitable as a beginner arduino project. It requires a GNU/linux (or possibly Mac) operating system with the arduino IDE and Processing IDE working properly. This project could also be implemented in Windows if you created a more complex processing application.
Hardware Requirements
Arduino Board
Laser pointer/pen
Light Dependant Resistor
100Kohm Resistor
Optional:
Webcam
Breadboard
Software Requirements
Arduino IDE
Processing IDE
Linux OS (I’m using Arch Linux for this project)
Curl
Webcam (part of xawtv)
Other Stuff:
Mirror
Solder and Soldering Iron
Wire
Hot Glue Gun
Hacksaw/Knife
Straw or Ballpoint Pen
Step 1 Connecting The LDR
I needed the LDR and the laser to be in a position where they would not move around so I connected my LDR and resistor directly to the Arduino without a breadboard, but you can do it however you like, below are the photos for soldering and bending them into shape I also included a simple diagram.
I cut the end off of a ballpoint pen so that I could slip it over the LDR to prevent ambient light from affecting the reading, you could also use a straw.
Step 2 Connecting the Laser Pointer
You can find these really cheap at some retail stores, I know that mine was under $3.
Unscrew the end and remove the batteries.
Use a hacksaw or sharp seraded knife to cut off 1 to 1/2 inch of the laser pointer, so that you can access the spring. You may not need to do this depending of what kind of laser pointer you found.
Connect and solder a wire to the spring ( I bent mine out to make it easier ) then rough up a small part of the outside of the laserpointer with a knife/sandpaper/pliers ect so that you can solder it to the outer casing. Then tape the button that activates the laser.
On my laser pointer the spring is + and the casing is – yours might be reversed. The best way to check is to take note of what position the batteries go in, the coin cells will have + marked on one side, if that side touches the spring then the spring is +.
Connect your + wire (Casing) to digital pin 13 on your arduino and you – wire (spring) to GND.
Now upload the arduino sketch and ensure that you are getting readings from the LDR and that the laser is on.
To accomplish this you must uncomment this line:
//Serial.println(ldrVal);
and comment out this one:
Serial.print(“1”);
If all is well you can position your Laser and LDR in a fixed position, bounce the laser to the LDR with a mirror to see that its registering. When the laser is detected it should print a “1”. You may need to adjust the threshold values depending on your LDR.
For more Detail: Laser Tripwire takes a Photo, Uploads it to Twitter

