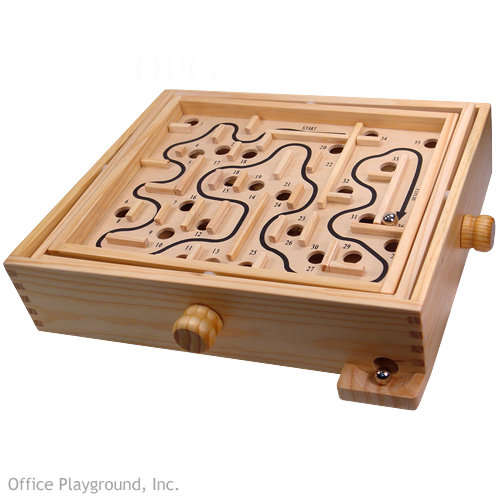
Do you know this classic wooden labyrinth game with two knobs for X and Y rotation?
So, I’ve decided to modify one by connecting two standard servos to the knobs and let a microcontroller (ATmega32) play the game.
Credits:
– To CarlS www.instructables.com/id/Servo-Controlled-Marble-Maze/ for inspiration.
– To the AVR freaks www.avrfreaks.net especially Dean (aka abcminiuser) for his excellent tutorials.
Please, feel free to write ideas for improvements and modifications.
Materials, Parts and Tools
I found all the materials for this project laying around at home and there were no plans nor designing. I just took the materials and thought how I can assemble them altogether.
You can use other materials and basically it’s a good practice to design and make plans beforehand.
Materials:
1 wooden Labyrinth – 280/230/60 mm
1 wooden board – 400/350/20 mm
4 pieces of wood – 30/30/10 mm
2 pieces of wood – 150/155/10 mm each
2 pieces of wood, L shaped – 120/27/4 mm each side
4 pieces of wood, L shaped – 34/32/8 mm & 18/32/8 mm each
600 mm long strong silk string
8 pieces of rubber – 30/30/1 mm each
4 L brackets, stainless steel – 32/32/1.5 mm each
8 bolts (40/5 mm) with nuts and washers
A bunch of small wood screws and nails
a piece of paper, A4 for example
hot-glue
contact adhesive
insulating tape
Parts:
2 Hitec HS-311 Standard servos
AVR ATmega32 and a programmer – I use the AVR-LIP (EC-AVR) by DeccanRobots
2 straight switch knobs
1 breadboard
Some wires and pins
Tools:
saw, screw-driver, hammer, sharp knife, scissors, clamp etc.
Labyrinth Modifications
Cut the servo horns (#13 R-D) just to make it symmetrical and use a hot glue to connect it to the switch knobs (90 deg. to the knob’s pointer).
Replace the two wooden side knobs with these switch knobs in order to calibrate the labyrinth easily.
To improve the strings/bars friction, replace the two nylon strings with a strong silk string and put some contact adhesive around the steel bars.
Put insulating tape on the inner side of each labyrinth’s hole and round pieces of paper on the outer side so the ball will stay on the board as long as you test the game.
For more Detail: Servo Controlled Labyrinth using Microcontroller ATmega32

