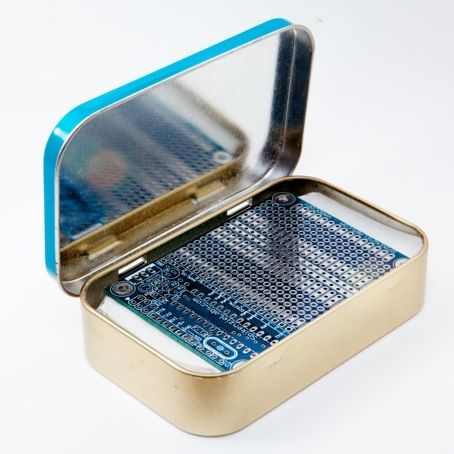
What is a Prototino™?
The Prototino™ is an Arduino clone with a built in prototyping area.
Designed to make a permanent version of your project once you have perfected it on a breadboard but without the expense of embedding your original Arduino into your project. The Prototino also makes your project more reliable and robust. With the prototyping area integrated into the board with the microprocessor, your project will have fewer boards and fewer wires, and because of that, fewer mistakes and fewer shorts.
Prototino™ features:


- 1.Works with either the ATmega168 or ATmega328
- 2.Large breadboard like prototyping area to make the transition from breadboard to permanent easier.
- 3.On board 5 volt voltage regulator rated up to 1 amp.
- 4.On board ICSP connector.
- 5.Pinout for optional FTDI USB to Serial cable, works with the Arduino software without modification to load your sketches.
- 6.Power LED
- 7.All digital and analog pins are brought out to the prototyping area in a straight line.
- 8.Entire Prototino™ board fits inside an Altoids tin.
- 9.Four corner 3mm mounting holes, to secure your project.
Programming the ATMega on the Prototino
The easiest way to program the ATmega on your Prototino has to be with a USB to Serial cable. With the cable you can load sketches into the Prototino using the Arduino IDE software just like a regular Arduino. If you don’t have this cable there are other ways to do it, see below for possibilities
The easiest way to program the ATmega on your Prototino has to be with a USB to Serial cable. With the cable you can load sketches into the Prototino using the Arduino IDE software just like a regular Arduino. If you don’t have this cable there are other ways to do it, see below for possibilities
Programming – With USB Cable:
- 1.Plug the USB to Serial cable’s serial end into the Prototino. The black wire is on the end of the Prototino’s connector with the GND pins and the cable’s green wire (RTS#) connects to the DTR pin on the Prototino.
- 2.In the Arduino IDE software, under the TOOLS menu, choose SERIAL PORT, then choose the serial port that the Prototino is connected to.
- 3.Under the TOOLS menu again, choose BOARD, then choose either … w/ ATmega168 or … w/ ATmega328 to match the actual ATmega on your Prototino.
- 4.Now you should be able to Verify / Compile and then upload the sketch to the Prototino.
For more detail: The Prototino™ using ATmega168 microcontroller
