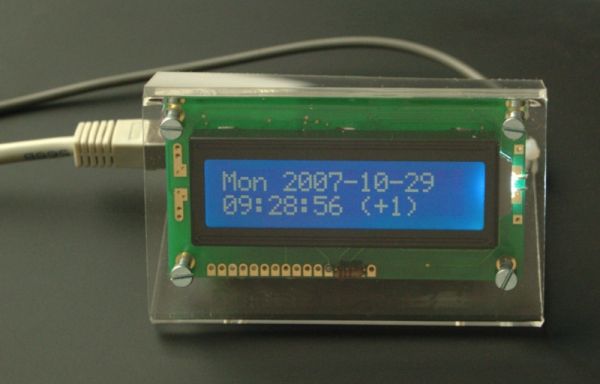
The Network Time Protocol (NTP) has revolutionized the world. Suddenly one could have anywhere in the world accurate time and date. NTP is a simple UDP based protocol and can be implemented in a Microcontroller.
Using the tuxgraphics ethernet board and a LCD display we build a nice clock which gets time and date via NTP. Just attach it to you DSL router!

A NTP client
So far we have only implemented UDP and TCP servers. A clock needs however to be a client. This is something new. A server just answers to incoming IP packets it is therefore a bit easier to implement. However NTP is a short packet and it is therefore possible to add a NTP client to the existing network stack. We can therefore build a clock which has not only a LCD display but also a build-in webserver. This can then be used to configure the clock or see the current time.
The NTP protocol is described in RFC958. Essentially it is just a 64 bit time-stamp. 32 bits of this time-stamp are the seconds in UTC (=GMT Greenwich mean time) since since Jan. 1st 1900. The other 32 bits are fractions of a second. In other words NTP can be very very accurate. For our purposes it is however enough if we just evaluate the seconds.
The AVR NTP clock synchronizes at startup with a NTP server and uses then a timer interrupt to maintain time locally. Every hour it tries then to synchronize again. If your DSL router is however off during the night then it’s not a problem. The clock just continues. We use the on board crystal to maintain the clock locally. This will minimize the drift even if no Internet connection was possible for a couple of days.
How to build a clock
A clock is essentially just a counter. Since NTP is already a 32-bit “counter” we just take a 32bit variable and increment it. That is: the initial setting of the counter comes via NTP and then we just count up every second.
For this we just generate a timer interrupt every second. The 16bit timer/counter of the atmega168 supports this already on hardware level.
The basic clock is therefore just this:
// interrupt, step seconds counter
ISR(TIMER1_COMPA_vect){
        time++;
}
The hardware interrupt is generated every second and we step the counter “time”. Very easy.
If you had already a look at the code you might have noticed that the included README file says that one needs an atmega168 for this and a atmega88 not sufficient. Why should such a simple counter not fit into an atmega88 chip??.
The problem is the math to convert seconds since day-X into a human readable format. This requires quite heavy math for a microcontroller. AVR is a 8-bit processor therefore 32-bit math is expensive. Add the NTP client, the web-server and the LCD driver and you are above the 8Kb available in the atmega88. An atmega168 has however more than sufficient space. It fills not more than 2/3 of the atmega168. You can therefore easily add additional functions to this wall clock if you want.
The tuxgraphics AVR NTP clock
The 16×2 LCD display with blue backlight and the AVR webserver SMD board are mounted on an acrylic glass sheet. For the power supply I used an old Ericsson Mobile phone charger (not visible on the picture). It produces 5V DC and is very light as it is a switched power supply. It plugs directly into the wall socket and the 5V DC output is then connected via a 1.5m cable to the clock. I got the charger at ebay for 2 Euro.
For more detail: The Tuxgraphics AVR NTP clock using ATmega168
