Summary of Programming an ATMega128
This article details a project to program ATMega128 chips on custom breakout boards. The author and a colleague, Steve, attempted using the Arduino IDE with a USBTiny programmer but faced upload failures and configuration errors. Consequently, the author switched to the Oshonsoft AVR Simulator to generate a hex file. After resolving Windows 8.1 digital signature issues for a USBASP programmer, they utilized AVRDudess software to successfully flash the code onto the chip.
Parts used in the Project:
- ATMega128 chips
- Breakout boards
- USBTiny programmer
- Oshonsoft AVR Simulator
- USBASP programmer
- Laptop running Windows 8.1
- AVRDudess GUI front-end
- avr-dude command-line tool
We tried all kinds of ways to get the Arduino IDE to compile and program our ATMega128 chips that we’d so carefully soldered onto our breakout boards. Steve spent longer than could be reasonably expected, hammering away, determined to make progress. In fact, he got so far as to get Arduino 022 to compile some code for the ATMega – it just wouldn’t upload via the USBTiny programmer
While Steve refused to give up, I went down a slightly different route. Having recently discovered that the latest Oshonsoft AVR Simulator included support for both the ATMega128 and ATMega165, I threw together a simple blink test and compiled to a .hex file (which the compiler did a great job of creating, at a meagre 240 bytes in size!)
With the Oshonsoft compiler creating the hex file, we were both neck-and-neck: hex file built, just the programming to go. Steve spent a while messing about with the USBTiny config files, trying to add in support for the ATMega128 but the nearest he got to completion was an error message in the avr-gc executable – highlighting the character “h” at the beginning of an innocuous looking entry in the modified config file.
In the meantime, I was having problems of my own.
Despite always running my laptop in “disabled digital driver enforcement mode” there was something about the USBASP programmer that Windows 8.1 really doesn’t like. I had to reboot the laptop twice; both times to disable digital signature signing, to enable the device to work. (there are plenty of links on the net about how to disable digital signing so there’s no need to go into detail here – except to say that a lot of guides are out of date and that the location of different settings has changed under Windows 8.1 in the later updates; I spent ages only to discover that the settings I wanted were no longer under “general” but “restore pc”)
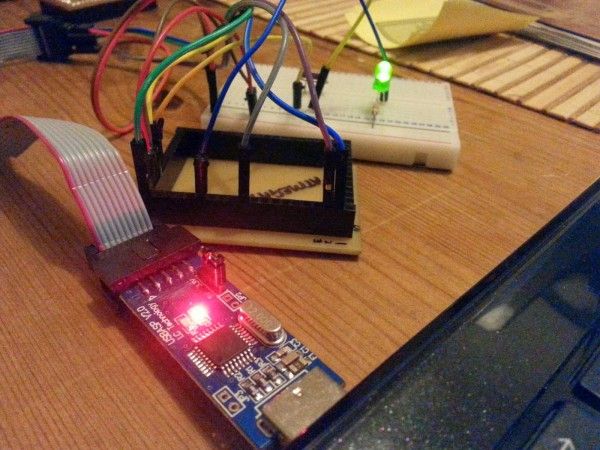
Having finally got the usbasp device installed, it was time to stick some code onto the chip. Taking extra care to wire the programmer to the breakout board, I downloaded and installed a GUI front-end for the command-line programming tool avr-dude (called AVRDudess).
For more detail: Programming an ATMega128
- Why did the Arduino IDE fail to upload code via the USBTiny programmer?
The text states that while the IDE could compile code for the ATMega128, it would not upload via the USBTiny programmer. - What alternative compiler was used to create the hex file?
The Oshonsoft AVR Simulator was used to compile a simple blink test into a 240-byte hex file. - What specific error occurred when modifying the USBTiny config files?
An error message appeared in the avr-gc executable highlighting the character h at the beginning of an entry in the modified config file. - How many times did the laptop need to be rebooted to enable the USBASP device?
The laptop had to be rebooted twice to disable digital signature signing. - Where were the correct settings located under Windows 8.1 updates?
The settings were found under restore pc instead of general. - What software was used as a GUI front-end for programming the chip?
AVRDudess was installed as a GUI front-end for the command-line programming tool avr-dude. - What size was the hex file created by the Oshonsoft compiler?
The compiler created a hex file that was 240 bytes in size. - Which microcontrollers does the latest Oshonsoft AVR Simulator support?
The simulator includes support for both the ATMega128 and ATMega165.