“Star Trek”, “The Terminator”, “Star Wars” or “The Avengers” – in each of these films technology was on a cosmic (literally) level. The heroes used laser weapons, which always fascinated me. I decided to build a laser gun, but I would not use it to kill people or aliens, but to compete with my friends a little. As I decided I did. Now I will show you how to make it.
Step 1: Desinging
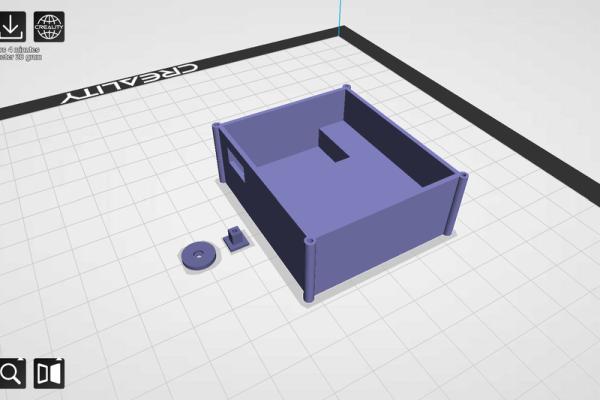
I started by designing the gun in Fusion 360. I divided it into two parts, which can be screwed together with three screws. In the bottom part, I made space for PCB, holes for USB socket, reload button, laser, buzzer and cables. I made a case for Laser Shield, added some corrections and the files were ready to print.
Step 2: Electronics
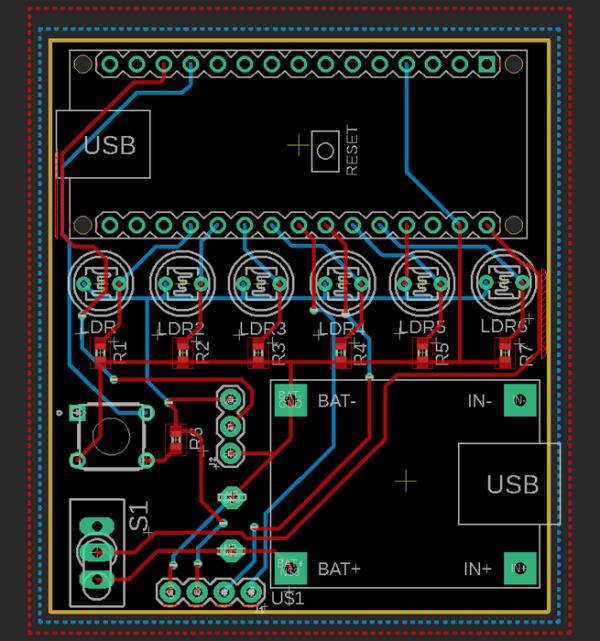
The electronic part of this project is very simple. It consists of: battery charging module, microcontroller module, programming module, laser, two buttons and buzzer. At the buzzer signal input I placed pads that you do not need to solder if you do not want the buzzer, it will save some battery. It was easier with the Shield because I used ready-made modules to make it. Then I sorted all the elements on the boards and exported them as Gerber files.
Step 3: PCB Ordering
I went to PCBWay.com and clicked “Quote Now” and then “Quick Order PCB” and “Online Gerber Viewer“, where I uploaded files for my board, so I could see what it would look like. I went back to the previous tab and clicked “Upload Gerber File“, I chose my file and all parameters were loading themselves, I changed only the soldermask colour to blue and black. Then I clicked “Save To Card“, provided shipping details and paid for the order. After two days the tile was sent, and after another two days, it was already on my desk.
Step 4: Folding
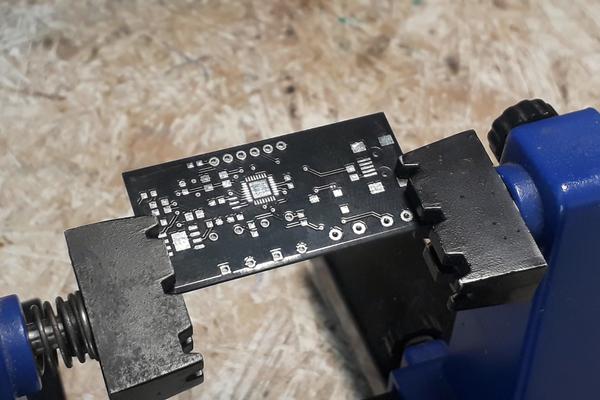
I put solder paste on each soldering pad and put all the elements for soldering with hot-air on it. I installed the largest diameter nozzle, set the temperature to 300 degrees and the airflow to almost the smallest. Using a regular soldering iron, I corrected imperfections and soldered the rest of the elements. Finally, I cleaned the board with isopropyl alcohol and a toothbrush.
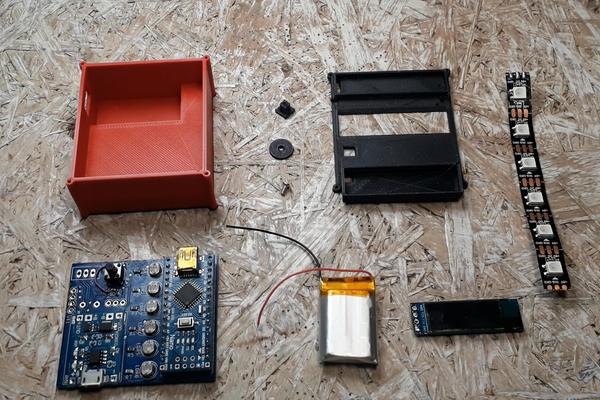
On the board from Laser Shield I started by soldering goldpin from Arduino Nano, then button, charging module, photoresistors and other small elements. I will leave soldering the led strip and display for later. I put all the components in the right places and glued the reload button and laser. In the upper part of the shield housing, I placed an element that will allow access to the button. I haven’t screwed the housings together yet, because I have to program the boards first.
Step 5: Programming and Rules of the Game
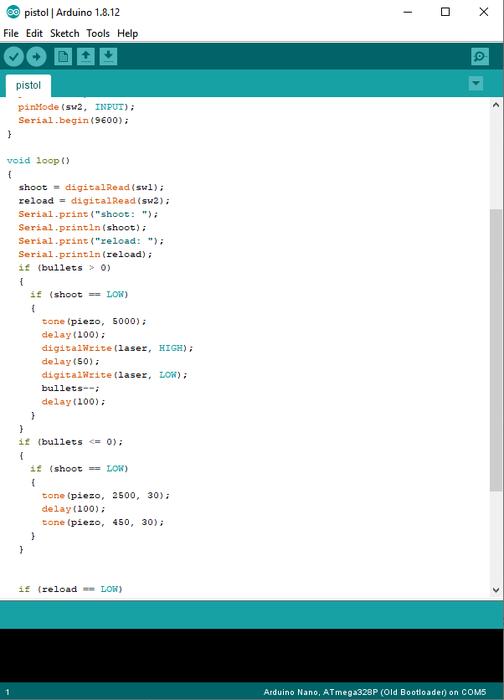
The program responsible for working of the game works as follows:
You press the trigger button and the laser turns on for 100 milliseconds. You can repeat the shot 7 times and you need to press the reload button, which lasts two and a half seconds. To start a new game you must press the button on the Shield. After pressing, you have ten seconds to settle in and get ready. When the countdown ends, a random LED will light up every second -left, middle or right. If the left is displayed, for a shot at two photoresistors on the left you get 30 points, in the middle two 10 points, and in the right two 5 points. A similar situation occurs if the diode in the centre or on the left lights up. You have a minute to collect as many points as you can. They are displayed during the game and 3 seconds after its end. You can also restart the game by pressing the button during the game.
Now I could screw together two parts of the housing for the shield and the gun and solder the display and led strip to the Shield board.
Source: Laser Game