Story
 ATtiny85 is a cheap and powerful alternate when u don’t need too many PWM pins. Since ATtiny85 is just a microcontroller we need a Arduino Uno to program it. In this project I will explain how to do it. Below is the pin configuration of ATtiny85 and the datasheet can be found here http://www.atmel.com/images/atmel-2586-avr-8-bit-microcontroller-attiny25-attiny45-attiny85_datasheet.pdf.
Configuring Arduino Uno as a ISP (In-System Programming)
To program the ATtiny85 we need to first set Arduino Uno in ISP mode. Connect your Arduino Uno to the PC. Open Arduino IDE and open the ArduinoISP example file (File -> Examples -> ArduinoISP) and upload it.
Adding ATtiny85 Support to Arduino IDE
By default Arduino IDE doesn’t support ATtiny85 so we should add ATtiny boards to Arduino IDE. Open File -> Preferences and in the Additional Boards Manager URLs give this url https://raw.githubusercontent.com/damellis/attiny/ide-1.6.x-boards-manager/package_damellis_attiny_index.json.
Connecting ATtiny85 with Arduino Uno
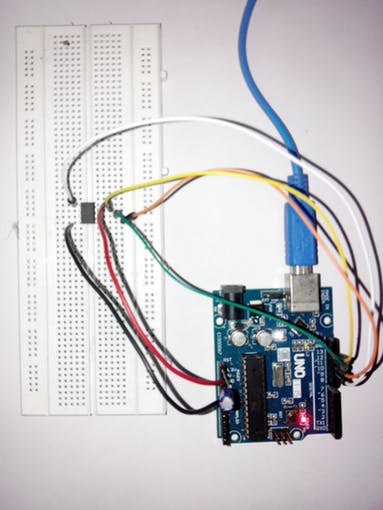
Now with all the above things ready we will start programming the attiny85. Connect the arduino uno to attiny85 using breadboard as below.
Arduino Uno – ATtiny85
- 5V – Vcc
- Gnd – Gnd
- Pin 13 – Pin 2
- Pin 12 – Pin 1
- Pin 11 – Pin 0
- Pin 10 – Reset

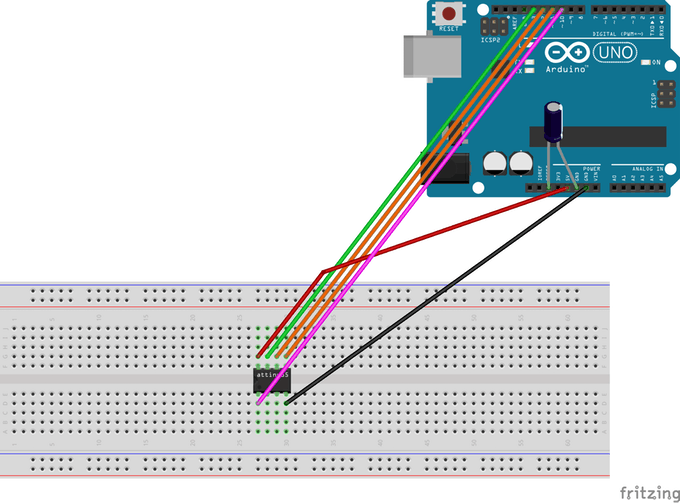
Add a 10uF capacitor between RESET and GND in arduino. This is to avoid arduino from being auto reset when we upload the program to attiny85. If you are using a electrolytic capacitor make sure the anode goes in GND of uno.
Uploading program to ATtiny85
Now back to Arduino IDE. Select ATtiny under Tools -> Board. Then select ATtiny85 under Tools -> Processor. And select 8 MHz (internal) under Tools -> Clock.
For more detail: Programming ATtiny85 with Arduino Uno