Summary of ATtiny Programming With Arduino
After following this guide you can program an ATtiny85/45 using an Arduino as an in-system programmer (ISP). It covers wiring the ATtiny to the Arduino, installing ATtiny support into the Arduino IDE, uploading the ArduinoISP sketch, using a 1 µF electrolytic capacitor during programming, mapping ATtiny pins to LED outputs, uploading sketches via Tools > Board > ATtiny85 (w/ arduino as ISP), and restoring the Arduino to normal use afterward.
Parts used in the ATtiny Programming With Arduino:
- Arduino board
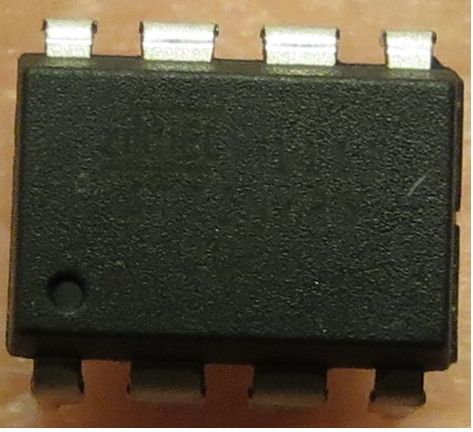
- ATtiny85 or ATtiny45
- Breadboard (or 8-pin shield)
- Breadboard jumper wires
- LEDs (5)
- 330 ohm resistors (for LEDs)
- 1 µF 50V electrolytic capacitor
- Optional 51 µF 50V electrolytic capacitor (mentioned in parts list)
After this Instructable you should be able to program an A Ttiny85/45 with an arduino. It may sound complex but it really isn’t. After doing some research I could not find to much info on how this could be done. I however did find https://www.instructables.com/id/Program-an-ATtiny-with-Arduino/. This Instructable is my interpretation of what I learned from Randy.
Step 1: Things You Will Need
Arduino
AT tiny 85/45 – available from Mouser 556-ATTINY85-20PU Need more info on the AT tiny check out the data sheet here.
Bread board ( or the 8 pin shield from Instructables )
Bread board jumper wires
Led- 5
330 ohm resistor-5
1uf 50V electrolytic capacitor
Step 2: Set Up
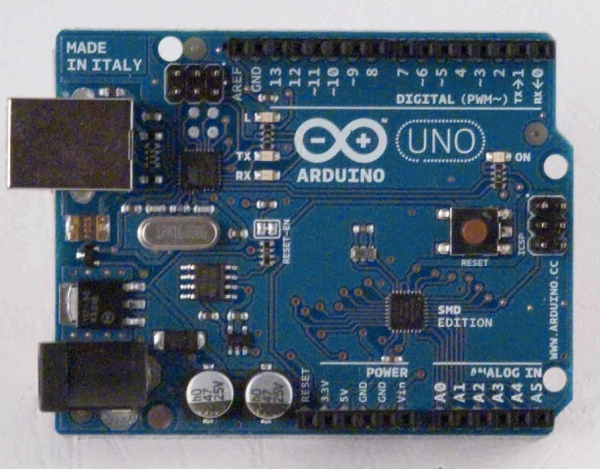
You will be using the following arduino pins (see pic)
5V +
5V Ground x2
10
11
12
13
Reset
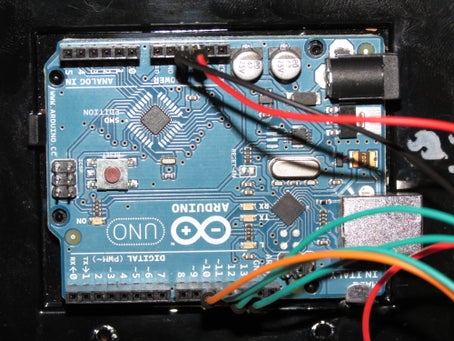
Wire up the bread board with the jumper wires as follows or see pic:
Note: be sure to not the dimple direction.
ATtiny pin# 1 to arduino pin# 10
ATtiny pin# 4 to arduino 5v ground
ATtiny pin# 5 to arduino pin# 11
ATtiny pin# 6 to arduino pin# 12
ATtiny pin# 7 to arduino pin# 13
ATtiny pin# 8 to Arduino 5v +
Now lets move onto adding our leds. Add the leds to the bread board as see in the pic keeping in mind the polarity of the leds.
Add the resistors to the positive side ( side without the flat part ) each led with get a resistor. Take some jumper wires from the resistors and connect them to the following ATtiny pins.
ATtiny pin# 5 this will be programmed as pin 0 in the sketch
ATtiny pin# 6 this will be programmed as pin 1 in the sketch
ATtiny pin# 7 this will be programmed as pin 2 in the sketch
ATtiny pin# 2 this will be programmed as pin 3 in the sketch
ATtiny pin# 3 this will be programmed as pin 4 in the sketch
Step 3: Setting Up the Arduino to Program
Setting up the arduino to program is not a permanent thing. All this will do is load a sketch that will allow you to program the chip then when you want to use the arduino you simply change the sketch.
Fist things first you will need the program, down load it by clicking attiny45_85.zip be sure that you are using arduino program version 0022.
Next:
Installing ATtiny45 / ATtiny85 support in Arduino
Download: attiny45_85.zip
Locate your Arduino sketchbook folder (you can find its location in the preferences dialog in the Arduino software)
Create a new sub-folder called “hardware” in the sketchbook folder.
Copy the attiny45_85 folder from the attiny45_85.zip to the hardware folder.
Restart the Arduino development environment.
Next:
Turning the Arduino board into a programmer
We’re going to use the Arduino board to program the ATtiny45 or ATtiny85. First, we’ll need to turn the Arduino board into an “in-system programmer” (ISP). To this:
Run the Arduino development environment.
Open the ArduinoISP sketch from the examples menu.
Select the board and serial port that correspond to your Arduino board.
Upload the ArduinoISP sketch.
Next:
Connect 1uf 50V electrolytic capacitor as follows:
side with stripe to arduino ground
side with no stripe to arduino reset pin
Next:
In the arduino development environment click on tools, board and select ATtiny85 (w/ arduino as ISP ) be sure if using ATtiny 45 you select the correct one. Now you can write your sketch and upload it as you would normally to the arduino. While uploading a new sketch the leds will blink crazy for a sec then the program will take over and will run as programmed.
Once the sketch is uploaded you can remove the electrolytic capacitor.
Sometimes after you upload your sketch you may get the following errors:
avrdude: please define PAGEL and BS2 signals in the configuration file for part ATtiny85
avrdude: please define PAGEL and BS2 signals in the configuration file for part ATtiny85
Do not worry the sketch will have loaded just fine. You can now remove all but the 5V+ and ground wires you how successfully programmed an ATtiny chip!
The following Arduino commands should be supported:
pinMode()
digitalWrite()
digitalRead()
analogRead()
analogWrite()
shiftOut()
pulseIn()
millis()
micros()
delay()
delayMicroseconds()
Step 4: The Sketch
This will blink all 5 leds
Step 5: Returning Arduino Back to Normal Operation
This is easy,
Run the Arduino development environment go to tools, board then select the board you are using and load what ever sketch you would like. That’s it!
Well I hope I have covered everything in as much but not overly confusing detail as possible. Feel free to contact me on any new updates regarding the programming and or sketches and I will add them.
Source: ATtiny Programming With Arduino
- What Arduino pins are used to wire the ATtiny?
The guide uses Arduino pins 10 (to ATtiny pin 1), 11 (to ATtiny pin 5), 12 (to ATtiny pin 6), 13 (to ATtiny pin 7), plus 5V and ground to ATtiny pins 8 and 4 respectively. - How do I install ATtiny support in the Arduino IDE?
Download attiny45_85.zip, create a hardware folder in the Arduino sketchbook, copy the attiny45_85 folder into hardware, and restart the Arduino IDE. - How do I turn the Arduino into a programmer?
Open and upload the ArduinoISP sketch from Examples with the correct board and serial port selected. - Do I need a capacitor when programming the ATtiny?
Yes, connect a 1 µF 50V electrolytic capacitor with the stripe to Arduino ground and the other side to Arduino reset during programming. - Which ATtiny pins are used for the LEDs in the example?
ATtiny pins 5, 6, 7, 2, and 3 are used and mapped to sketch pins 0 through 4 respectively. - What Arduino functions are supported on the ATtiny as listed?
pinMode, digitalWrite, digitalRead, analogRead, analogWrite, shiftOut, pulseIn, millis, micros, delay, and delayMicroseconds are supported. - What should I select in the Tools > Board menu to upload to the ATtiny?
Select ATtiny85 (w/ arduino as ISP) or the corresponding ATtiny45 entry if using ATtiny45. - What do I do after uploading my sketch to return the Arduino to normal use?
Open the Arduino IDE, go to Tools > Board, select your Arduino board, and load any sketch you want; the Arduino will operate normally.