Sending out a little one to “just go play outside” is a great way to get them moving, and out of your hair for a while. Once they start riding bikes though, it can be a bit more scary. What happens if they fall and you are inside talking to Aunt May? Are you sure you would always be able to hear their cries from inside the house and across the street?

Well, I wasn’t. So I created the ‘Crash Jacket’. This jacket uses the LinkIT ONE to detect a crash and then text me right away. That way as soon as something bad happens, I can be there in a jiffy.
Step 1: Getting Everything You Need
The Linkit one has built-in text messaging functionality included with it, which makes it a great tool for our crash jacket!
Linkit one
linkit one battery
Sim card
Accelerometer
Piezo Sensors (I used 2, but I guess the more the better!)
A Jacket
Step 2: Hook Up Your Accelerometer
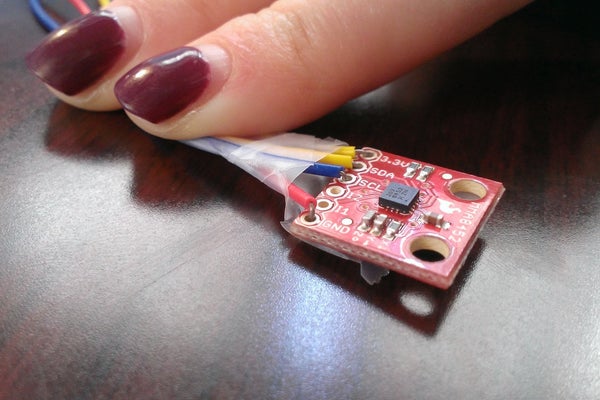
To hook up your accelerometer, you’ll need some wires to attach to the SCL, SDA, GND, and 3.3V pins. Hopefully GND and 3.3V are obvious as to where the hook up on your Linkit one. The SCL and SDA actually are pretty easy too. Look for the SCL and SDA pins near the headphone jack. I’ve attached a picture showing exactly where they are. This is where you want to plug in the wires from your accelerometer.
Step 3: Hooking Up Your Piezo Sensors
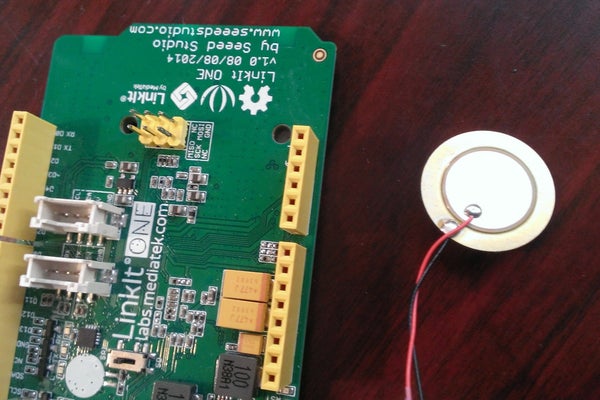
Did you know Piezo is latin for ‘press’ or ‘pressure’? That’s exactly what these sensors do: detect pressure. These will be used to tell us if there was a hard crash or not. I’ve use two of these two go on each shoulder of the jacket.
When you connect these to your Linkitone, make sure to put them in the Analog signal pins. These are labeled as pins that begin with ‘A’ on your device. I pointed this out specifically in one of my pictures attached.
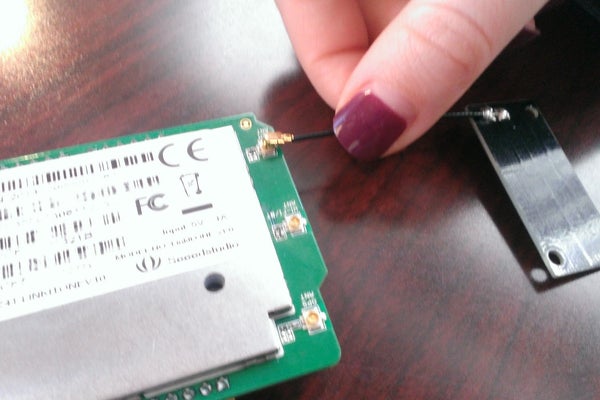
Step 4: Insert the Sim Card and Attach the Antenna
You want to make sure the linkit one is in ‘SPI’ mode instead of ‘SD’ mode. SD mode would make it use the SD card slot instead of the Sim card slot. We prefer text messages to storage for this project, so let’s use the Sim card slot instead 🙂
Insert the sim card in the back of your device, and don’t forget to attach the GSM antenna that came with your linkit one. This lets us get a cell signal so we can send text messages!
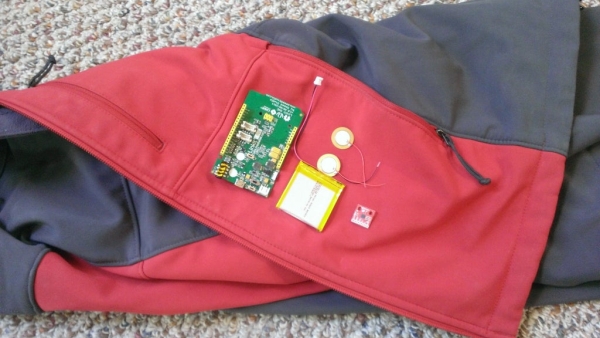
Step 5: Connect the Battery
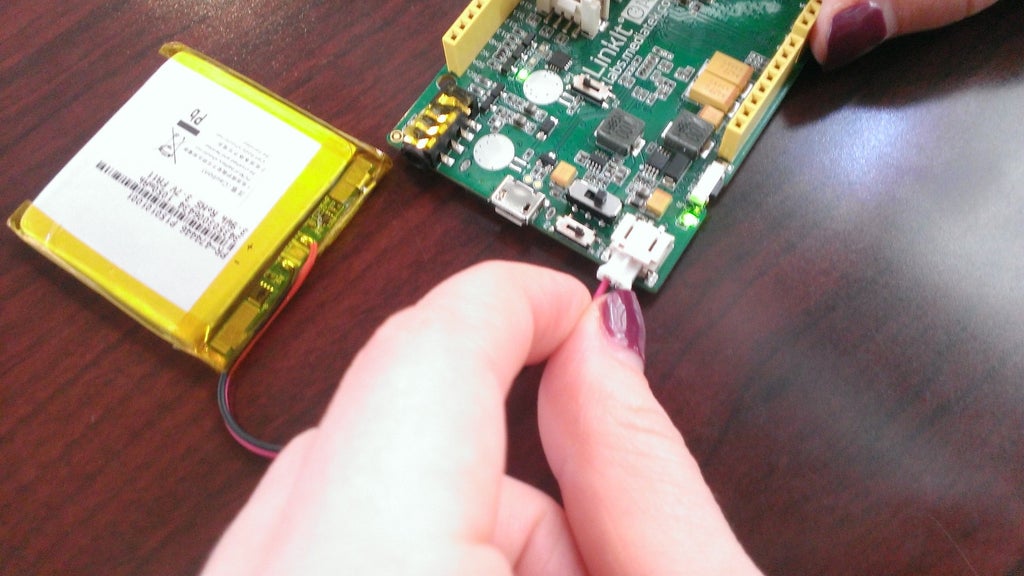
We want this thing to be mobile (we don’t want a long cord following our kid around on their bike). Your linkit one should have come with a battery. This is another one of the super cool features of the linkit one. We don’t need to buy some special board or something like if we had an arduino, it all comes in one big kit!
Attach the battery to the battery slot (shown above). In order to go to battery power, make sure you switch the ‘BAT’ btn to ‘BAT’ instead of ‘USB’.
Step 6: Program Your Device
The Program logic is relatively simple, but then again we could argue that all programming logic is simple 🙂
In the loop function, we constantly check the reading of the accelerometer and piezo elements. Should we detect any large acceleration (note that it is going to have to be pretty large, as we don’t want text messages everytime our kids takes a turn) or a lot of pressure with he piezo element, we want to alert us with a text message. Don’t forget to swap out your phone number with the one in the code!
Step 7: Wire Up Your Jacket
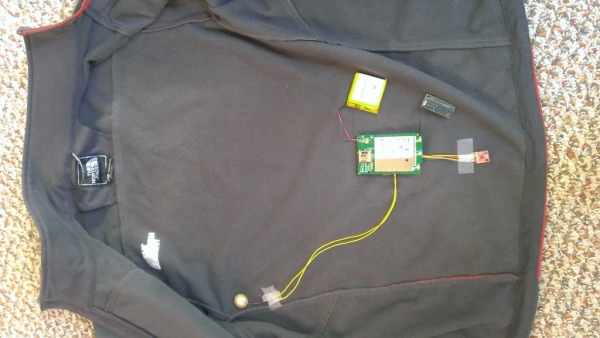
Now for the fun part!
I attached the accelerometer at the lower back area of the jacket. This way it would be best to detect hard falls, versus up high by the next where the acceleration could vary more often (leaning or ducking). I just used a bit of tape for now to test, but later I might want to go back and actually sew it in once I’ve seen more results.
Next, I wired up the Piezo sensors to go to the shoulders. I originally wanted to wire them down the sleeve, but it got really complicated when putting your arm through the sleeve. Your hand always got caught on wires and you had to be really careful. Plus, when you fall, you usually stick out your hand to brace your fall, so your wrist doesn’t really take a lot of the pressure.
Unfortunately during my testing, one of the wires of one of my piezo sensors broke, so I only have one picture. But all you would do is copy it over to the other shoulder too! In the meantime, hope they only fall to the left…
Step 8: Be Safe!

Now you can let your kids go outside in play with a peace of mind you never had before! This is a great example of IoT at work helping us live healthier and safer lives.
Source: Crash Jacket