So, in this video we’ll be seeing how to build this haptic feedback device and the ambient light system which reacts to the player’s health value inside a PC game! For that we’ll be using the ESP-NOW protocol, about which we learnt in the previous video and also see how to use different RGB LEDs and different libraries to drive them. Finally a little bit of python and open cv to get the data from the game.
Supplies:
These are the list of products which can help you do this project with ease
(Affiliate Link)
- Esp12E: https://amzn.to/3h3b37s
- Haptic motor(exact one): https://amzn.to/2J8E06T
- Haptic motor(alternative): https://amzn.to/2J8E06T
- 3.3V regulator (smaller capacity): https://amzn.to/2J8E06T
- 3.3V 800mah (1A) : https://amzn.to/31762F2
- Velcro: https://amzn.to/2J8E06T
- Header Pins: https://amzn.to/2J8E06T
- Angled Header Pins: https://amzn.to/2J8E06T
- Wires: https://amzn.to/2J8E06T
- FTDI: https://amzn.to/2J8E06T
- PCB: https://amzn.to/2J8E06T
- Soldering Gun: https://amzn.to/2J8E06T
- Soldering Lead: https://amzn.to/2J8E06T
- Foam sheets: https://amzn.to/2J8E06T
- screw terminal: https://amzn.to/3qHwVKP
- Resistor : https://amzn.to/2ZCruRu
- Tp4056: https://amzn.to/3vPSCLL
- Boost: https://amzn.to/2OSdHEU
- LED Strip : https://amzn.to/319usO7
- RGB ring : https://amzn.to/3f6Hhkt
- Node MCU : https://amzn.to/3f498Ss
- Breadboard + power supply : https://amzn.to/3lK1HRS
- 7805 : https://amzn.to/2Pp8hRG
- DC jack : https://amzn.to/3d0SCQl
Step 1: Python Gamer Assist Application
This is one of my long-lost least-motivated projects, initially I started in 2018 as soon as I saw this video by Youtuber Michael Reeves “A Robot Shoots Me When I Get Shot in Fortnite”. It had everything I loved, from electronics, coding and getting shot by the gun. But I don’t know what happened, it took forever to complete.
Trust me, without this the whole project wouldn’t be possible. Because this is the application that reads the data from the game and sends it to the microcontroller. But I wanted it to be elegant and wanted to extend the functionality of what Michael Reeves had done. And…that’s where my journey of banging my head against the wall started. It was very time intensive to get to this working stage.
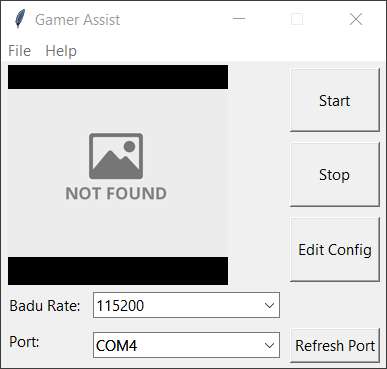
Step 2: Working of Gamer Assist
Let me show you the current progress so you know what I’m talking about. To run this you need a configuration csv file, which will contain the location of the health bar in the game and other information for processing the data. So, the first step is to create the configuration file.
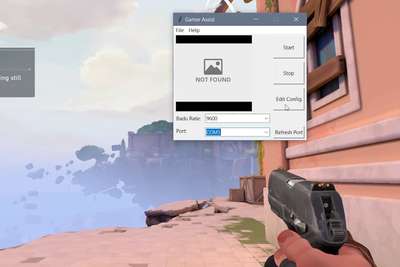
Since the program is GUI friendly you can do this for any game, just as an example let me show you how to set up this application for the game apex legend. First take a screenshot of the game when the game is in full screen mode and the health value is clearly visible, and use the shortcut Alt + tab to get to the python application, then click edit config. (Make sure the screenshot is in full screen mode during selection) Draw a rectangle around the health value. Then click grab. In the editor window you can adjust these sliders and check the result until you get the health value on the output section.
Once that’s done. Save the file. Remember this is just a one time process which you might have to do for every game.
Now we can go back to the home page and upload the configuration file.
Just hit the start button and it should read the onscreen data and send it to the hardware through serial communication.
If you want to know how to install and run this python application. You can checkout my Github readme for more details
Step 3: Addressable RGB LED
Sorry if it’s boring already, I know most of you are here for electronics so let’s dive into that topic.
The major part of this project is controlling RGB LEDs. There are so many variants and so many ways of using them. But in this video we’ll just focus on addressable RGB LEDs.
Unlike regular LEDs these LED’s can be accessed individually through a microcontroller with just one data pin. If you absorb this Led strip you can see there is an IC placed next to the LEDs. This is what takes the data from the single data pin and drives the RGB LED.
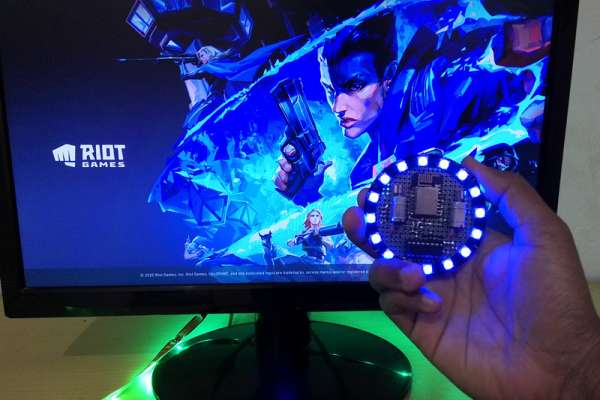
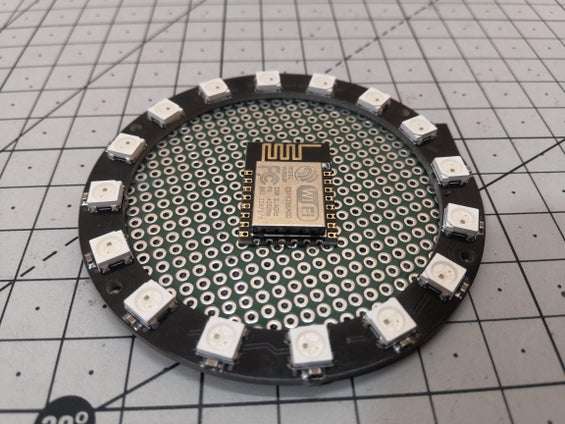
Even these addressable LEDs have many different variants. The Led strip I have drive 5 LEDs together and it’s not possible to address them individually rather they address 5 LEDs at once. Even though the strip looks long, while controlling them through a microcontroller we can consider it as 5 individual LEDs instead of 25 LEDs because the strip contains only 5 driver IC. But the LED ring I have consist of 16 LED’s [WS2812] which have integrated driver inside the IC, so we can address all of these 16 LEDs individually.
Step 4: Making the Ambient Light System
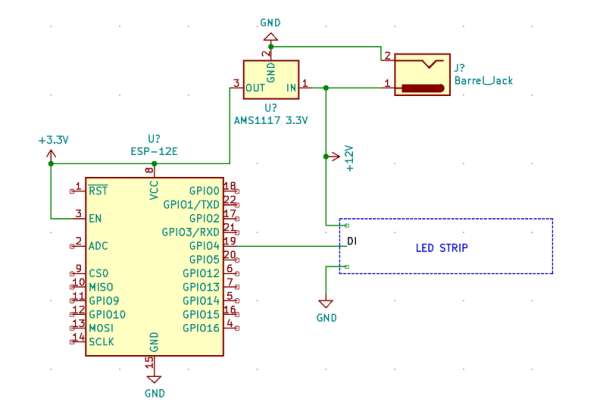
To test this out we’ll build a small circuit using NodeMCU, IC 7805, terminal block and dc jack. My led strip works on a 12V supply, so the DC jack will take the 12V and supply it to the led strip through the terminal block, while the 7805 regulator step down this voltage to 5V and sends it to the NodeMCU operation. You can also alternatively build this with esp12E and AMS1117 using the circuit diagram.
For programming these addressable LEDs there are a few libraries that we can use, the popular ones are FastLED and adafurit_Neopixel library. We’ll be using the FastLED library for the led strip
To test them we’ll open the example sketch of the FastLED. Here are 2 important points to remember. First, you need to know what kind of LED drivers the strip is using and the number of LEDs in the strip. In my case it’s GS1903 and I have 5 of them. So I enter the value for the IC and the number of LED’s.
Then just compile and upload the code. You can see the LEDs are working great!
Step 5: Making Ambient Light System Wireless

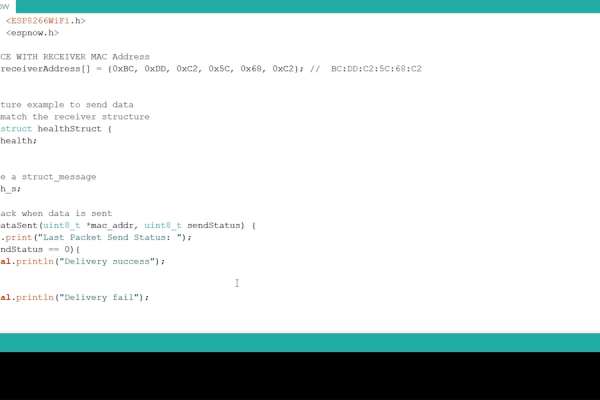
Let’s make this wireless now, so that it’s not necessary for these led strips to be connected to the PC. This is where we use the esp-now protocol to send the data wirelessly.
For the code, go to my github repo and download the project “gamer assist”. Then open the folder arduino code and upload the sketch find_MAC_address. This will give the mac address that we need for our espnow protocol. After uploading the code, open the serial monitor and note down the mac address of the NodeMCU which we’ll be using in the later part of this video. Once you have the mac address you can upload the health_value_ambient sketch, which will control the color of the light depending on the health value. But before uploading make sure you change the name of driver IC and the number of LED’s according to the led strip you have. In my case it is GS1903 and the LED count is 5.
Step 6: Testing Ambient Light System
To test if it’s working we just need another NodeMCU which can receive the serial data from the python application and transfer the data through esp now protocol to our ambient light setup. Open the file Serial to esp_now.ino, In this file enter the mac address of your Nodemcu which we got earlier, then just compile and upload the code. Now we can run the python application. When you play the game the led strip should change its colour from green to red depending on the players health value inside the game.
Let me also show you a another small demo for better understanding.
You can see the Image I have set up the python application to read the data from the notepad and send it through serial communication. If you observe the terminal you can see the data is processed sent to the NodeMCU via serial communication.
Source: [Gamer Assist] Haptic Feedback System for Games Using Esp8266