Summary of How to interface keypad with AVR microcontroller (ATmega16)
This article details interfacing a 4x3 keypad with an ATmega16 microcontroller to display output on an LCD. It outlines the core logic of configuring row/column pins, setting input states, and monitoring port values in a continuous loop to detect key presses. The process involves initializing ports, checking for changes in the PORTD register, and executing specific check functions when a key is pressed.
Parts used in the Keypad Interfacing Project:
- 4x3 Keypad
- ATmega16 Microcontroller
- LCD Display
- Row Pins
- Column Pins
- PORTD Register
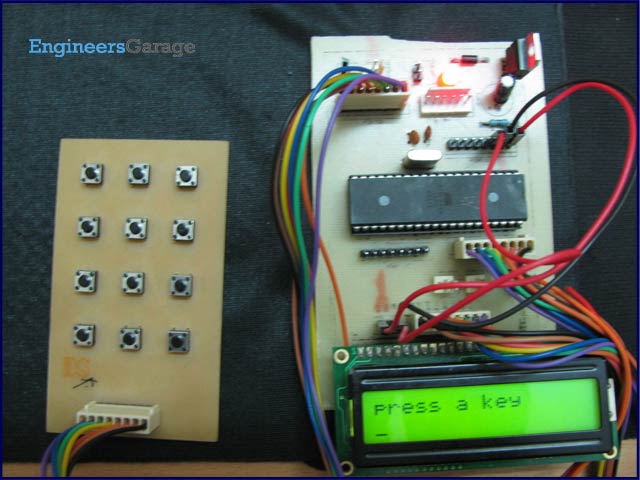
Keypad is most widely used input device to provide input from the outside world to the microcontroller. The keypad makes an application more users interactive. The concept of interfacing a keypad with the ATmega16 is similar to interfacing it with any other microcontroller. The article of Interfacing keypad with 8051 can be referred for detailed description of the methodology used here. This article explains the interfacing of a 4×3 keypad with AVR microcontroller (ATmega16) and displaying the output on a LCD.
The algorithm and detailed explanation for keypad interfacing is given in above mentioned article. The brief steps to interface the keypad with AVR are written below:
1. Configure the row pins or column pins.
2. Make all output pins to low and input pins to high.
3. Keep monitoring the port value, where the key pad is connected.

while(1)
{
PORTD=0xF0; //set all the input to one
value=PIND; //get the PORTD value in variable “value”
if(value!=0xf0) //if any key is pressed value changed
{
check1();
check2();
check3();
check4();
}
}
For more detail: How to interface keypad with AVR microcontroller (ATmega16)
- What is the primary purpose of using a keypad with a microcontroller?
The keypad provides input from the outside world to make applications more user interactive. - Does the method for interfacing a keypad with an ATmega16 differ significantly from other microcontrollers?
No, the concept is similar to interfacing it with any other microcontroller. - How do you initialize the pins before monitoring the keypad?
You must configure the row or column pins and set all output pins to low while setting input pins to high. - What value is assigned to PORTD to prepare the input pins?
The value 0xF0 is set to make all input pins high. - How does the system detect that a key has been pressed?
The system detects a press by checking if the PIND value is not equal to 0xF0. - What happens immediately after the code detects a change in the port value?
The code executes the check1, check2, check3, and check4 functions. - Can this project be adapted for other microcontrollers like the 8051?
Yes, the methodology is similar, though detailed descriptions for 8051 can be found in separate articles.