Summary of Linkit One-Home Automation With Bluetooth Controller Android App
Summary: This article describes a low-cost DIY Bluetooth home automation using a LinkIt One board and a free Android Bluetooth Controller app. It covers breadboard testing with LEDs, programming the LinkIt One to handle 9 one-byte commands, pairing the app, then building a real-world system using relay modules, power adapters, wiring, and enclosure mounting to control household appliances.
Parts used in the Linkit One - Home Automation With Bluetooth Controller Android App:
- LinkIt One board with WiFi/Bluetooth antenna
- Breadboard (for testing)
- LED lights (for testing)
- Android mobile phone
- Bluetooth Controller Android app (free from Google Play)
- PCB board (for final implementation)
- Relay modules (example: 12V 4-relay module)
- 12V adapter (for relay module)
- 5V / cell phone adapter (to power LinkIt One)
- Wires and connectors
- Extension board / power plug
- Double-sided tape (for mounting)
- Enclosure/box
All options are come with smart phones. Smart phones make our work very easy and make us lazy. Turn on and off home appliances using smart phone with blue tooth is in market, but cost high. So DIY Blue tooth Home Automation using Free Android App and Low cost Link it one.
Details Given here
1) Check the function with Breadboard.
2) Implement in real time application.
Step 1: Materials Needed

For Testing
1) Linik it one Board with WIFI Antenna.
2) Bread Board
3) LED Lights
4) Android mobile.
5) Bluetooth Controller App Free Download from Google.
For Real time Home Automation
1) Linik it one Board with WIFI Antenna.
2) PCB Board
3) Relay Modules
4) Android mobile.
5) Bluetooth Controller App.
6) 12V and 5V Adaptor.
7) Wires.
Step 2: Testing Circuit

1) Connect the LED positive terminal to the Digital pin of Linkit one.
2) We can able to connect 9 Devices with this Program.
3) Connect from Digital pin 3 to 11.
4) Connect the WIFI/Blue Tooth Antenna to the Linkit one Board.
Step 3: Programming Real Time

1) Connect Blue tooth module of the Linkit one board in server mode.
2) Check for incoming connection.
3) If Connected, then read the Bytes received, Change it to Char.4) We want to receive 0 to 8 (setup in Android app).
5) So Initialize a 9 element integer array.
6) Save the last status in the array.
7)On receive key Flip the Pin status.
In program set the received byte length to 1. This makes very fast switching.
Step 4: Android Test Program Setup

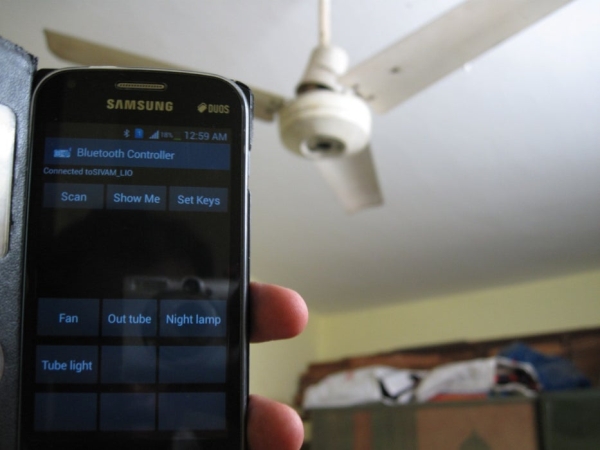
1) Download the Bluetooth controller from Google Play store.
2) Open the Application. Ask to turn on the blue tooth.
3) After Turn on the Blue tooth.
4) Application Loaded. In the Screen found 9 Empty Buttons.
5) In the Top Click Scan button.
6) Shows the Available Bluetooth device.
7) Select the Name Given in the Linkit one program.
8) The mobile connected to the device.
9) Click set keys in the right top of the screen.
10) Text boxes ask the button and and text to send while press the key.
11) Enter the name as u like and give 0 to 8 in data of key.
12) Click ok.
13) Now all done. Start checking.
Step 5: Testing
For testing see how the LED turn on and OFF. Its very quick because of send and read only one character. See the video. Then want to implement in practical purpose.
Step 6: Real Time Circuit

1) Disconnect the Breadboard and LED.
2) Connect the Relay module to the Linktit one.
3) I have 12 V 4 relay module.
4) I use a cable with connector to connect. So use the digital pin 10,11,12,13 to connect to the relay board. Connect the GND to the Relay module ground.
5) Link all the relay common using wire and join the wire to a power plug phase.
6) Connect a cell phone adapter to the Linkit one board and 12V adapter to relay module.
7) Take four long wires and connect it to the NO(normally open) of the Relays.
8) Plug the two adapter and the power plug for relay common to a extension board.
9) I stick the board using double side tape. Close the Box after connect the Bluetooth antenna.
Now all ready its time to fix.
Step 7: Small Change in Program

Before fix a small change in program want to done because I only use Digital pins 10,11,12,13.
1) I use 4 Relay module here. So i can able to control 4 switches.
2) For easy circuit i use pin 10,11,12,13,GND. So change the program for that pin.
Source: Linkit One – Home Automation With Bluetooth Controller Android App
- How do I test the function before building the real circuit?
Test on a breadboard using LEDs connected to LinkIt One digital pins and verify switching via the Bluetooth Controller app. - Can the system control multiple devices?
Yes, the program supports up to 9 devices using digital pins 3 to 11, though the example real build uses 4 relays on pins 10 to 13. - What does the Android app send to the LinkIt One?
The app sends single-character bytes (0 to 8) configured per button to enable very fast switching. - How do I configure the Bluetooth Controller app for this project?
Scan for the LinkIt One Bluetooth device, connect, then set each key text and data (0 to 8) in Set Keys. - What changes are needed for the real relay-based circuit?
Disconnect LEDs, wire relay module inputs to LinkIt One digital pins (example 10–13), connect relay commons to the power phase, and use separate 12V power for relays and 5V for LinkIt One. - How is the LinkIt One Bluetooth configured in the program?
Configure the LinkIt One Bluetooth in server mode, check for incoming connections, read bytes, convert to chars, and flip the corresponding pin status in a stored 9-element array. - What power supplies are required for the final setup?
Use a 5V adapter or phone adapter for the LinkIt One and a 12V adapter for the relay module. - How many pins does the example real implementation use?
The example real implementation uses 4 digital pins (10, 11, 12, 13) plus GND for the relay module connections.