In this Instructable I will let you know the basic building block of a Quadcopter and how to make it in a very simple way.Only thing you need is some skill on Soldering and few basic tools.I think it will give opportunity to the new hobbyists to sharpen their skills on this platform.
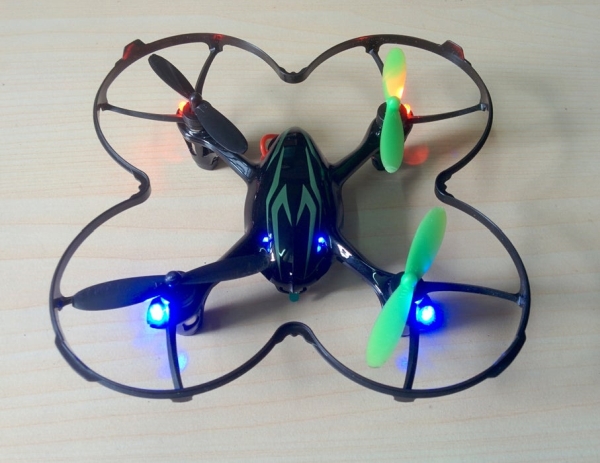
To demonstrate the process I choose Hubsan X4 -H107.Because its parts are very cheap, easily available,huge community resources in the internet.For a beginner I think it is one of the best Quadcopter to get started.
Note : If you already have a HUBSAN X4 then this guide will be helpful to repair it after a fatal crush.Just follow the steps in the reverse order.
What is a Quadcopter :
A Quadcopter is a type of helicopter with four ( Quad ) rotors, so it is known as Quadrotor. Because of its unique design, it allows a more stable platform, making it ideal for surveillance and aerial photography. A normal helicopter has one big motor to provide all the lifting power but a Quadrotor has four motors all work together to produce upward thrust and each motor lifts only one fourth of the total weight. The Quadcopter’s movement is controlled by varying the relative speed of each motor.
How it is Work :
A Quadcopter depends on the flight controller and Electronics Speed Controller (ECS) to distribute the correct speed to each of the 4 motors depending on what we want it to do.I found a great article on basics of Quadcopter on Learn Robotix blog. You can go through it to get more clear ideas.I am attaching the links below
http://learnrobotix.com/uavs/quadcopter-basics/wha…
How Do Quadcopters and Multicopters Fly?
Step 1: Parts and Tools Required :
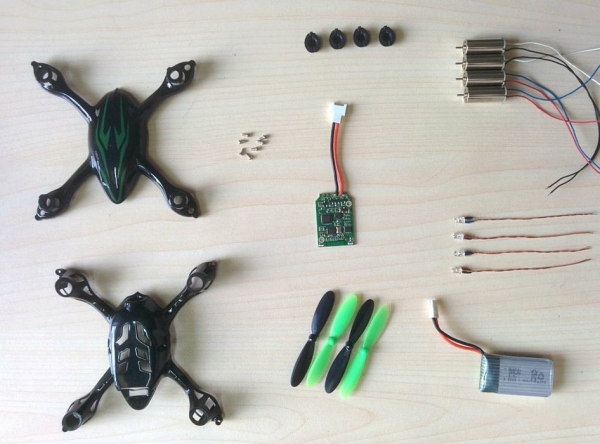
Parts Required :
1. Flight Controller Module Rx ( H107-A43 ) – Amazon
2. Body Shell (H107-A21) – Amazon
3.Motors (H107-A23) – Amazon
4.Propellers (H107-A02) – Amazon
5.Rubber Feet (H107-A29) – Amazon
6.Blue LEDs (H107-A32) – Amazon
7.Red LEDs ( H107C-A33) – Amazon
8.Screw Sets ( H107-A07) – Amazon
9. Protection Cover ( H107C-20 ) – Amazon
10. Battery ( H107-A24 ) – Amazon
11. Charger – Amazon
12. Transmitter ( H107-16 ) – Amazon
13. Wrench ( H107 A11 ) – Amazon
Tools Required:
1.Soldering Iron ( Amazon )
2.Wire Cutter ( Amazon )
3.Wire Stripper ( Amazon )
4.Screw Driver (Amazon )
Step 2: Installing the Flight Controller ( Rx )
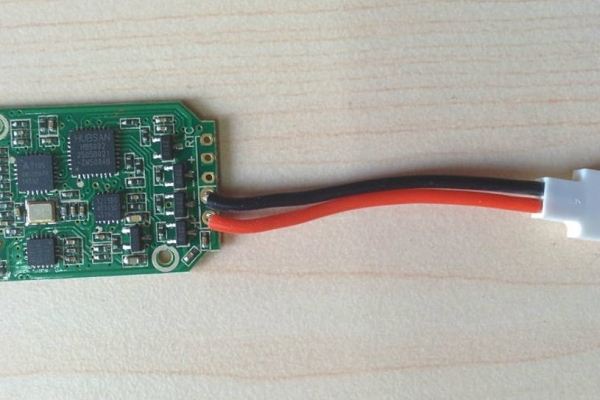
To control the Quadcopter and make the entire structure stable in air,it needs an electronic system which is called Flight Controller.It is the brain of the Quadcopter and uses gyros to keep the aircraft stable.
The Hubsan X4 Receiver Module ( Flight Controller Board ) has gyroscope, accelerometer, and radio receiver all placed onto a single PCB board to minimize space requirements and complexity.Another good thing is that all the soldering pads on the board are named neatly. So you can solder the motors and LEDs very easily.
The main components on the board are:
1. Hubsan HBS002 Processor
2. Invensense ITG-3050 Integrated Triple-Axis Gyroscope
3. 16 MHz Quartz Crystal Oscillator
4. 3210AP 3-Axis Accelerometer
5. A7105 2.4GHz Wireless Module
Step 3: Mount the LEDs
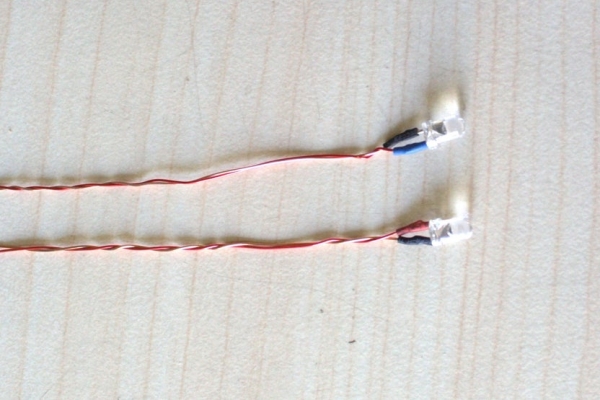
LEDs are very helpful during the night flying.There are 6 LEDs on Hubsan-X4 ,two on board and remaining fours are to be installed in each arm (near the motors). There are two pairs of LEDs i.e RED and BLUE.We have to installed the Blue pairs on the front and Red pair on the back side of the Quadcopter.
The LEDs have a red positive leads and a yellow/bronze negative lead.You can identify the colour by closer inspection, it looks like the heat shrink on the positive lead matches the LED colour.
Insert the wires of the LEDs in to the slots given in the each arm end.
Use a tweezers to thread the LED wires in to the leg slots.
Before going to solder,check it by using a coin cell.You may do this earlier also.I have found one of my red LED was damaged during shipping.
Then Solder the LEDs to the Flight controller.You can see soldering pads on the board are named neatly ( LED3, LED4 , LED5 and LED6 )
Step 4: Mount the Motors
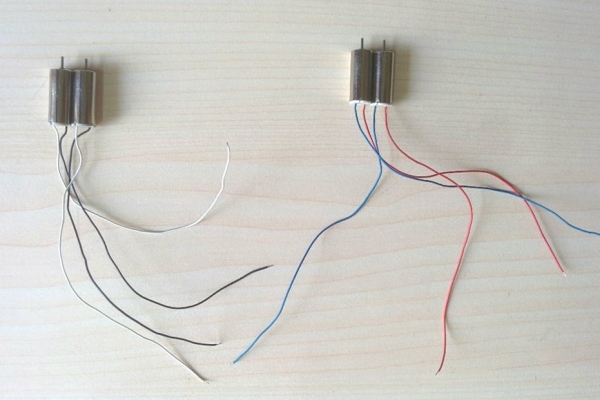
The motors with the help of propellers provide lift and direction to the Quadcopter. They are controlled by Electronics Speed Controller.The Hubsan X4 Controller circuit board has a neat design where it´s almost impossible to connect wrong motor to wrong connections.There are two different type of motors clockwise (CW) and counter clockwise (CCW).The motors come with different coloured wire to identify it easily.
Clockwise — Black and White Wire
Counter Clock Wise — Red and Blue
Insert the wire and press the motor from top side to fix it.
Use a tweezers to thread the motors wires in to the arms.Put it just above the LEDs wires.
Then trim the extra wires by the wire cutter.
Solder the wires to the corresponding solder pads ( M1,M2,M3 and M4 )
Note : 1. The diagonal motors are of same type. 2. Black and Blue wires are negative.
Step 5: Install the Propellers
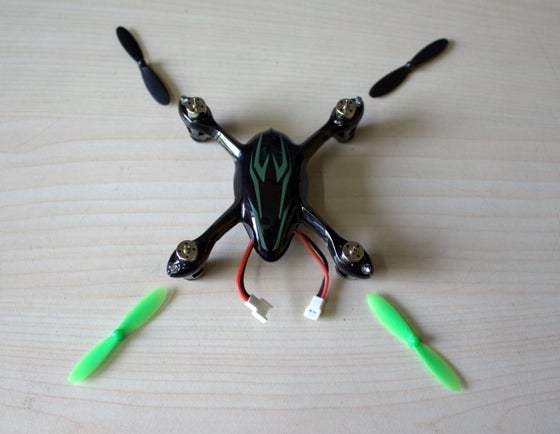
The propellers are mounted on each of the motors to provide the required thrust.
The 4 propellers are actually not identical. On closer look you can see that the propellers are tilted in different direction.By making the propeller pairs spin in each direction, but also having opposite tilting, all of them will provide lifting thrust without spinning in the same direction. This makes it possible for the Quadcopter to stabilize the yaw rotation, which is the rotation around itself.
There are two pairs of propeller.They comes with variety of colours. I ordered the black and green pairs.
On closer look you can see they are named like ” A” and ” B”.
Insert the black pairs in to the front side motors shaft.
Then insert the green pairs in to the back side motors shaft.Remember the diagonal blades are of same name.
i.e On a particular diagonal one Green A blade and another black A blade.
Step 6: Fix the Rubber Feet
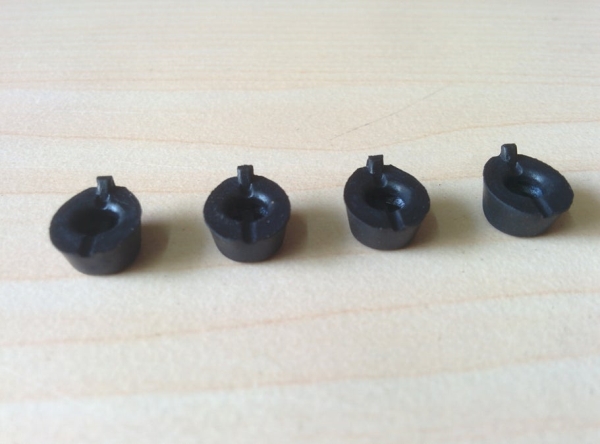
Rubber feet are used to absorb the shocks from the 4 landing gears during the landing.It prevents the motors and the Quadcopter from severe shocks during crushing or falling from a height.
Slightly open the rubber slots and fix it to the each landing gear bottom projection.
Step 7: Close the Lower Shell
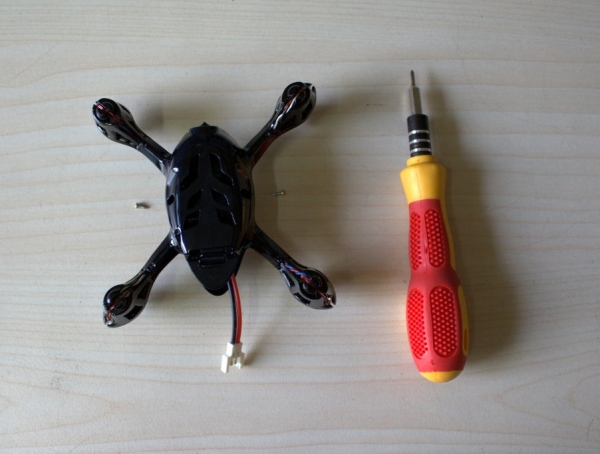
The lower shell have two parts the shell itself and the battery compartment.
First put the battery compartment in to the lower shell.
Fix it to the upper shell.The screw holes should be aligned.
Tighten the 2 screws on each side.
Finally apply pressure downwards on each arm to snap the lower body.
Step 8: Insert the Battery
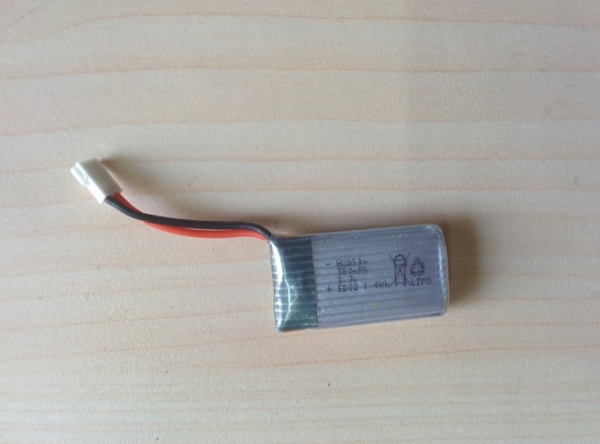
LiPo batteries are used to provide power to the Quadcopter.
You can never have enough batteries when it comes to flying your Hubsan X4! With a flight time of just 5 to 8 minutes on a full charge, it is imperative that you own at least a couple of spare batteries to be able to continue flying your drone without any stopping. And if you are close to a charging source, then you can have you non-stop playtime!
Insert the battery in to the bottom battery compartment .
Twist the wires and squeeze them in to the notched holder as shown in above pics.
Make sure the battery and wires are pushed in to the end of battery compartment, so they will not negatively affect the centre of gravity and cause unstable flight.
Source: SIMPLE QUADCOPTER ( HUBSAN X4 )
