Summary of Wheelchair Pride Project
The Wheelchair Pride Project transforms functional wheelchairs into personalized expressions of identity. It features custom spoke covers with motion-activated, color-changing Neopixel lights powered by a tilt sensor and Adafruit Trinket. The design allows users to swap decorative centers easily, turning the wheelchair into a dynamic extension of their personality while boosting confidence for both the user and observers.
Parts used in the Wheelchair Pride Project:
- Frosted Acrylic Sheet
- Waterproof Neopixel Strip
- Adafruit Trinket
- Tilt Sensor
- Solderable Breadboard
- PVC and Flexible Silicon Wires
- E6000 Glue
- Heat Shrink or Electrical Tape
- Exacto Knife
- External Lipo Battery
- Self Adhering Velcro Strips
- Cardboard Cake Plate
- Foam Ring
- Fake Flowers
The Wheelchair Pride Project is designed to allow wheelchair users to feel confident and empowered in their chairs by creating an avenue for self-expression within the chair itself. Oftentimes wheelchairs are cold and industrial looking because they are designed for functionality, but when a wheelchair is used regularly it becomes an extension of an individual and their abilities. By making the chair more personal, this not only allows the wheelchair user to feel more confident and at home in their chair, but also projects a sense of comfort and pride to non-wheelchair users. These custom-designed spoke covers incorporate color-changing lights which are turned on by the spinning of the wheels, and allow for interchangeable aesthetic decorations that can change as easily as changing an outfit.
Supplies
Required Materials :
- Frosted Acrylic Sheet (with access to a laser cutter)
- Waterproof Neopixel Strip
- Adafruit Trinket
- Tilt Sensor
- Solderable Breadboard
- Wires (both pvc and flexible silicon)
- E6000 Glue
- Heat Shrink or Electrical Tape
- Exacto Knife
- External Battery (Lipo Preferred)
- Self Adhering Velcro Strips
- Sticky Backed Velcro
Decorative Materials (Can be variable depending on desiered look):
- Cardboard Cake Plate
- Foam Ring
- Fake Flowers
Step 1: Making Your Circuit
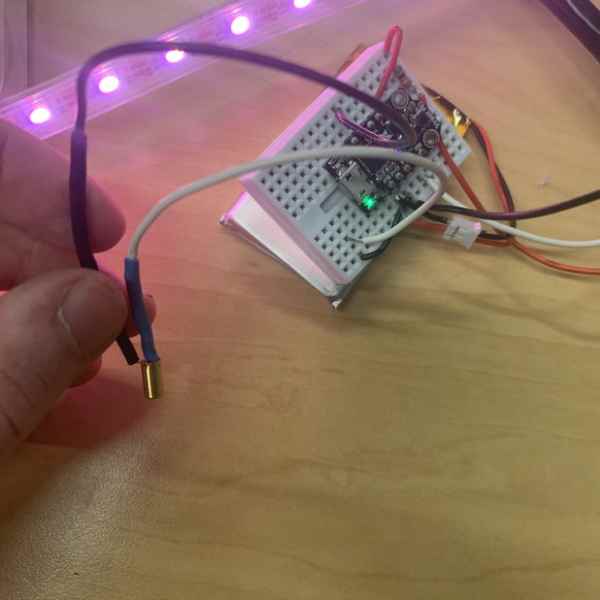
The circuitry and code for this project are fairly straightforward and include a relatively small number of parts, the main focus should be on creating clean and well-organized circuitry. When starting off making your circuit I recommend using a regular breadboard so that you can make sure all of your components are working before getting into soldering. For programming the neopixels I used the FastLED library, which makes neopixel programming easy and, well, fast!
I began by choosing a color for the LEDs that I enjoyed. FastLED lets you use the HTML color library to define neopixel colors, and so I was able to filter through a range of colors quickly to choose the right one. Because the point of this project is to express your personality through your wheelchair, make sure that you’re picking a color that suits you, I went with Indian Red. Once I had picked the color, I then added gamma correction to make it more rich and vibrant. Using FastLED doesn’t allow you to use gamma correction functions that are built into the neopixel documentation, so I had to create a separate gamma correction function that I could call to correct the LED color before it was displayed. I then created a simple moving light animation within the main LEDs. Adding this animation makes the neopixel look more natural as it is actuated by the tilt sensor, rather than turning the whole LED strip on or off.
Once the neopixels were programmed, I then had to actuate them with the tilt sensors. Most of the tilt sensor code was pulled from the Adafruit tilt sensor documentation, and was then modified slightly to incorporate the strip of neopixels rather than a single LED. Rather than turning the neopixel signal on and off, it is easier to simply put the brightness at full or at zero, which has the same effect. By attaching the tilt sensor to the wheel, it will actuate as the wheel turns which is a simple way to make it appear as if the lights are turned on by the movement of the wheel.
Once you have gotten all of your components working on a breadboard, it’s time to move everything over to a solderable board. When soldering your board, it’s important to make all of your wires as small and clean as possible so that they won’t get caught or tangled by the movement of the wheels. I recommend using regular PVC wire for most of your connections and using silicon wire for your neopixel connections which allows you to place the neopixel strip more easily.
The final step for completing your circuit is incorporating an external battery. To do this, all you need to do is create connections on the ground and battery pins of your trinket, and then connect those to an external battery. I would recommend using a lipo battery because it’s rechargable.
Neopixel Tilt
#include “FastLED.h”
#define NUM_LEDS 43
#define PIXEL_PIN 3
CRGB leds[43];
int tiltPin = 0; // the number of the input pin
int LEDstate = 100; // the current state of the output pin
int reading; // the current reading from the input pin
int previous = LOW; // the previous reading from the input pin
// the following variables are long because the time, measured in miliseconds,
// will quickly become a bigger number than can be stored in an int.
long time = 0; // the last time the output pin was toggled
long debounce = 50; // the debounce time, increase if the output flickers
void setup()
{
pinMode(tiltPin, INPUT);
digitalWrite(tiltPin, HIGH); // turn on the built in pull-up resistor
pinMode(PIXEL_PIN, OUTPUT);
FastLED.addLeds(leds, NUM_LEDS);
FastLED.setCorrection(Typical8mmPixel);
FastLED.setTemperature(MercuryVapor);
}
void loop() {
int switchstate;
reading = digitalRead(tiltPin);
// If the switch changed, due to bounce or pressing…
if (reading != previous) {
// reset the debouncing timer
time = millis();
}
if ((millis() – time) > debounce) {
// whatever the switch is at, its been there for a long time
// so lets settle on it!
switchstate = reading;
// Now invert the output on the pin 0 LED
if (switchstate == HIGH) {
LEDstate = 255;
FastLED.setBrightness(LEDstate);
} else {
LEDstate = 0;
FastLED.setBrightness(LEDstate);
}
}
// Save the last reading so we keep a running tally
previous = reading;
for(int dot = 0; dot < NUM_LEDS; dot++) { leds[dot] = CRGB::IndianRed; gammaCorrection(); FastLED.show(); } void gammaCorrection(){ for (uint16_t i = 0; i < NUM_LEDS; i++) { leds[i].r = dim8_video(leds[i].r); // gamma correction function for more nuanced color output leds[i].g = dim8_video(leds[i].g); leds[i].b = dim8_video(leds[i].b); } }
Step 2: Attaching the Lights
When making your spoke covers, you need to start out by laser cutting a piece of frosted acrylic to the size of your wheels. Measure the diameter of your wheels (within your grips), this will be the size of your outer cut — I recommend decreasing the size by a few inches to make attachment easier. Then measure the diameter of a small circle around the hub of your wheels, this creates an area for your circuit board to fit through and attach to your decor.
When you have your acrylic cut, you now need to attach your neopixels. You can change the placement and size of your neopixel ring depending on the length of your strip, just make sure that you change the number of LEDs in your code depending on the length of your strip. For this design, you need to use the waterproof model of neopixels because it comes in a flexible casing that allows you to attach the neopixels on their sides.
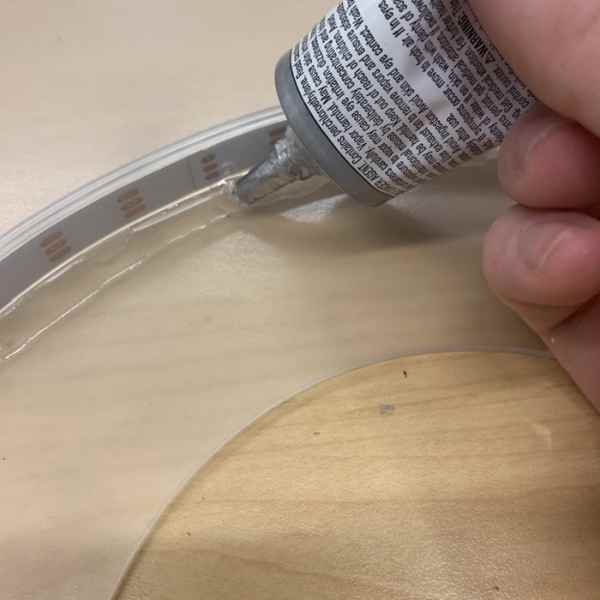
Place your neopixels in their desired location and shape, and then lightly trace their shape. Set the neopixels to the side, and lay down your E6000, following the traced lines, and then put the neopixels on the E6000. Make sure that the LEDs of the strip are facing outwards, this will make the glow shine in a wider area rather than just a small circle.
To keep the neopixels in a circle, I recommend feeling your hookup wires through the casing of the opposite side and then cutting a small hole to pull them through. This not only holds your LEDs in a circular shape better but also protects the connections. If you do choose to use this process, you must do it before soldering the wires to your board.
Once the neopixels are laid down on the E6000, you can stabilize them more by adding glue to the inner sides of the circle. This creates more points of attachment and helps to keep the strip upright. If glue leaks to the outer side of your circle, you can clean it up by waiting for the E6000 to become tacky, and then cutting and removing it with an Xacto knife. Depending on the size of your central decorations, this may or may not be necessary, so it is a completely optional step.
The final step for your spoke covers is adding self-adhering velcro to the inside (the size where you have attached your neopixels). You must make sure that where your velcro attachments are line up with the layout of your spokes. If your wheels have two layers of spokes, making your velcro strips long enough to go through both layers of spokes makes attachment easier. Once you’ve laid out your velcro placement, glue them down to your acrylic with E6000. To hold them in place while they dry, I recommend using alligator clips.
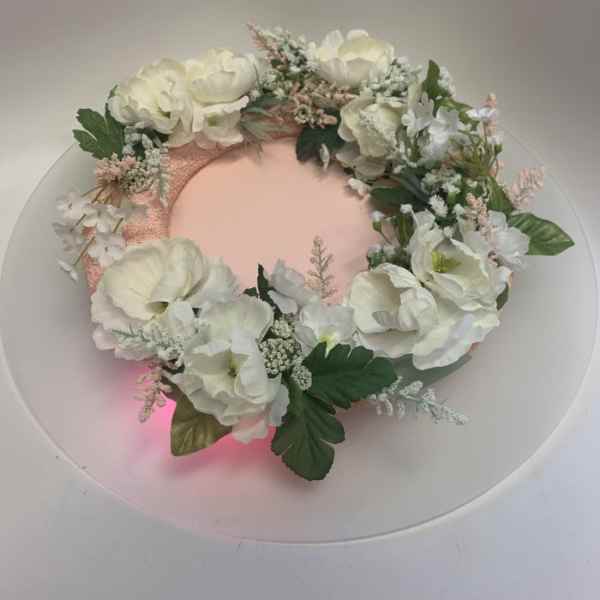
Step 3: Making Your Decor
The last thing to bring your wheelchair pride together is adding the central decorations. Having decorations in the center is important for covering your wires and having a place to attach your board, but it can be as simple or complex and you want. I made mine floral, but you could make yours using cardboard and paper, a new piece of acrylic, anything that is slightly rigid and fits your aesthetic. The other thing about this design is that it is completely detachable, so if you make a design that you grow out of, it’s simple to make a new one.
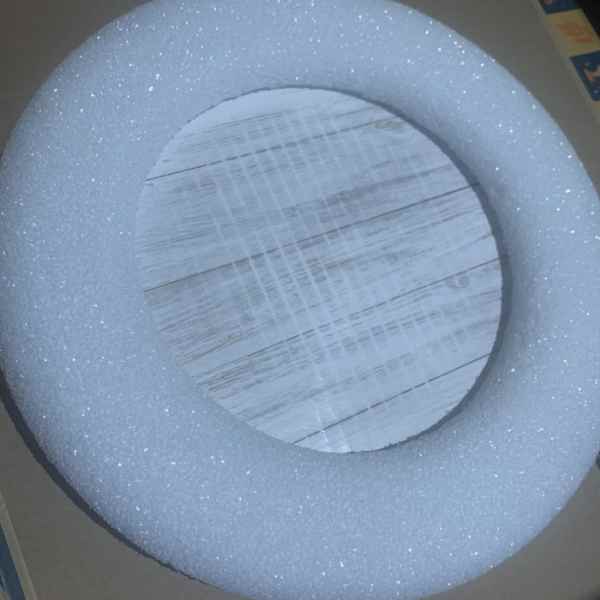
For my central decorations, I used a cardboard cake board attached to a foam ring. I glued the two pieces together, and then spray painted them light pink. I then took a selection of fake flowers, cut them down, and attached them to the foam ring. For added stability, I dipped the stems of the flowers in glue before sticking them into the foam.
Step 4: Enjoy Your Wheelchair Pride!
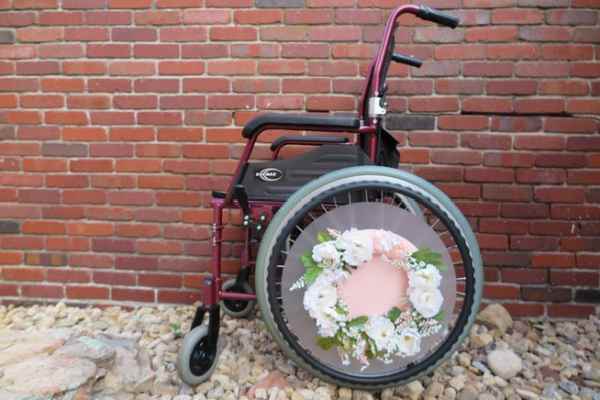
With your circuit done, lights attached, and decor made, all that’s left to do is bring it all together and enjoy your wheelchair pride! Using adhesive-backed Velcro, attach your decor to your spoke covers, and then attach the bottom of your circuit and battery (I recommend using a small strip of self-adhering velcro to hold the circuit and batter together) to the back of your decor. If your board is too close to the hub of your wheels the metal of the hub may short your board, this can be resolved either by putting fabric between the two or attaching your board to one of the back spokes using self-adhering velcro.
The wonderful thing about this design is that it’s easy to change based on your preferences and needs. Every wheelchair user is different, and so wheelchair design should be too. There has been a lot of innovation in practical wheelchair design, but not much attention has been paid to making wheelchair aesthetic design work with and for the user. Hopefully this project changes that, and allows any wheelchair user to feel joy, excitement, and pride in using their chair.
Source: Wheelchair Pride Project
- How does the project turn on the lights?
The lights activate via a tilt sensor attached to the wheel that triggers when the wheel spins. - Can I change the color of the lights?
Yes, you can select any color from the HTML color library using the FastLED code. - What type of battery is recommended for this project?
An external rechargeable Lipo battery is recommended for power. - How do I attach the decoration to the spoke cover?
You use self-adhering velcro strips to attach the central decor to the inside of the acrylic spoke cover. - Is the decoration permanent or removable?
The design is completely detachable, allowing you to swap decorations as easily as changing an outfit. - What material should be used for the spokes covers?
A frosted acrylic sheet cut to the size of your wheels using a laser cutter is required. - Which library is used to program the neopixels?
The FastLED library is used to make programming the neopixels easy and fast. - How do I prevent the wires from getting tangled?
Wires should be kept small and clean, and silicone wire is recommended for neopixel connections to allow easier placement.