
Summary of Arduino magnetic stripe decoder using microcontroller
This project demonstrates scanning magnetic stripe cards using an Arduino and a standard magnetic stripe reader. It leverages freely available code to decode data from credit cards or student IDs, offering a beginner-friendly alternative to traditional game port interfaces. The setup involves connecting the reader's pins to specific Arduino digital pins and loading a provided sketch to display the card information.
Parts used in the Magnetic Stripe Scanner:
- Arduino board
- Omron V3A-4K magnetic stripe reader
- Soldering wires
- Breadboard or breakout pads
- +5v power supply
- GND terminal
- Digital pin 2 for DATA
- Digital pin 3 for CLK
- Digital pin 5 for LOAD
This instructable shows how to use some freely available code, an arduino, and a standard magnetic stripe reader to scan and display the data stored on magnetic stripe cards such as credit cards, student IDs, etc.
I was inspired to post this after reading the intro to magnetic stripe reading and Stripe Snoop that is found in MAKE magazine Volume 1. That tutorial details how to interface a stripe reader to a game port interface, but I have a mac laptop, so I don’t have a game port interface!
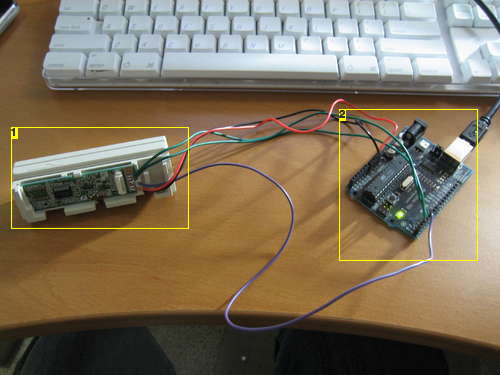
Also, I think that the arduino suite of hardware/software is much more integrated and easy to understand for beginners than the “traditional” approach presented on the Stripe Snoop website and MAKE magazine.
However, this application simply shows the data that’s on a magnetic stripe; it does not have any of the more advanced features that Stripe Snoop does.
The last step of this instructable has some links to more in-depth information about this topic for those who are interested.
Step 1: Hardware
CLK – 3
LOAD – 5Finally, connect the +5v and GND to their respective terminals on the Arduino board.
Step 2: Software
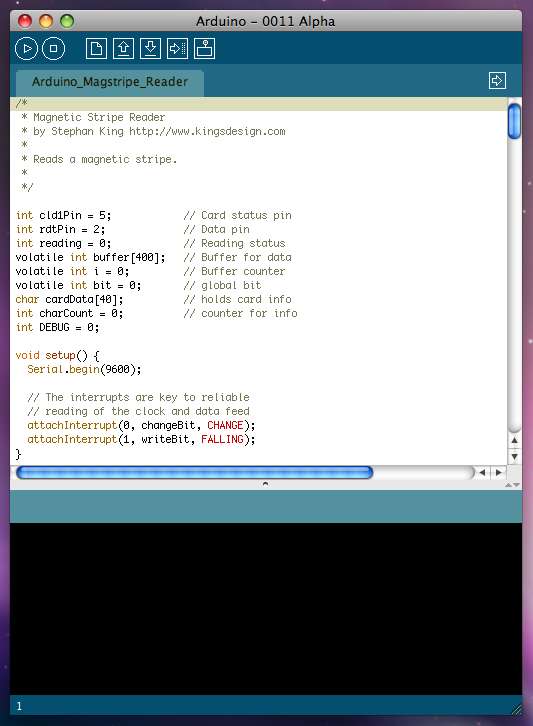
This step is easy. Simply load the attached sketch on to your Arduino.
Note: I didn’t write this code, I found it here. I’ve just attached it here for convenience.
For more detail: Arduino magnetic stripe decoder using microcontroller
- What is the primary function of this project?
The project scans and displays data stored on magnetic stripe cards like credit cards and student IDs. - Can I use a different reader than the Omron V3A-4K?
Yes, any standard TTL reader will work as long as you consult its datasheet for wiring. - Do I need to buy a fancy harness for the reader?
No, you can solder wires directly to the breakout pads inside the reader circuit board. - Which Arduino pins connect to the magnetic stripe reader?
Connect DATA to pin 2, CLK to pin 3, and LOAD to pin 5. - Where did the software code come from?
The author did not write the code but found it online and attached it for convenience. - Does this project have advanced features like Stripe Snoop?
No, this application only shows the data on the stripe without advanced features. - Why did the author choose Arduino over the game port interface?
The author chose Arduino because they have a Mac laptop which lacks a game port interface. - How much did the specific reader cost the author?
The Omron V3A-4K reader cost approximately $20.00.
