Summary of ATMega32 UART PC Interface – Testing
This article describes testing an ATmega32 UART-to-PC interface using a MAX232 level-shifter and Windows HyperTerminal. It provides UART support files (uart.h, uart.c) configured for a 16 MHz clock, explains calling uart_init() before using printf to send VT100-initialized text, and includes a sample program that prints Would you like to play a game? to HyperTerminal. A downloadable AVR Studio project file is provided to preset linker options.
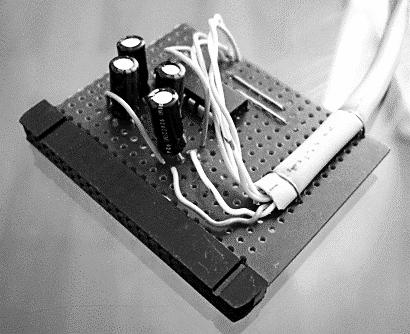
Parts used in the ATmega32 UART PC Interface:
- ATmega32 microcontroller
- 16 MHz crystal
- MAX232 level translator IC
- Capacitors for MAX232 (as required by MAX232 datasheet)
- RS232 connector (DB9) or equivalent serial cable
- PC running Windows with HyperTerminal
- avr-gcc/AVR Studio project files (serialport.zip)
- uart.h support file
- uart.c support file
This article shows to test the ATMega32 UART PC Interface, and how to configure the software. Assuming you have made the interface, all that is required now is the software and the configuration. The hardware is simply a MAX232 chip, which provides the electrical translation between RS232 signal levels and TTL. The connection to the ATmega32 enables Windows HyperTerminal to display the data sent by the microcontroller.
Terminal emulators are one of those old technologies that have remained with us since the early days of the IBM computers. It always reminds me of that old classic film “War Games”, where David Lightman (Matthew Broderick) hacks into a military network using a terminal emulator program and a PSTN modem.
This is a simple example program that will print, “Hello…would you like to play a game?” in the HyperTerminal window.
UART.H and UART.C Support Files
In order to print to Windows HyperTerminal, you will need two support files, which will provide serial communications between the PC and the ATMega32 AVR. The parameters for serial communications require optimisation based on the clock frequency. In this case, it is for a 16 MHz clock.
These files enable the programmer to display information in HyperTerminal using the “printf” function. Therefore, if you plan to use this function then you need to include these files in your project.
The function “uart_init()” exists in the file “uart.c” and must be called once in the main project before “printf” can be used.
My Project File
Unzip it and double click on serialport.aps file which will start AVR Studio with the project files already set up for you. If you use this package then you will not need to add the linker options as described below as they are automatically set by the project file.

Serial port project files: serialport.zip
Serial Port Communication Code
1: /********************************************
2: Author:Peter J. Vis
3: Last Updated:8 Dec 2009
4:
5: Microcontroller:ATmega32
6: Crystal:16 MHz
7: Platform:Development System
8:
9: LIMITATIONS:
10: No portion of this work can be used in
11: commercial applications without prior written
12: permission. This work cannot be used by
13: bloggers for web publishing.
14:
15:
16: PURPOSE:
17: To test the UART interface communication
18: with a PC, by sending characters to Windows
19: HyperTerminal.
20:
21: CIRCUIT:
22: UART PC Communication Interface using a MAX232.
23:
24: *********************************************/
25:
26: #define F_CPU 16000000UL
27:
28: #include <avr/io.h>
29: #include <util/delay.h>
30: #include "uart.h"
31: #include "uart.c"
32:
33: int main()
34: {
35: // Initialise UART - This function is
36: // in the file uart.c. This file is needed to
37: // make printf work when sending characters
38: // to HyperTerminal.
39:
40: uart_init();
41:
42:
43: // Initialise HyperTerminal by sending
44: // VT100 escape sequences.
45: printf("\x1B[2J\x1B\x63");
46:
47: // Print a welcome message.
48: printf("Would you like to play a game? \r\n");
49:
50: }
Read more: ATMega32 UART PC Interface – Testing
- What hardware is needed to interface ATmega32 UART to a PC?
A MAX232 chip for level translation, the ATmega32, a 16 MHz crystal, capacitors for the MAX232, an RS232 connector or cable, and a PC with HyperTerminal. - Which support files are required to send data to HyperTerminal?
The files uart.h and uart.c are required. - What clock frequency are the provided UART files configured for?
The UART support files are configured for a 16 MHz clock. - What function must be called before using printf for serial output?
Call uart_init() once in main before using printf. - How does the example program initialize HyperTerminal display?
It sends VT100 escape sequences using printf: x1B[2Jx1Bx63. - What message does the sample program print to HyperTerminal?
It prints Would you like to play a game? followed by a carriage return and newline. - Is there a ready-made project file for AVR Studio?
Yes, serialport.zip contains a serialport.aps AVR Studio project that presets linker options. - Where is the uart_init function located?
uart_init() is located in the file uart.c.