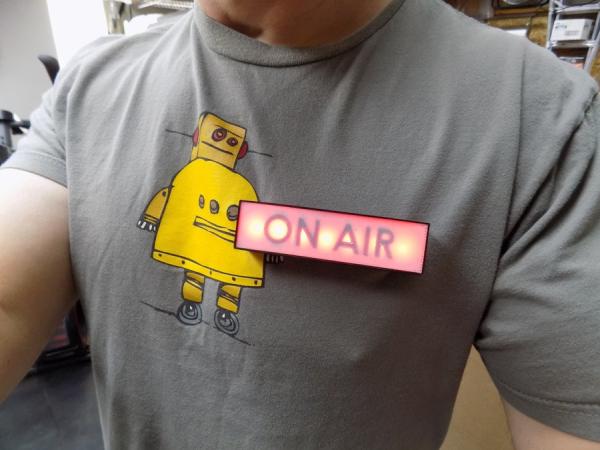
I was working on an unrelated project that utilizes Bluetooth, I had to test the communication so I built one of the Arduino test circuits.
The light contains all of the electronics, microcontroller and battery which can be recharged VIA USB.
It uses really strong magnets to attach it to my clothes.
I 3D printed a custom housing and light lens.
Much of the information that I required was hidden by dead and false links
I thought that this would be a fun project to share…
Supplies:
Arduino
Bluetooth module
Battery
Red LEDs
Step 1: The Electronics
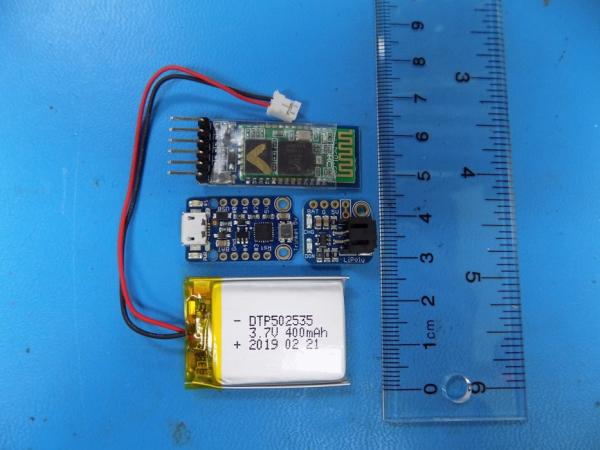
I wanted the smallest possible footprint so I chose to use an Adafruit Trinket.
There is also a tiny battery charging circuit that pairs nicely with it.
Step 2: Programming the Bluetooth Module
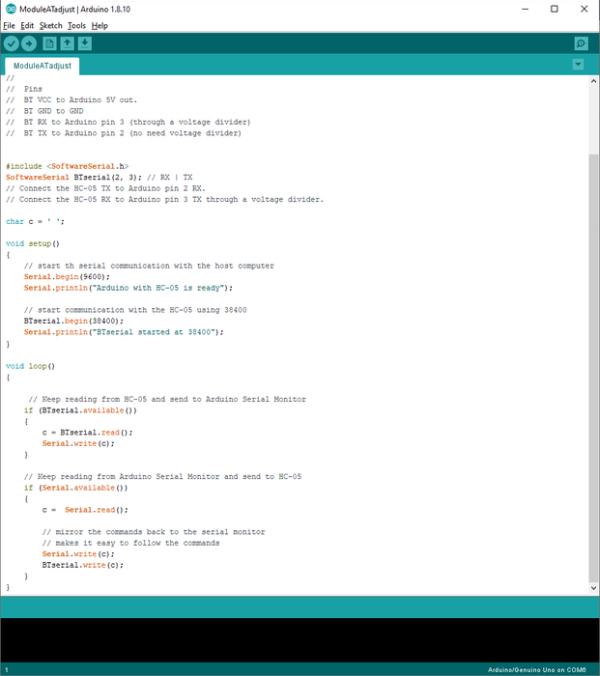
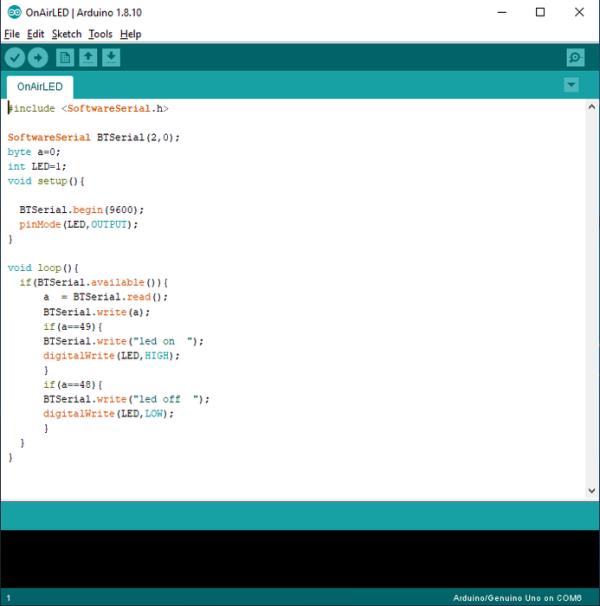
I used the attached code modified from HERE to program the Bluetooth module:
Upload the code to an UNO and connect as specified in the comments section of the sketch.
The link has the circuit connection information.
Open the Arduino serial monitor.
NOTE: It is very important to depress the switch on the module prior to powering it on, this will allow changes to be programmed onto the module. The onboard LED will blink slowly to indicate that the module is in AT mode.
On the serial monitor typing “at” followed by the enter key will return an OK response.
The change I made was just the name using “at+pswd=ONAIR” on the serial monitor.
Step 3: Arduino Code
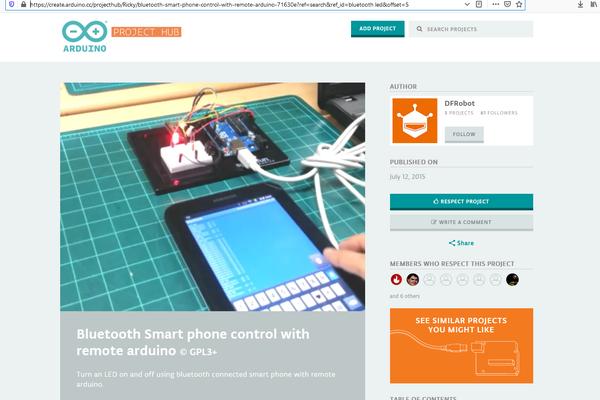
I used code from HERE to get the communication working on the UNO.
My phone was prepared with a Bluetooth terminal program.
The terminal uses “1” to turn on the LED and “0” to turn it off again
Step 4: Custom Light Lens
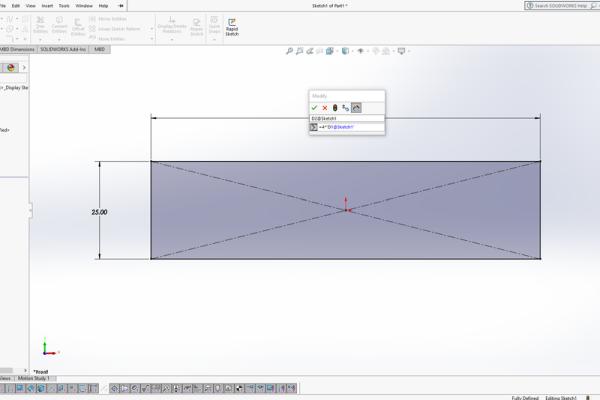
Begin by selecting the front plane.
Draw a centre point rectangle then add dimensions so that it is 4 times wider than it is tall. I use an equations for the relation which makes future adjustments remain to the same ratio.
Extrude the sketch out from the plane by 1mm.
Again select the front plane and sketch text to read “ON AIR” then adjust the font size to 15mm.
Dimension the sketch so that it is centred.
Extrude the sketch back or away from the plane by 1mm.
From the front this will read normal.
This model is then saved as .STL
This file is then printed wide part down with a pause between the flat section and the lettering. This facilitates a filament colour change on my machine.
I tried both red and black but ultimately chose to go with black.
Step 5: The Housing
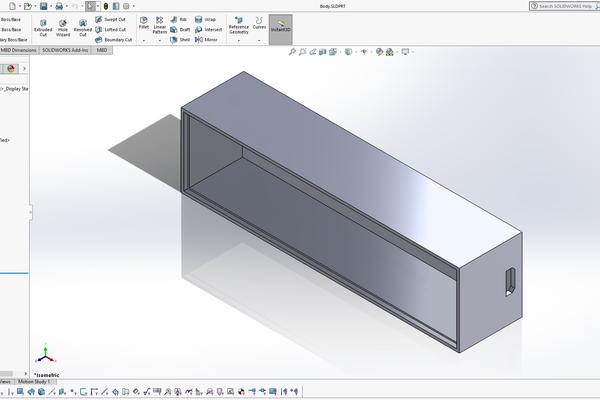
This part is highly dependant on the size of the lens.
The critical elements here are to house all of the electronics and still have a way to charge the internal battery.
I have included my printing files.
Step 6: Trinket Code
For the code to work on Trinket the pin designations need to be changed.
the rx pin on the BT module is connected in code and physically to pin 0
the tx pin on the BT module is connected in code and physically to pin 2
the external LED are connected in code and physically to pin 1
Step 7: Assembly
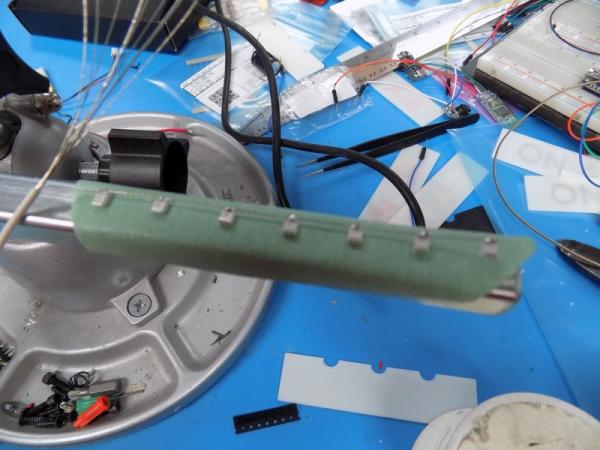
I chose to use surface mount LEDs. These are connected in parallel using fine wire.
I then connected a 10 ohm resistor to the anode leg on the LED strip.
I printed a LED back panel from white ABS. The LED strip was hot glued to the back panel.
The LED strip was then connected to the microcontroller, gnd to gnd and pin 1 to the anode resistor.
Before final assembly the electronic circuit was tested for proper operation.
The Bluetooth terminal program was opened and connected to the ONAIR device. Sending “1” turns on the LED strip and sending “0” turns it off again.
The housing has 3 circular indents on the inside of the back. These are for magnets. They friction fit into place.
This is insulated with Electrical tape.
The microcontroller is placed on the 4 pins inside the housing. The rest of the circuitry is friction fit into place.
The LED strip assembly friction fits on top of the electronics.
The lens friction fits into the housing front.
Source: Bluetooth “On Air” Lapel Pin