Summary of Choosing the Right Microcontroller for Beginners in the AVR Family
Getting started with AVR microcontrollers: choose based on project needs and skill level—ATtiny85 for tiny, low-cost projects; ATmega328P (Arduino Uno) for broad beginner support; ATmega2560 for many I/O and larger projects; ATtiny167 for 16-bit performance. Use Arduino IDE for easiest start, advance to AVR/Atmel Studio or command line for more control. Learn GPIO, timers, interrupts, serial, ADC, PWM, and good coding practices. Start with simple projects (blinky, reaction game, sensor logger) and progressively tackle advanced topics and mechatronics to build toward embedded careers.
Parts used in the AVR Beginner Guide:
- ATmega328P microcontroller
- ATtiny85 microcontroller
- ATmega2560 microcontroller
- ATtiny167 microcontroller
- Arduino Uno (as example board)
- ISP programmer / 6-pin ISP connector
- LEDs
- Pushbuttons
- Thermistor (temperature sensor)
- LCD display
- Piezo buzzer
- Motors and H-bridge driver
- SD card (for digital photo frame)
- Power regulation components (voltage regulator, batteries)
- Radio receiver (for RC controller)
- Accelerometers/gyroscopes (for quadcopter)
Getting started with a microcontroller as a beginner can feel intimidating. With so many options and specifications to consider, it’s easy to get overwhelmed. The AVR family of microcontrollers from Atmel (now part of Microchip) offers a great range of controllers for learning everything from basic inputs and outputs to more advanced programming techniques.
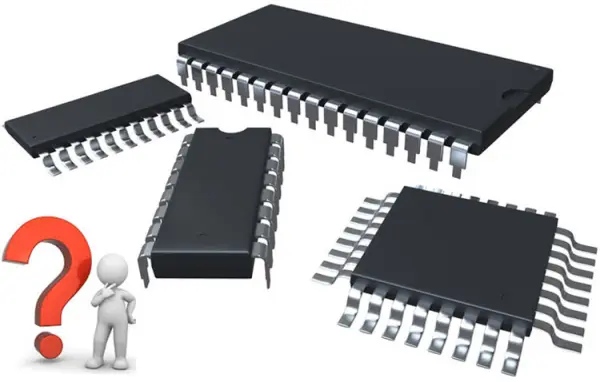
In this article, I’ll explain the key factors to consider when choosing your first AVR microcontroller as a beginner. We’ll look at the most popular options within the AVR family and discuss their pros and cons. By the end, you’ll have a good idea of which AVR MCU is the best fit for your skill level and first projects as a newcomer to embedded systems and microcontrollers.
AVR Microcontroller Family Overview
Before diving into specific part recommendations, let’s first look at a brief overview of the AVR architecture and some of its key characteristics:
- RISC-Based Architecture: AVR microcontrollers use a reduced instruction set computing (RISC) architecture. This focuses on simple, efficient instructions ideal for beginner programming.
- 8-bit/16-bit Processors: The bulk of the AVR family uses 8-bit processors, with some higher-end models utilizing 16-bit. 8-bit is great for intro projects due to its lower cost and complexity.
- On-Chip Memory: AVRs contain both flash program memory and SRAM data memory integrated into the chip. No external memory is required for most applications.
- Peripherals Integrated: Useful I/O features like timers, PWM, analog inputs, and more are built right into the MCU package. This eliminates extra components for beginner circuits.
- ISP Programming: In-system programming (ISP) allows programming and debugging the chip directly over pins without an external hardware programmer. Makes quick testing and iterating on code simple.
- Arduino Compatibility: Many AVR chips are used in Arduino boards, providing a familiar and well-supported intro development environment. Great for learning on low-cost boards before designing custom circuits.
Wide Variety of Options: From small 8-pin chips up to larger 64-pin packages, the AVR family offers controllers scaled for everything from basic to advanced applications. Plenty of choices at every level.
With this overview in mind, let’s examine some of the most popular and beginner-friendly specific AVR microcontrollers to consider for your first projects:
ATmega328P – The Classic Beginner Choice
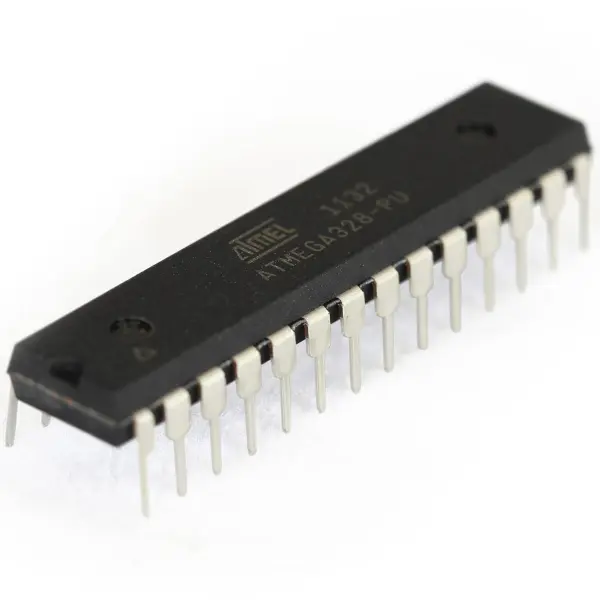
Hands down one of the most used AVR microcontrollers of all time is the ATmega328P thanks to its inclusion in the ubiquitous Arduino Uno board. For good reason too – it offers an excellent balance of features and simplicity that make it ideal for beginners:
- 8-bit AVR RISC processor running at 16 MHz
- 32KB flash program memory + 1KB EEPROM + 2KB SRAM
- 14 digital I/O pins + 6 analog inputs
- Timers, PWM, USART, SPI/I2C interfaces
- Supports Arduino IDE programming through bootloader
- Low cost at under $5 in DIP or SOIC packages
Pros:
- Feature-rich yet easy to use on Arduino
- Huge community support online for help
- Inexpensive and readily available from many sources
- Simple 6-pin ISP programming without external hardware
Cons:
- Not the most powerful or fastest AVR chip
- Only 14 digital I/O limits the scope of beginner projects
Suitable For: All introductory electronics, robotics, sensor, and IoT projects just getting started with microcontrollers on a budget. Remains a great choice even after gaining experience.
ATtiny85 – A Tiny Yet Mighty Beginner Option
For projects requiring an even smaller/cheaper microcontroller, the ATtiny85 can’t be beaten. Its tiny yet packed-in features make it perfect for introducing programming techniques in a more constrained environment:

- 8-bit AVR processor running at 8/20 MHz
- 1KB flash program memory + 64B EEPROM + 96B SRAM
- 8 I/O pins and 6 PWM/timer channels
- USART, analog comparator, PWM
- Built-in high-voltage serial programming
- Low 5mm DIP/SOIC packages under $1
Pros:
- The tiny size is great for wearables, sensors, robots
- Very low-cost yet still useful capabilities
- Simple to program with barebones code
- Challenges optimization skills on limited resources
Cons:
- Small program size can sometimes be limiting
- Requires alternate programming method vs Arduino
Simple sensing, wearables, basic robotics, and learning embedded optimization on tight constraints. Also a fun “secret ingredient” for hiding in larger projects.
ATmega2560 – Increased Complexity for Intermediate Projects
For bigger projects that require more program space and I/O, the ATmega2560 delivers with increased horsepower over the 328P while retaining Arduino compatibility:

- 16MHz 8-bit AVR processor
- 256KB flash program memory + 8KB RAM + 4KB EEPROM
- 54 digital I/O pins + 16 analog inputs
- Hardware serial, SPI, TWI, PWM, timers
- Arduino Mega compatibility
Pros:
- Massive I/O count enables advanced input/outputs
- Increased program space allows complex code
- Familiar Arduino environment
- Plenty of memory for complex tasks
Cons:
- Physical size is larger than 328P
- Higher cost than smaller AVR chips
- More complex than 328P for beginners
Suitable For: When projects shift towards more inputs/outputs, larger code, enhanced features like motor control, displays, sensors arrays, and intermediate/advanced programming techniques – without requiring a step up to 32-bit.
ATtiny167 – 16-bit Power in a Tiny Package
For learning 16-bit AVR programming and higher performance in a small chip, the ATtiny167 provides a solid step up in processing power:
- 16 MHz 16-bit AVR CPU
- 128KB flash program memory + 16KB RAM
- 20 general-purpose I/O ports
- USB, SPI, TWI, timer/counters
- 3x 16-bit timers with PWM
- Only 64mil QFN/SOIC packages
Pros:
- 16-bit CPU offers speed/capability boost over 8-bit
- Decent I/O count in tiny package
- On-chip USB eliminates bulky external chips
- High on-chip memory for 16-bit
Cons:
- Higher learning curve than 8-bit AVRs
- Fewer tutorials/documentation than mainstream chips
Suitable For: More advanced control applications benefitting from 16-bit processing in a tiny design footprint. Learning 16-bit AVR techniques on a low-cost chip before advancing to larger packages.
Choosing Your First AVR Microcontroller
To summarize, here are the key factors to consider when choosing your first AVR MCU as a beginner:
- Start Small – For basic learning, the ATtiny85 is ideal due to its compact capabilities and cost. Don’t overlook it!
- Go Mainstream – The ATmega328P on the ubiquitous Arduino UNO provides the best all-around balance thanks to vast community resources. Hard to go wrong here.
- Scale Up Nicely – When increasing complexity, the ATmega2560 is a very approachable next step up with its Arduino ecosystem.
- Challenge Yourself – The ATtiny167 lets you graduate to 16-bit AVR programming on a miniature yet powerful platform.
- Consider your Projects – Pick an MCU matching the memory, I/O, and features required without being overly complex for your current skill level.
- Budget Friendly – Always keep price in mind, especially early on. ATtiny85 and ATmega328P are very economical controllers.
- Take Small Steps – Don’t feel you need to leap to the most complex part. Learn on progressively more featured chips at your own comfortable pace.
Remember that the best microcontroller for a beginner is whatever gets you excited about exploring embedded systems and coding interactions between hardware and software. Any of these AVRs can serve you well in learning the fundamentals. So select one that aligns with your constraints and interests, and enjoy your journey into microcontrollers!
Programming Development Environments
Now that you’ve chosen your first AVR microcontroller, the next step is selecting your programming and development environment. There are a few popular options suitable for beginners:
Arduino IDE (Integrated Development Environment)
For the ATmega328P and similar Arduino-compatible AVRs, the Arduino IDE is by far the easiest to get started with. It provides:
- Simple block-based programming in C/C++ without complex headers or config files
- Built-in compiler and programmer to directly upload code
- Robust code editor with troubleshooting output
- Huge library of pre-written code snippets for common functions
- Automatic 6-pin ISP programming of stand-alone ATmega328 integrated circuits (ICs)
While limited to complex projects, the Arduino IDE lowers the initial learning curve tremendously. It makes exploring the fundamentals of inputs/outputs, timing, and sensor interaction seamless.
AVR Studio
For programmers ready to migrate beyond the Arduino IDE, Atmel’s free AVR Studio software provides a similarly integrated development environment with additional professional features:
- Full C/C++/assembler language code editing
- Project management tools for building complex programs
- Debugging support through simulator or hardware tools
- Low-level control lacking in Arduino IDE
- Requires external hardware programmer for most parts
AVR Studio streamlines development for advanced projects while retaining many of the conveniences that made Arduino IDE popular. The tradeoff is a steeper learning curve upfront.
Atmel Studio
Atmel Studio is a newer and actively developed alternative to AVR Studio from Microchip. It offers similar capabilities with some improvements:
- Simplified installation over AVR Studio
- Enhanced code editing features
- Built-in simulators for hardware bring-up
- Auto code formatting and project wizards
- Cross-platform support for Windows, Mac, Linux
Atmel Studio seeks to combine the usability of Arduino IDE with the power of a full C/C++ IDE for professional embedded development. As a modern option, it makes for a smoother transition beyond introductory tinkering.
Command Line Development
For Unix-based systems or experienced coders, developing directly from the command line using makefiles provides ultimate control:
- Native build tools allow full customization
- Direct compiler and linker options without abstraction
- Workflows integrate with version control, editors
- Requires explicit knowledge of the build process
- External programmers still needed for most parts
While offering peak performance for experts, going straight to command line tools has the steepest initial ramp. It’s best left until achieving confidence with a simplified visual IDE first.
In summary, the Arduino IDE is unrivaled for beginners thanks to its minimal learning curve. AVR Studio/Atmel Studio are good mid-level choices when more control is desired. And command line remains the most powerful, albeit complex, environment for experienced embedded coders.
Getting Familiar with AVR Programming Basics
With your AVR microcontroller and programming environment selected, it’s time to start learning the fundamentals of embedded coding on the chip. Here are some key topics to familiarize yourself with:
- Pin Configuration Registers – Setting up peripheral functions like GPIO, PWM, timers on specific pins.
- GPIO Programming – Controlling digital outputs, reading digital/analog inputs through registers. Fundamental I/O tasks.
- Interrupts – Enabling asynchronous event handling for external pins or internal events like timers.
- Timers – Using internal timer modules for tasks like delay, PWM, and event timing. Learning registers and preschoolers.
- Serial Communication – Basics of USART and other serial protocols for debugging or data I/O.
- Memory Maps – Understanding program and data memory spaces along with their usage.
- Simple LED Blinking – The classic “hello world” of embedded coding. Iteratively improves blink speed control.
- Digital Input Switch Detection – Reading pushbuttons and executing code based on state changes.
- Analog Reading – Measuring analog voltages from sensors using built-in ADC.
- External Interrupts – Configuring and responding to pin interrupts for button presses, sensors, etc.
- PWM Fundamentals – Generating analog voltages from digital pins for motors, lighting, etc.
Getting comfortable with these fundamental building blocks will provide a strong foundation for any project. Experiment by implementing them in small simple programs initially before integrating multiple techniques. Documentation, examples, and tutorials abound online to support your learning.
First Project Ideas for AVR Beginners
With the basics under your belt, it’s time to embark on your first full microcontroller project! Here are some approachable ideas to get hands-on experience applying your new skills:
Blinky LED Circuit
Extend the classic LED blinking into new patterns controlled by timers and interrupts. Add buttons to change modes.
Reaction Time Game
Time how fast a user can press a button in response to an LED turning on – compare to the reactions of friends!
Temperature Sensor Logger
Record and log ambient temperatures over time with a thermistor, displaying min/max on an LCD.
Coin Toss Simulator
Randomly generate “heads” or “tails” by spinning an LED with PWM when a button is pressed.
Alarm Clock
Set an alarm time and wake up to an audible sound or lights. The Snooze feature adds complexity.
Digital Dice Roller
Generate random numbers 1-6 by lighting different LED combinations with each button press.
Button Melody Player
Assign musical notes to buttons – play tunes by pressing sequences! Add a piezo buzzer for sound.
RC Car Controller
Build wireless car controls with motors, H-bridge, and radio receiver triggered by joystick inputs.
Quadcopter APM
Interface APM autopilot board for basic drone flight control and telemetry monitoring.
Security Trigger
Be alerted via text if motion sensors or doors are opened while away from home.
Digital Photo Frame
Display photos stored on an SD card with an LCD – add slideshow and playback controls.
As you try these sorts of practical hands-on projects, be sure to document your work. Explain the goals, what you learned, any issues encountered, and how they could be improved. This portfolio of DIY experiences will boost your embedded skills rapidly.
Building Fluency with Good Programming Practices
While having fun applying your new skills to projects, developing good programming practices from the start is important. Some key habits to form include:
- Writing Descriptive Comments – Explain high-level logic and intentions, not just code details.
- Consistent Formatting – Use a coding style guide for indentation, braces, and readability.
- Descriptive Variable Names – Avoid vague one-letter names, explicitly describe purpose.
- Separation of Concerns – Group-related logic in functions/files rather than one large block.
- Modular Programming – Break code into reusable modules or libraries where possible.
- Don’t Repeat Yourself (DRY) – Consolidate repeated logic/code into reusable subroutines.
- Defensive Coding – Check for errors, and handle exceptions safely without interrupts/lockups.
- Self-Documenting Code – Strive for readability so future you understand without comments.
- Version Control from Day 1 – Track code changes and revisions through Git, saving many headaches.
- Proper Code Structure – Headers, libraries, and projects should follow conventions for readability.
While not always vital for small practice programs, establishing a sound coding style is crucial for managing larger, collaborative projects. The strong technique also makes code more portable and maintainable long-term as skills progress.
Advanced AVR Programming Techniques
Once a solid foundation has been built, it’s time to dive into more advanced AVR microcontroller programming techniques:
- Direct register access – Understanding how to read/write from registers without library calls.
- Custom peripheral usage – DMA, analog comparator, 12-bit DAC output, and other specialized peripheral modules.
- Interrupt Service Routines (ISRs) – Designing and handling interrupt priorities across the system.
- Multitasking with cooperative multithreading – Breaking programs into concurrent tasks through loops and flags.
- Communication Protocols – Implementing protocols beyond basic serial – I2C, SPI, USB, Bluetooth low energy.
- Timing Critical Code – Optimizing performance through assembly, direct register calls for precise timing loops.
- Floating Point Math – Using the included float math library or optimized fixed-point implementations.
- Memory Optimization – Working within tight constraints through pointers, efficient algorithms, and compression.
- Self-Calibrating Systems – Designing sensors/devices that automatically tune themselves.
Bootloader Programming – Writing bootloaders to allow OTA firmware upgrades or changes.
By engaging with more complex topics, proficiency will grow rapidly. Focused practice projects help cement techniques in a real-world context. Learning never stops!
Physical Interfacing and Mechatronics
While code is crucial, interfacing with real sensors and actuators expands skills in mechatronics design. Here are some ideas to explore:
- Basic Inputs: Buttons, switches, LEDs, sensors for light, sound, distance
- Analog Sensors: Thermocouples, strain gauges, flex sensors, gas/liquid level, load cells
- RFID/NFC: Identifying tags, transmitting small payloads over distance
- Motor Control: Driving DC geared motors or steppers with H-bridge ICs
- Communications: I2C sensors, Bluetooth/WiFi modules, SPI displays
- Human Interface: LCD/OLED displays, keypads, joysticks
- Power Management: Voltage regulation, battery/solar charging, low power modes
- Precision Sensing: Accelerometers, gyroscopes, magnetometers
- Advanced Outputs: Servos, relays, power MOSFETs for high current loads
Learning mechanical assembly techniques, circuit design, and sensor/actuator selection complements embedded coding skills. Experiment iteratively and document designs to continuously expand the intersection of hardware and software.
Breaking Into Embedded Systems Work
With rigorous practice under your belt, you’ll be well-equipped to advance your career in embedded fields. Some ways to transition include:
- Apply Skills as a Hobbyist – Build commercial products, and offer services like controller programming. Portfolio proves experience.
- Academic Degrees – Bachelor/Masters programs teach systems engineering design, and deep DSP skills for jobs in medical, and automotive sectors.
- Bootcamps/Courses – Intensive short programs prepare for entry-level embedded roles, often with job placement help.
- Entry-Level Firmware Jobs – Look for Associate/Junior roles focused on lower-level embedded code at companies building IoT, and robotics.
- Contract Work – Sites like Upwork let you bid on smaller embedded projects to build experience and credibility.
- Personal Projects – OSS contributions or creating your own mechatronic devices to sell shows skills to employers.
- Internships – Great way to transition directly into the workforce at companies doing meaningful embedded development.
- Certifications – Exams like ARM mbed, Nordic nRF and Espressif verify proficiency in relevant architectures.
- Networking – Attend tech meetups, join online communities, and build rapport with those already in the industry you wish to pursue.
With determination and the right opportunities, your embedded journey can take you places within just a few years. But passion for the work will always be the defining trait of success. Don’t forget to have fun along the way!
- What AVR is best for a first microcontroller?
The article recommends the ATmega328P on the Arduino UNO as the best all-around beginner choice due to balance of features and community support. - Can I start with a very small AVR for simple projects?
Yes, the ATtiny85 is ideal for tiny, low-cost projects and learning on constrained resources. - Does the ATmega2560 suit advanced beginner projects?
Yes, the ATmega2560 provides more I/O and memory for intermediate projects while retaining Arduino compatibility. - What development environment should a beginner use?
The Arduino IDE is recommended as the easiest way for beginners to start programming AVR chips. - How do I program AVR chips without an Arduino board?
Use in-system programming (ISP) with a 6-pin ISP connector or an external hardware programmer as described for standalone ICs. - What basic programming topics should I learn first?
Start with GPIO, timers, interrupts, serial communication, ADC, and simple LED blinking experiments. - Can I progress to professional tools after Arduino IDE?
Yes, move to AVR Studio or Atmel Studio for more advanced features and lower-level control. - What are easy beginner projects to try?
Suggested projects include a blinky LED, reaction time game, temperature logger, coin toss simulator, and digital dice roller. - Is budget a big factor when choosing an AVR?
Yes, the article advises keeping price in mind; ATtiny85 and ATmega328P are economical choices.