Learn how to control relay module from anywhere in the world with Amazing UI using Losant, this is part 6 of IoT World Series
Step 1: Needed Components
Needed components
- ESP8266
- PlatformIO IDE with default project setup
- Relay Module [Shipping free for a dollar]
- Jumper cables [40 pcs Shipping free for a dollar]
- USB 2/3 to Micro USB [Shipping free for a dollar]
- Losant Account
- Breadboard (optional) [Shipping free for few dollars]
- Kits with various sensors, wires, leds (optional) [Small Kit][Big Kit][Insanely Huge Kit] Shipping Free!
Step 2: Creating Device and Setting Up Dashboard
Log in your account, in case of not having one, sing up, it’s really fast and easy
Create a device with no Device attributes set, my recipe is available
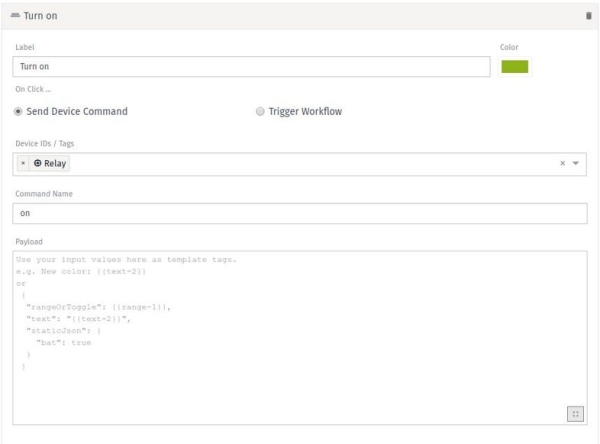
Create a dashboard (mine is named Relay dashboard) with 2 Button Trigger
Turn on button with Command Name – on
Turn off button with Command Name – off
In case you can’t press the buttons, go to the Settings icon in upper right on the block and select Unlock
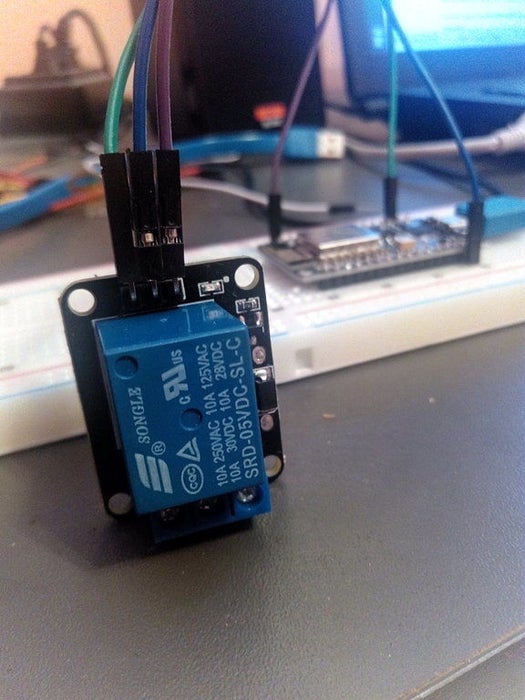
Step 3: Wiring the ESP8266 and the Relay Module
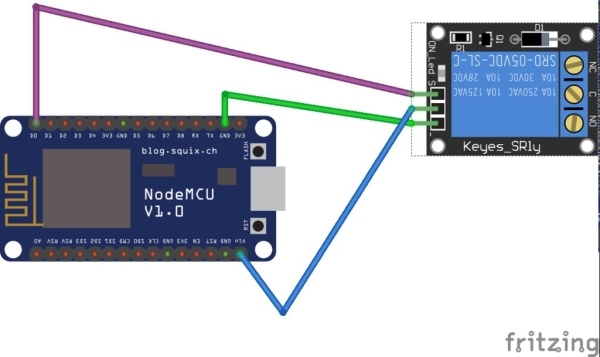
Connect Relay Module to ESP8266
S to D0
+ to VIN
– to GND
Step 4: Flashing the Code on the ESP8266
Create a file inside ProjectName/src/ called main.cpp and inside put
#include <ESP8266WiFi.h>

#include <Losant.h>


// WiFi credentials.
const char *WIFI_SSID = "wifi-name";
const char *WIFI_PASS = "wifi-password";</p><p>// Losant credentials.
const char *LOSANT_DEVICE_ID = "device-id"; // Device id can be found under
                                            // Applications > Devices > Your
                                            // device > Right corner
const char *LOSANT_ACCESS_KEY = "access-key";
const char *LOSANT_ACCESS_SECRET =
    "access-secret"; // To generate Key & Secret go to Applications > Security >
                     // Right corder + Add access key</p><p>WiFiClientSecure wifiClient;</p><p>// For an unsecure connection to Losant.
// WiFiClient wifiClient;</p><p>#define RELAY_PIN D0</p><p>LosantDevice device(LOSANT_DEVICE_ID);</p><p>// Called whenever the device receives a command from the Losant platform.
void handleCommand(LosantCommand *command) {
  Serial.println();
  Serial.print("Command received: ");
  Serial.println(command->name);</p><p>  if (strcmp(command->name, "on") == 0) {
    digitalWrite(RELAY_PIN, HIGH);
    Serial.println("Relay on");
  } else if (strcmp(command->name, "off") == 0) {
    digitalWrite(RELAY_PIN, LOW);
    Serial.println("Relay off");
  }
}</p><p>void connect() {
  // Connect to Wifi.
  Serial.print("Connecting to ");
  Serial.println(WIFI_SSID);</p><p>  WiFi.begin(WIFI_SSID, WIFI_PASS);</p><p>  while (WiFi.status() != WL_CONNECTED) {
    delay(500);
    Serial.print(".");
  }</p><p>  Serial.println();
  Serial.println("WiFi connected");
  Serial.println("IP address: ");
  Serial.println(WiFi.localIP());</p><p>  // Connect to Losant.
  Serial.println();
  Serial.print("Connecting to Losant...");</p><p>  device.connectSecure(wifiClient, LOSANT_ACCESS_KEY, LOSANT_ACCESS_SECRET);</p><p>  // For an unsecure connection.
  // device.connect(wifiClient, ACCESS_KEY, ACCESS_SECRET);</p><p>  while (!device.connected()) {
    delay(500);
    Serial.print(".");
  }</p><p>  Serial.println("Connected successfully");
}</p><p>void setup() {
  Serial.begin(115200);
  while (!Serial) {
    // wait until Serial is initialized
  }</p><p>  // map the pin as output
  pinMode(RELAY_PIN, OUTPUT);</p><p>  // default turned off
  digitalWrite(RELAY_PIN, LOW);</p><p>  // Register the command handler to be called when a command is received
  // from the Losant platform.
  device.onCommand(&handleCommand);</p><p>  // connects to WiFi
  connect();
}</p><p>void loop() {
  bool toReconnect = false;</p><p>  if (WiFi.status() != WL_CONNECTED) {
    Serial.println("Disconnected from WiFi");
    toReconnect = true;
  }</p><p>  if (!device.connected()) {
    Serial.println("Disconnected from Losant");
    Serial.println(device.mqttClient.state());
    toReconnect = true;
  }</p><p>  if (toReconnect) {
    connect();
  }</p><p>  device.loop();
}</p>
Project is available in GitHub
git clone <a href="https://github.com/beastovest/relay.git">https://github.com/beastovest/relay.git</a>
Connected to your ESP8266, on the right in Platform IO there is an arrow button > with tooltip Upload, press it, the upload should take few seconds
In case you get similar message
/dev/ttyUSB0: Access denied
You need to give rights to your current user to read ttyUSB0 port
Controlling relay module from anywhere in the world with Amazing UI using Losant is part 6 of IoT World series, you can check other in my blog
Source: Controlling Relay Module From Anywhere in the World With Amazing UI Using Losant