Summary of Setup External programmer in Atmel Studio
This tutorial guides users on integrating an external programmer into Atmel Studio 7.0 to flash AVR boards directly, bypassing the Universal_GUI application for improved efficiency. The process involves downloading avrdude, enabling Advanced Mode, configuring External Tools with specific commands and arguments, optionally setting keyboard shortcuts, and executing the flash command.
Parts used in the Integrate External Programmer into Atmel Studio Project:
- Atmel Studio 7.0
- avrdude.exe
- USBASP Programmer
- AVR Board (ATmega128)
- Hex File
- Tools Menu
- External Tools Configuration
This tutorial provides step-by-step instructions on how to integrate an external programmer into Atmel Studio 7.0. By setting up the external programmer, you will be able to flash the AVR board directly from Atmel Studio without the need to switch to the “Universal_GUI.exe” application. This streamlined workflow enhances the debugging and troubleshooting process, resulting in increased efficiency.
0. Download avrdude
On the school computer, avrdude is installed at
V:\avrdude\avrdude.exe
For your personal Windows PC, you can download avrdude here:
http://web.engr.oregonstate.edu/~jinyo/ece375/sw/avrdude.zip
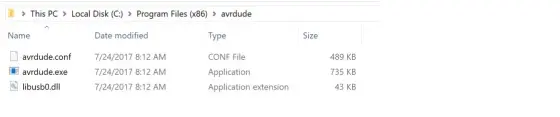
Unzip the file and save to your preferred directory, e.g.
C:\Program Files (x86)\avrdude\avrdude.exe
1. Enable “Advanced Mode”
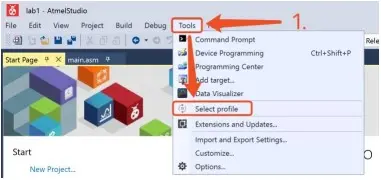
To configure an external programmer, you must ensure that Atmel Studio is in the “Advanced” profile mode. You can access this option by navigating to the Tools menu and selecting the “Select Profile” option.
1. Enable “Advanced Mode”
To configure an external programmer in Atmel Studio, you need to switch the software to the “Advanced” profile. This can be done by accessing the Tools menu and selecting the “Select Profile” option. Once you click on it, a menu will appear where you can choose the “Advanced” profile.
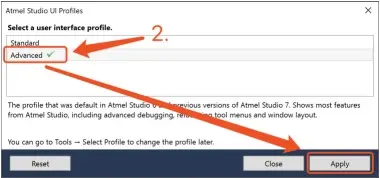
Select “Advanced” and click “Apply”.
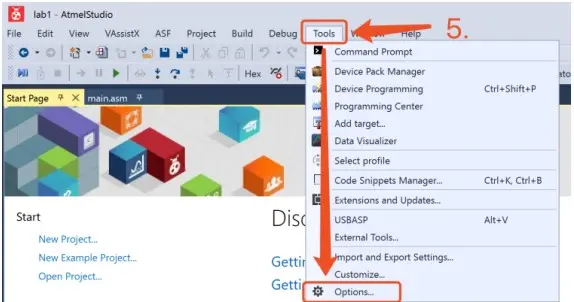
2. Add “External Tools”
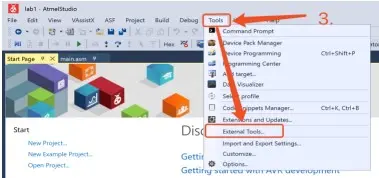
Go to > Tools > External Tools.
Add new external tool
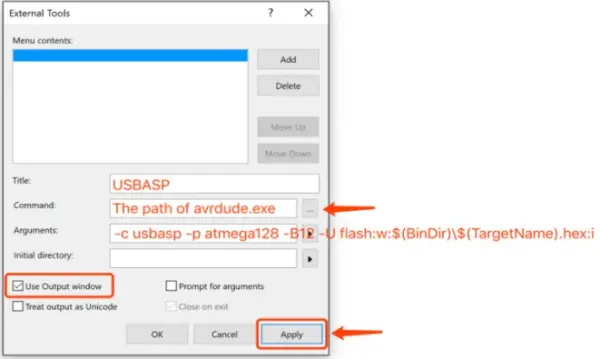
Title:
USBASP (or the name of your choice)
Commands:
C:\Program Files (x86)\avrdude\avrdude.exe (or the path of avrdude.exe)
Arguments:
-c usbasp -p atmega128 -B12 -U flash:w:$(BinDir)\$(TargetName).hex:i
Check ???? “Use Output window”, Uncheck ☐ “Treat output as Unicode” and ☐ “Prompt for arguments”.
Then, click “Apply” to save the setting.
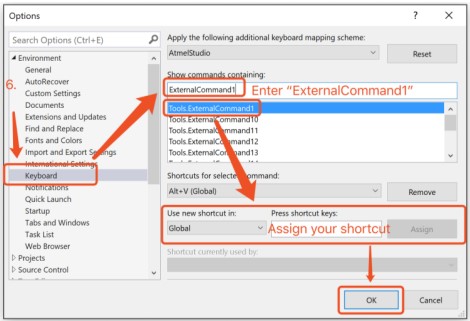
3. Setup keyboard shortcut (Optional)
This section is optional. You can skip it if you feel more clicky using the mice or touchpad.
Go to > Tools > Options
Here are the paraphrased instructions:
1. Choose “Keyboard” and input “ExternalCommand1”. Then choose “Tools.ExternalCommand1”.
2. Specify your desired shortcut keys and select “Assign”.
3. To save the configuration, click “Ok”.
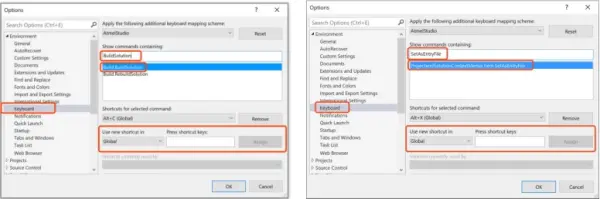
You can also assign shortcuts for other y frequent used command like “Set as Entry File” or
“Build Solution”, e.g. my choices of shortcut are:
Set as Entry File: Alt+X (Hint: X as check mark)
Build Solution: Alt+C (Hint: C as compile)
ExternalCommand1: Alt+V (Hint: well, it’s next to X and C…)
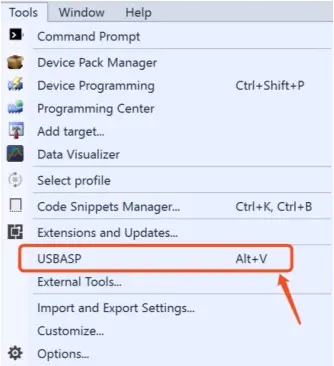
4. Flash hex file with external programmer
Here’s a paraphrased version:
To begin, ensure that your project is built. In the Solution Explorer, the specific folder or file that is highlighted is irrelevant as long as you are in the correct project.
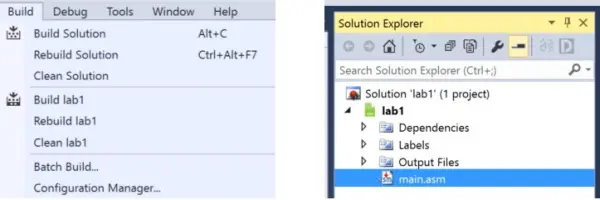
Go to > Tool > USBASP, or use the shortcut of your choice.
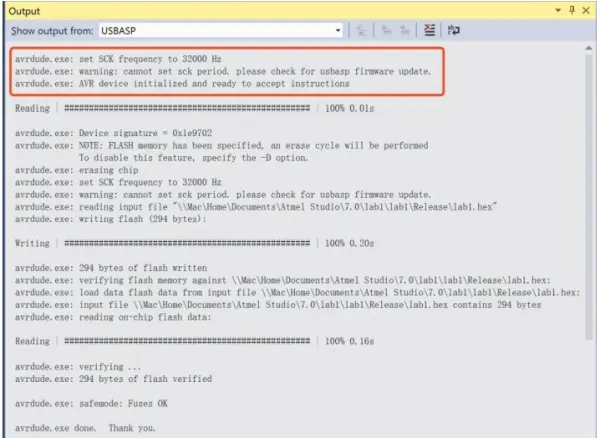
5. DONE!
Here’s a paraphrased version:
If the message below is displayed, it indicates that the hex file has been successfully flashed onto the AVR board. Any warning messages appearing in the output window can be disregarded.
- How do I enable Advanced Mode in Atmel Studio?
Navigate to the Tools menu, select Select Profile, choose Advanced, and click Apply. - Where can I download avrdude for a personal Windows PC?
You can download it from http://web.engr.oregonstate.edu/~jinyo/ece375/sw/avrdude.zip. - What arguments are required for the USBASP external tool configuration?
The arguments are -c usbasp -p atmega128 -B12 -U flash:w:$(BinDir)$(TargetName).hex:i. - Can I use a keyboard shortcut to flash the hex file?
Yes, you can assign a shortcut by going to Tools Options, selecting Keyboard, and assigning keys to Tools.ExternalCommand1. - What does the output message indicate after flashing?
It indicates that the hex file has been successfully flashed onto the AVR board. - Should I check Treat output as Unicode when adding the external tool?
No, you should uncheck Treat output as Unicode. - Is it necessary to switch to Universal_GUI.exe to flash the board?
No, this workflow allows flashing directly from Atmel Studio without switching applications. - Which profile mode is required to configure an external programmer?
The Advanced profile mode is required to configure an external programmer.