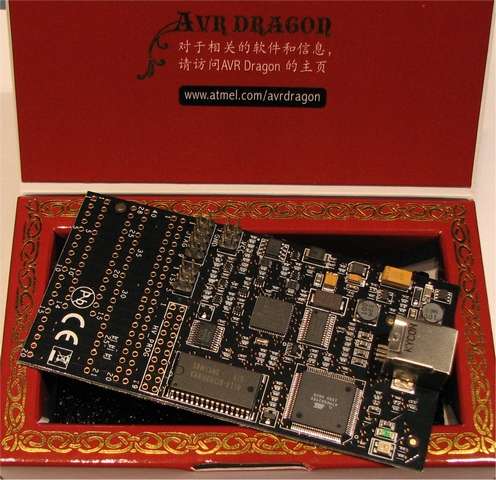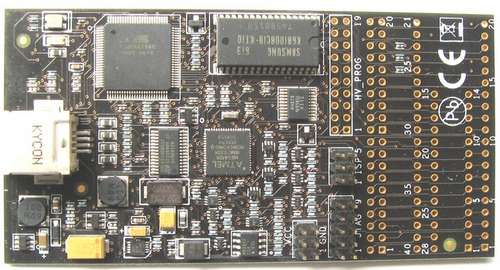
Atmel promotes their AVR Dragon as a low cost development product tool for use with their AVR microcrontollers. While the product does come in a fancy red cardboard box, unlike all the other AVR hardware debug/emulation development tools, the Dragon is sold as a single PCB with no cables or even a protective case.
Atmel does not even offer the option of buying the product with a protective case.
The customer is on his own as to how to best do this.
Before going any further, I must say that the Dragon has a tremendous amount flexibility and huge number of features and options – almost too many in my opinion.
As a result, there is no practical way to build a case that could provide easy access to every single combination of features and capabilities.
This instructable will focus on the creation of a protective case that wraps the Dragon in as small of a package as possible. As a result, when the enclosure is closed, functionality is primarily limited to that available from ISP or JTAG connectors, essentially giving you similar functionality to that of the JTAG ICE MKII, but only for the 8 bit microntrollers, and at a fraction of the cost.
Step 1 Different Dragons and Different Cases

That said, I was also looking for a case, that could still work with the older version of the board using a hole-less attachment option such as double stick tape.
The biggest problem in locating a case for the Dragon is the size of PCB. Many of the off the shelf cases are very similar in dimensions to each other and none of them that I was able to locate (and I looked at MANY) were an exact fit – especially for the mounting holes. I even asked Atmel directly on their support site if they designed the Dragon for a specific case. – I got nothing back from them. Nearly all of the cases were either too large for what I wanted or just slightly too small in one dimension. Also complicating matters is that since the Dragon has status LEDs on the PCB I was looking for a case that had a translucent plastic option so that the LEDs could be viewed through the case rather than have to deal with any sort of light pipe.
I did manage to find two cases that could be coaxed into working.
Serpac H-Series H-65: http://www.serpac.com/Products/Hseries/h-65.aspx
Photo: http://media.digikey.com/photos/Serpac%20Photos/A-65%20TR%20GY.jpg
Dimension Drawing: http://www.serpac.com/Products/Hseries/drawings/h-65.pdf
Hammond 1553 (1553BTBUBK) 4.615×3.109×0.945 : http://www.hammondmfg.com/1553colors.htm
3D Dimension Drawing: http://www.hammondmfg.com/pdf/1553B.pdf
These cases are readily available including places like Digikey, and Mouser who also sell the Dragon.
At the time I bought them, the Hammond is about half the cost of the Serpac.
Serpac runs about $13 and the Hammond about $7.
For Translucent Colors, the Hammond only offers blue, while the Serpac offers translucent gray, red, green, or blue. The Hammond has rubber along each side. The Hammond case is also a bit thicker and sturdier plastic than the Serpac.
Both come with several battery & door options (which were not used for this project) and the Hammond 1553 comes in two different sizes. Also some of the pictures in the online catalogs have photos of the wrong colored case (the text description is correct). So be very careful when ordering.
Now all that said about the translucent case, there is an alternative if you really want another color or don’t like the translucent look. Since these cases have replaceable face plates and the Dragon LEDs are near the edge of the PCB, you could replace the face plate with a clear plate which still allows you to see the LEDs. That way if you want black, or that bright red or safety yellow Hammond case, you can get it and still see the LEDs.
NOTE: The clear panels are harder to find as they are often not carried by online merchants.
Step 2 Which case?
While either the Hammond or the Serpac case should work for either PCB version of the Dragon, there are a few differences beyond the obvious color options and costs that are worth noting.
While I have both cases and have examined and measured both very carefully, I will point out that, at this point I have only done the modification on the Serpac case; however, having completed this, I can comment on the effort for the Hammond. (I will update this instructable, once the Hammond is completed)
The Serpac might be the better option for the older board without the mounting holes. I say this only because the Serpac is a tighter fit and has screw posts at either end that could be used to brace the board to keep it from moving forward/backwards when the USB cable is inserted.
I only mention this because I really don’t know how strong double stick tape is.
I believe that the Hammond case will be easier to modify. This is because on the Serpac the 4 posts used to hold the screws that hold the case shut are very close to the PCB mounting posts which have to be shaved down. It is difficult to get the dremel cutting tool into the corner by the front faceplate. The Hammond only uses 2 screws to secure the case so those posts are in the middle of the case and out of the way of the PCB posts which have to be shaved down or removed..
Because the Hammond case has only 2 case posts instead of 4, you will be able to mount the PCB all the way up to the face plate. This is not possible on the Serpac.
On the Hammond case, the distance between the Dragon PCB and the metal screws is VERY tiny like 1mm or less. In fact if the Dragon PCB is not precisely placed, the case screws might rub against the Dragon. I don’t think that this should be an issue.
The Serpac has 6 PCB mounting posts. If you plan on adding a Dragon Hyde “daughter board” to your dragon, the Serpace has two PCB posts already at the far end of the case that could be used to secure the daughter card.
Bottom line, is either case will work. And some of it comes down to preference.
Step 3 Additional Supplies
In addition to one of the cases you will need:
– Safety Glasses
– Dremel Tool
– cutoff wheel
– Fine/small grinding bit
– 5/64″ drill bit
If using the the older board with no mounting holes
– Double stick tape
If using the newer board with mounting holes:
– Four #2 x 1/2″ screws with binder/pan head
– Four hex nuts
– Four lock nuts (regular hex nuts could be substituted)
I used Nylon screws and highly recommend using nylon over metal because, if you don’t get your holes in the case exactly correct, the nylon has a bit of give that will make mounting possible and prevent cracking the case.
For more Detail: A protective case for the Atmel AVR Dragon using AVR
