Summary of AVR microcontroller tutorials for beginners
AVR microcontroller tutorials provide a comprehensive set of lessons covering AVR history, features, Atmega16/Atmega32 specifics, development tools (Atmel Studio 6, VMLAB, PonyProg), and interfacing projects like LED blinking, push button, LCD (16x2), DC motor with L293D, DS18S20 temperature sensor, optocoupler, and timer usage. The list helps beginners learn programming, simulation, device programming, and hardware interfacing with AVR chips.
Parts used in the AVR microcontroller tutorials:
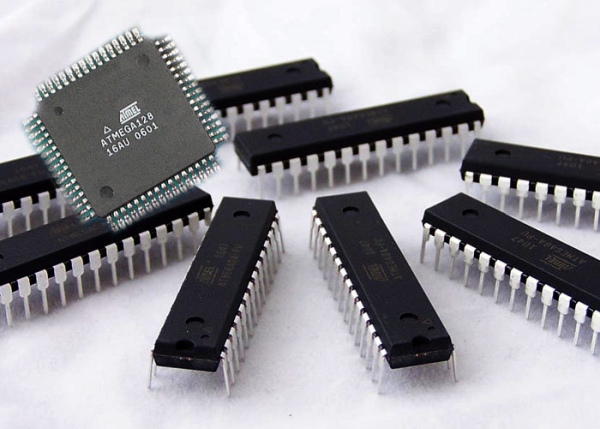
- AVR microcontroller (ATmega16, ATmega32)
- Personal computer with Atmel Studio 6
- VMLAB (Visual Micro lab) simulation tool
- PonyProg programmer software
- Programmer hardware (serial device programmer compatible with PonyProg)
- LEDs
- Push button
- 16x2 LCD module
- DC motor
- Motor driver IC L293D (or L298)
- DS18S20 digital temperature sensor
- Optocoupler / Optoisolator
- Power supply for microcontroller and peripherals
- Connecting wires and breadboard or PCB
AVR Microcontroller tutorials: In this article, we are going to present a complete list of avr microcontroller tutorials. After reading this article, you will get a complete idea about avr microcontrollers. This list contains more than 20 avr microcontroller tutorials. we completely learn about AVR microcontroller and interfacing with a different component using AVR microcontroller. So we the discussed here some introduction and some important feature of AVR microcontroller. A complete list of avr microcontroller tutorials is given below:
- Getting Started With AVR Microcontroller: In this tutorial, we discussed AVR microcontroller, so first, we know what is a microcontroller? AVR microcontroller was first developed by Atmel in 1996. It is an advanced version of minicomputer that integrated on a small chip which has a processor, memory and programmable I/O peripherals. AVRs are available with 8-pins to 100-pins; Most recently used the 40-pin ATmega16 or ATmega32.
Features of AVR microcontroller
- Multifunction
- Multiple internal oscillators
- Flash memory up to 256 KB
- Internal dataEEPROM up to 4 KB
- InternalSRAM up to 16 KB
- Two timers are 8 bit and one timer is 16bit
- ATmega16 Microcontroller: In this tutorial, we completely learned about Atmega16 microcontroller and also its pin description. It is an 8-bit microcontroller of Atmel’s. It is based on enhanced RISC architecture. ATmega16 is a 40 pin microcontroller. There are 32 I/O (input/output) lines which are divided into four 8-bit ports designated as PORTA, PORTB, PORTC, and PORTD.
- VMLAB tutorial for beginners: In this topic, we discussed “Visual Micro lab”. It is a special tool which provides the virtual environment for mild simulation and software writing. It is also used to compile the program of AVR microcontroller.
- PonyProg tutorial for beginners: In this tutorial, we learned how to program the microcontroller for the programming of AVR microcontroller we need a powerful programmer which is PonyProg. It is serial device programmer software with a user-friendly GUI framework available for Windows95/98/ME/NT/2000/XP and Intel Linux.
- Atmel Studio 6 Tutorial step by step guide: In this tutorial, we will learn about Atmel Studio 6. How to use the Atmel Studio 6 and what is Atmel Studio 6? What is Atmel Studio 6? It is an IDE by Atmel for developing and debugging Atmel AVR microcontroller. It provides an environment to write, build and debug your applications that are written in C/C++ or assembly code.
- Getting Started with Atmel Studio 6: In this project, we learned how to use the Atmel Studio 6 and how to make the first project in Atmel Studio 6. It is very easy to use in which we can build any type of application as per requirement. For complete guidelines we follow these steps to start with Atmel Studio 6;
- Download Atmel Studio 6 Website: www.atmel.com
- Open the Atmel Studio
- After the installation. The installation process is very eas
- Create a New Project
- Device Selection
- Write a Program
- Compile the Code
- Select Programmer
- Device Programming
- LED Blinking using ATMEGA32 AVR microcontroller: In this tutorial, we learned about the AVR Atmega32 and its programming and also how to develop the code for blinking LED through Atmeg32.First, we will write code using C language in Atmel Studio 6. For Atmega32 programming we used two registers DDR and PORT. DDR tell us the pin of Atmega32 input or output and PORT tell us whether pins are active low or active high.For the code and simulation for this project please visit
- How to use push button with ATMEGA32 AVR microcontroller: This tutorial is for beginners in the field of Atmel AVR programming. I hope that you read my first tutorial Blinking LED using Atmega32 and Atmel Studio. In this topic, we will learn what push button is and how we can use push button with AVR microcontroller Atmega32. What is Push Button? It is a small controlling device that’s operated by the electrical device by pressing. Here a push button is used to switch with a microcontroller. For the code and simulation for this project please visit
- LCD interfacing with ATMEGA32 AVR microcontroller: In this tutorial, we will discuss LCD and interfacing with Atmega32 AVR microcontroller.16×2 LCD is a module which is used to display the character. It is a very basic module which is commonly is used in many electronic devices and project. It can display 2 lines of 16 characters. 16×2 LCD can be interfaced with a microcontroller in 8 Bit or 4 Bit mode. These differ in how data and commands are sent to LCD. In 8 Bit mode, character data (as 8 bit ASCII) and LCD command are sent through the data lines D0 to D7. That is 8-bit data is sent at a time and data strobe is given through E of the LCD.
- DC motor interfacing with Atmega32 and L293D: In this tutorial, we learned about DC motor, how to interface with AVR microcontroller and also learned about motor driver L293D. Directly connect the DC motor to a microcontroller is not a good because the motor needs more current else the microcontroller provide current. So to solve this problem we use a motor driver to interface with a microcontroller. We use IC like L293D or L298.
- DS18S20 interfacing with PIC and AVR microcontroller: In this tutorial, we will discuss DS18S20 and how to interface with PIC and Atmega32 microcontroller. DS18S20 is a 9bit digital thermometer that is used to measure the temperature in Celsius. It communicates with only one wire with microcontrollers.
- Optocoupler interfacing with AVR PIC and 8051 microcontrollers: In this topic we learn about the Optocoupler, working of the Optocoupler and how to interface with AVR, PIC, and 8051 microcontrollers. What is Optocoupler? It’s also known as Optoisolator. It is an electrical component that interconnects with two separate electric like that is used to transmit input signal by light sensitive.
- How to use timers of AVR microcontroller: In this topic, we discussed AVR timer and how to use the timers of AVR in different projects as required. AVR ATmega32 consists of three timers Timer0, Timer1 and Timer2 respectively. Two timers are 8 bit registers whereas thee one is a 16 bit register.
Source: AVR microcontroller tutorials for beginners
- What is an AVR microcontroller?
AVR is an advanced minicomputer on a chip developed by Atmel in 1996 that includes a processor, memory, and programmable I/O peripherals. - Which AVR chips are commonly used in these tutorials?
ATmega16 and ATmega32 are commonly used, with ATmega32 being a frequently used 40-pin device. - What development tools are covered for AVR programming?
The tutorials cover Atmel Studio 6, VMLAB (Visual Micro lab), and PonyProg programmer software. - How is LED blinking implemented on ATmega32?
LED blinking is programmed in C using DDR registers to set pin direction and PORT registers to set pin state in Atmel Studio 6. - Can a push button be used with ATmega32?
Yes, a push button is used as a switch input with ATmega32; the tutorial builds on the LED blinking example to show usage. - How is a 16x2 LCD interfaced with ATmega32?
The 16x2 LCD can be interfaced in 8-bit or 4-bit mode sending data via D0-D7 and using the E pin for strobe; commands and ASCII data are sent accordingly. - Why use a motor driver like L293D with a microcontroller?
Because DC motors require more current than a microcontroller can supply directly, so a motor driver like L293D or L298 is used to drive the motor. - What is the DS18S20 and how does it connect to AVR?
DS18S20 is a 9-bit digital thermometer that communicates over a single-wire interface with microcontrollers like AVR and PIC. - What is an optocoupler and why is it used?
An optocoupler or optoisolator transmits signals between two separate electrical circuits using light, providing isolation when interfacing with microcontrollers. - How many timers does ATmega32 have and what are they?
ATmega32 has three timers: Timer0 and Timer2 are 8-bit, and Timer1 is a 16-bit timer.