Summary of Hands-Free Cardboard Gumball Machine
This article details the construction of a touch-free gumball machine using cardboard and micro:bit electronics. A distance sensor detects a hand to trigger a servo, which releases a gumball from a corkscrew track into a rocket-shaped base. The project emphasizes DIY assembly with common craft supplies and educational electronics components, resulting in an interactive device that dispenses candy without physical contact.
Parts used in the Touch-Free Gumball Machine:
- Crazy Circuits Bit Board
- micro:bit
- Ultrasonic Distance Sensor
- LEGO compatible 270 Degree Servo
- Battery Pack
- 2 x AAA Batteries
- Cardboard
- Craft Plastic
- Super Glue
- Red Spray Paint
- Aluminum Foil Tape
- Washi Tape

We made a Touch-Free Gumball Machine Using a micro:bit, a Crazy Circuits Bit Board, a distance sensor, a servo, and cardboard. Making it and using it was a “BLAST”! ???? ????
When you place your hand in the base of the rocket, a distance sensor hidden inside detects your hand and the machine administers a gumball, without touching a thing!
If you like our projects and want to see more of what we get up to each week please follow us on Instagram, Twitter, Facebook, and YouTube.
Supplies:
Brown Dog Gadgets does in fact sell kits and supplies, but you don’t need to buy anything from us to make this project. Though if you do it does help support us in creating new projects and teacher resources.
Electronics:
- Crazy Circuits Bit Board
- micro:bit
- Ultrasonic Distance Sensor
- LEGO compatible 270 Degree Servo
- Battery Pack and 2 x AAA Batteries
Other Supplies:
Step 1: Make the Center Tube
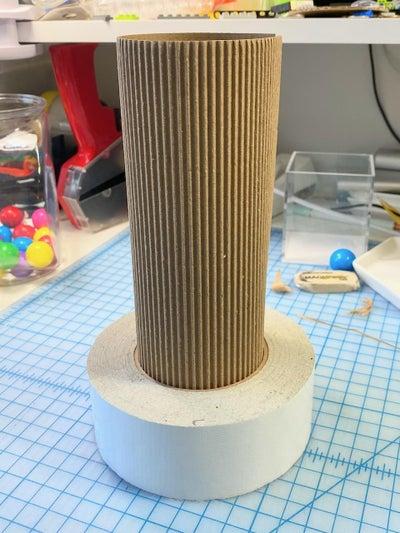
- We made the center tube by peeling the paper off of one side of the corrugated cardboard and rolling it inside the core of a roll of tape. This gave us a 3-inch outer diameter tube.
- We cut a small rectangular hole in the tube a few inches from one side and glued the servo in place.
- We used duct tape on the inside of the tube to secure it.
Step 2: Add the LEGO Beam
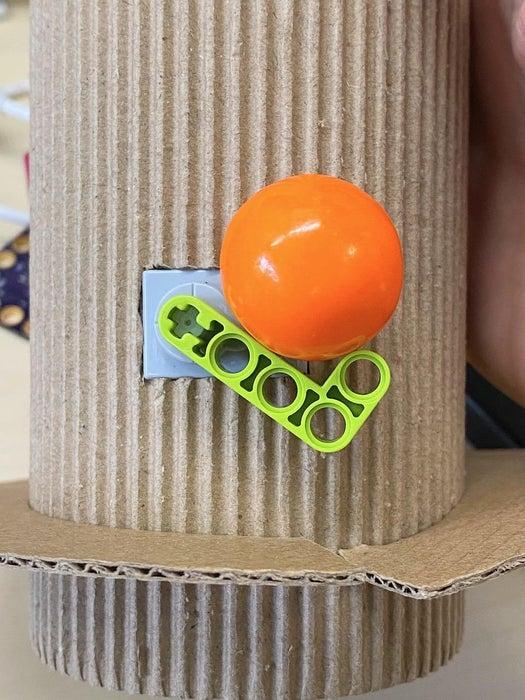
- We attached a LEGO Beam to the servo and tested the placement of the gumball.
- Here’s how it will work: the gumball will fall down into the bottom of the beam’s “V” and get stuck. When the servo turns, it will move the gumball to the left and at the same time prevent the next gumball from falling until it returns to its original position.
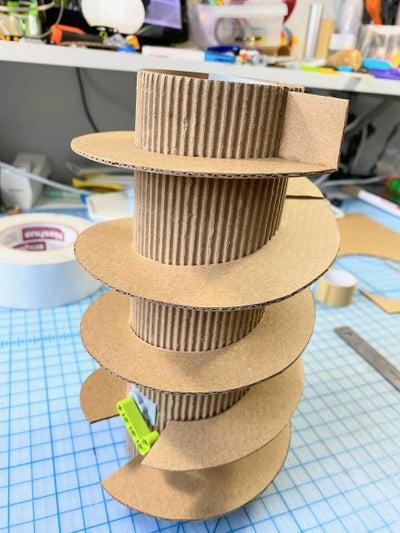
Step 3: Make the Gumball Track
- We measured the gumballs (ours were about an inch) and added 1/8th of an inch for some wiggle room.
- We multiplied that measurement by 2 and added the diameter of the center core (which was 3 inches).
- We cut cardboard disks with that diameter.
- We cut 3-inch circles from the center of each disk to accommodate the center tube.
- We cut slits into the circles to separate them and create the corkscrew. We used super glue to keep the corkscrew pieces in place – making sure that they were placed at the correct angle to allow the gumball to fall downwards.
- At the beginning of the track, we added a piece to stop the gumball from falling to the next level.
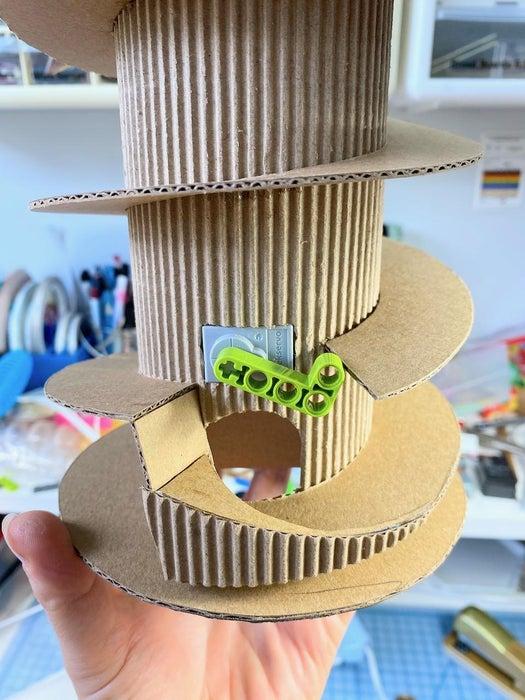
- In the middle, we made the track stop at the LEGO beam and start again just after.
- At the end, we cut a hole for the gumball to escape, and added a piece to block the end of the track.
Step 4: Direct the Gumball Through the Hole
We created an extra piece that directs the gumball through the hole. We added the front triangle to this piece for decoration.
Step 5: Make the Base
Here’s how we created the template for the base:
- Our goal was to create a cylinder-like shape with many flat sides that was slightly larger at the bottom than the top.
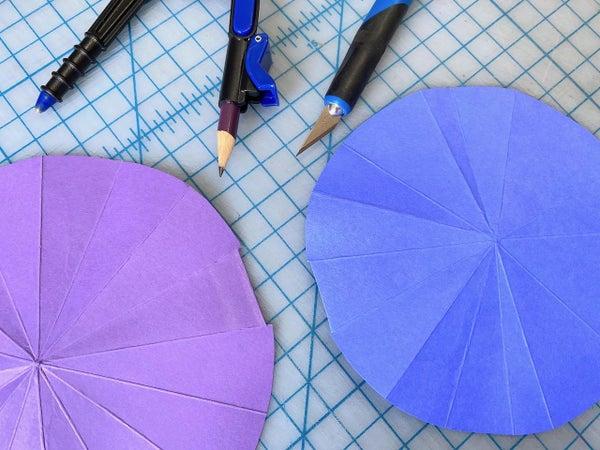
- To figure out the correct measurements, we cut one circle from paper that was a bit larger than the base of the gumball track, and another circle that was a little bit bigger than that.
- To figured out what the measurement of the top and bottom of our trapezoid template would be, we folded the paper into 16 pieces like a pizza and measured the straight length between the ends of the folds on both pieces. (You can see the notches in the first picture.)
- We then created a template using these measurements and the height that we wanted the base to be. (2nd photo.)
Step 6: Cut Pieces & Build the Base
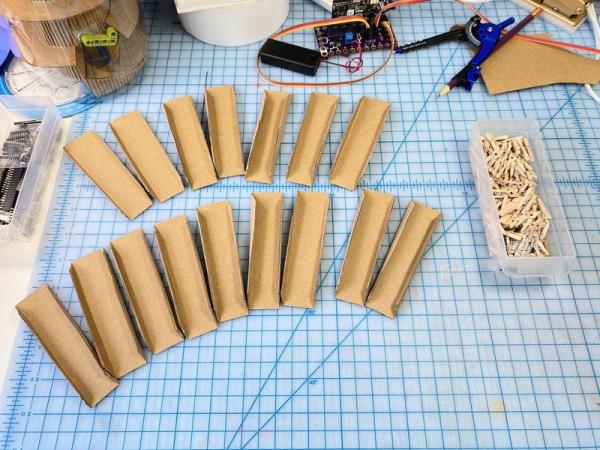
- We cut out 16 of these shapes with a 1/4 inch extra on the edges to glue them together and create the vertical lines.
- We glued them all together with superglue.
Source: Hands-Free Cardboard Gumball Machine
- How does the machine detect a user?
A distance sensor hidden inside the base detects your hand when you place it there. - What triggers the gumball release?
The machine administers a gumball when the distance sensor detects your hand. - How is the center tube constructed?
The tube is made by peeling paper off corrugated cardboard and rolling it around a tape roll core. - How does the LEGO beam function?
The beam catches a falling gumball and moves it left when the servo turns to prevent the next one from dropping. - What materials are used for the gumball track?
The track is built from cardboard disks cut with slits to form a corkscrew shape. - How was the base template created?
The template was made by folding paper circles into 16 pieces to measure straight lengths between folds. - How many shapes were cut to build the base?
Sixteen trapezoid shapes were cut out to be glued together vertically. - What prevents the gumball from falling too quickly?
Pieces are added at the beginning and middle of the track to stop the gumball before it reaches the next level.