When I was first working with AVR microcontrollers, I relied a lot on tutorials I found on the web, but nearly all of them raised the question of how to attach a programmer to the microcontroller when you aren’t using a development board. Most of the time, I would see people shoving pieces of wire into the end of the programming cable to connect it to a bread board, but this is clunky and is too easy to get messed up. Plus, what do you do when you are working on multiple devices at once? You would have to continuously move the wires back and forth between your devices and probably have to look up the connections in the datasheet each time. Other people had built circuits with the header on one side and pins to go down to the appropriate breadboard sockets on the other side, but this is a bit ridiculous and not everyone has the time or tools to make a printed circuit board. I decided enough was enough and came up with a simple but effective way to connect an ISP programmer to the breadboard.
Step: 1 Required Materials
The standard AVR programmer comes with a 10 pin or 6 pin connector; many have both. I prefer the 6 pin version because it is more compact, but this guide can still be followed to create a 10 pin version as long as the correct connections are used.
Thing You’ll Need
AVR ISP Programmer – Not exactly required, but why else would you be doing this?
Row of breakable header pins – You’ll need 12 pins for the 6 pin header, 20 pins for the 10 pin header.
Needlenose pliers – helpful for breaking the header pins apart
Soldering Iron
Superglue
Red and Black Marker (optional)
Step: 2 Creating Pin Sections
Step: 3 Rearrange the Pins
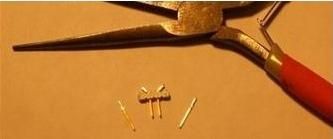
Next, the outer two pins are removed from each header section, but don’t lose them! This can be done easily by pushing the pin down onto the edge of a hard surface. The pins sometimes have a sort of ledge to keep them in place, so if it doesn’t come out easily, try pushing in the other direction.
The two inner pins then need to be bent out towards the outer edge of the header.
For more detail: ISP Breadboard Header using AVR microcontrollers


