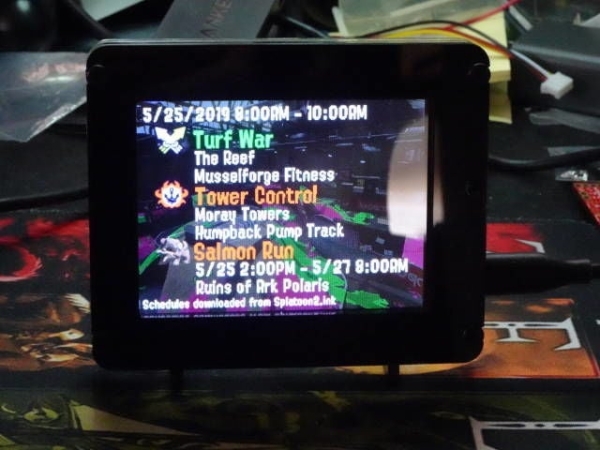
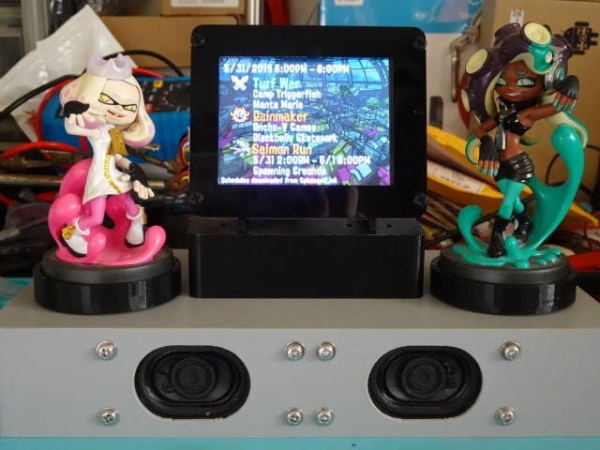
Fun display of current and upcoming Splatoon 2 stages in Turf War and Ranked games, Ranked game type, and Salmon Run schedule using an Adafruit PyPortal. Cycle through the schedule by pressing on the touch screen. Backgrounds are randomly cycled for eye candy. The optional Amiibo stand is for Amiibotronics that spin Amiibos toward the screen when there are schedule changes.
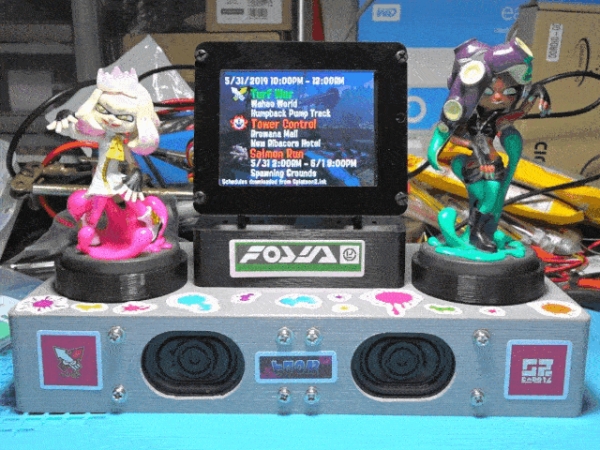
The current stages are retrieved from Splatoon2.ink made by @mattisenhower and time is synchronized from Adafruit IO.
This project is really easy if you just want to display the schedule on a PyPortal and use what I have. Basically you just have to update the configuration files for your network settings, Adafruit IO account information, and time zone.
The project gets slightly more involved if you want to customize further depending on how well you are with image programs and Python programming.
Adding the Amiibo animation is optional and will require quite a bit more of work with soldering and 3d printing.
Caveat
The PyPortal is not as fast as your 1ms HDMI gaming monitor. The display takes a few seconds to finish drawing everything to the screen.
Supplies:
Required:
Optional Amiibtronic Build:
- Adafruit PyPortal Desktop Stand Enclosure Kit
- MG90S Micro Servos x 2
- PC9685 Servo module
- USB micro breakout board
- Stereo Enclosed Speaker Set – 3W 4 Ohm
- 3-Pin Female JST PH Connector
- 4-Pin Female JST PH Connector
- JST RCY Plug Connectors
- M2.5 screws, washers and nuts
- M3 Screws, washers and nuts
- 4-40 Screws, washers and nuts
- Wires
- Small cable ties
- Heat shrink wrap
- 3d Printer
- Screw taps
- Splatoon stickers
Step 1: Simple Portal Splatoon 2 Stages Display
Download the SplatSchedule project from GitHub. Create a secrets.py in the src/conf directory with your information using the example in src/conf directory. Update application_configuration.py in the same folder.
Create a backgrounds directory on the micro SD card at its root. Copy all bmp files from the project images directory into the backgrounds directory you just made. Insert the micro SD card into the PyPortal.
Install the SplatSchedule_[date].uf2 file from the firmware folder to the PyPortal by pressing the reset button on the back of the PyPortal twice quickly to open the Boot drive. Then copy the file over. The PyPortal will automatically reboot when the file is done copying. This firmware is CircuitPython 4.0.1 with the required Adafruit libraries built in.
Copy all files from the src directory onto your PyPortal and you should be good to go. The PyPortal should automatically reboot itself and startup.
The following are a quick explanation of the configuration files.
secrets.py – Each configuration should be self-explanatory. Replace SSID with your WiFi’s SSID and so forth. You will need to grab your time zone from http://worldtimeapi.org/timezones, eg. my time zone is Pacific/Honolulu.
# This file is where you keep secret settings, passwords, and tokens!
# If you put them in the code you risk committing that info or sharing it
# which would be not great. So, instead, keep it all in this one file and
# keep it a secret.

secrets = {
    'ssid': 'SSID',             # Keep the two '' quotes around the name
    'password': 'PWD',  # Keep the two '' quotes around password
    'timezone': "TIMEZONE",  # <a href="http://worldtimeapi.org/timezones" target="_blank">http://worldtimeapi.org/timezones</a>
    'aio_username': 'AIO_USERNAME',
    'aio_key': 'AIO_KEY',
    }
application_configuration.py – You only really need to update time_adjust to quickly get up and running. I didn’t figure out a way to get that number timezone setting from secrets.py so you will need convert your time zone adjustment into seconds. The rest of the settings should be self-explanatory.
configuration = {
    'battle_schedule_url': 'https://splatoon2.ink/data/schedules.json',
    'salmon_schedule_url': 'https://splatoon2.ink/data/coop-schedules.json',

    'time_service': 'https://io.adafruit.com/api/v2/%s/integrations/time/strftime?x-aio-key=%s',
    'time_service_strftime': '&fmt=%25Y-%25m-%25d+%25H%3A%25M%3A%25S.%25L+%25j+%25u+%25z+%25Z',
    # Adafruit IO strftime is %Y-%m-%d %H:%M:%S.%L %j %u %z %Z see http://strftime.net/ for decoding details
    # See https://apidock.com/ruby/DateTime/strftime for full options

    'time_adjust': -36000,  # hours in seconds
    'touchscreen_touch_throttle': 2,
    'sd_mount_directory': '/sd',
    'background_images_directory': '/sd/backgrounds/',
    'background_timeout': 900,  # 900 = 15 minutes
    'schedule_change_timeout': 180,  # 180 = 3 minutes
    'schedule_refresh': 43200,  # 43200 = 12 hours

    # If you built the turntable stage, set to True
    'enable_turntable': False,

    # The follow are optional and used for testing and debuggin
    # 'debug': False,
    # 'disable_wifi': False,
    # 'use_test_files': False,
    # 'test_battle_schedule_file': '/test_battle_schedule.json',
    # 'test_salmon_schedule_file': '/test_salmon_schedule.json'
    }
That’s all there is to getting a PyPortal Splatoon 2 Schedule display. Read on if you want to customize a background and/or tweak text placement.
Step 2: Background Customization
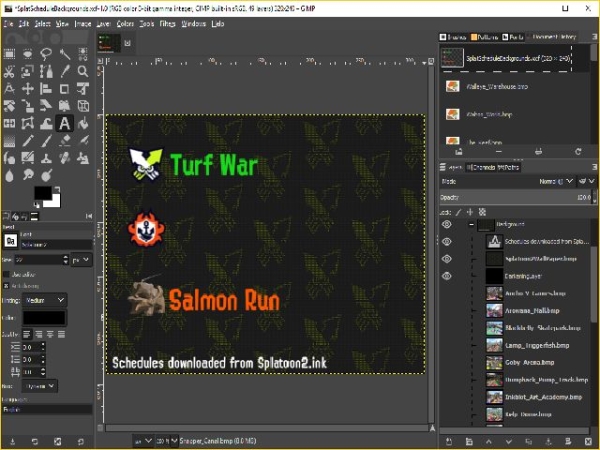
Included in the SplatSchedule project is a GIMP project file used to create the backgrounds. Use this as an example if you like using GIMP. Or use your favorite image editor to make backgrounds. Follow some of the guidelines below to help you make backgrounds that are displayable.
The stage backgrounds were grabbed from Inkipedia.
As mentioned earlier, the PyPortal is not fast at rendering the display. To help cut down on what the PyPortal has to process, place static text on the background.
Backgrounds must be 320×240 pixels in size and in bitmap format. I saved the backgrounds in 24-bit format as 16-bit looked horrible and 32-bit had a blue tinge to them.
That is pretty much it for backgrounds. The next step describes text font and placement.
Step 3: Font Customization
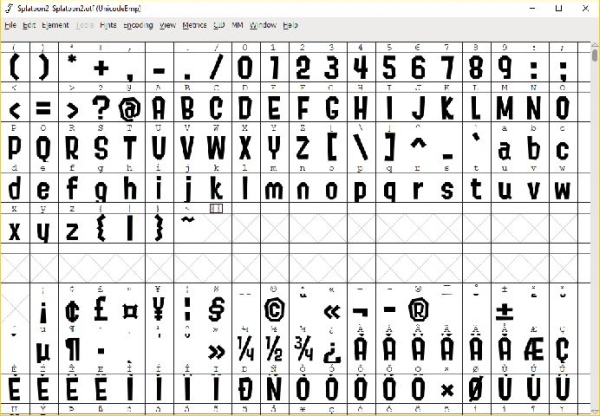
Read Custom Fonts for CircuitPython Displays for creating your own custom fonts.
I used fonts from @frozenpandaman found at https://frozenpandaman.github.io/inkling.html.
Place fonts according to the directory specified in text_configuration.py in the src/conf directory. The default location is in /fonts/.
Update text_configuration.py for which font to use, color, and placement coordinate for text.
text_configuration.py – Should be self-explanatory.
configuration = {
    'fonts_directory': '/fonts/',

    # text: (font, color, (x, y))
    'text_battle_time_slot': ('Splatoon2-18.bdf', 0xFFFFFF, (10, 18)),
    'text_battle_regular_stage_a': ('Splatoon2-18.bdf', 0xFFFFFF, (65, 66)),
    'text_battle_regular_stage_b': ('Splatoon2-18.bdf', 0xFFFFFF, (65, 86)),
    'text_battle_ranked_rule_name': ('Splatoon2-24.bdf', 0xF54910, (65, 108)),
    'text_battle_ranked_stage_a': ('Splatoon2-18.bdf', 0xFFFFFF, (65, 129)),
    'text_battle_ranked_stage_b': ('Splatoon2-18.bdf', 0xFFFFFF, (65, 149)),
    'text_salmon_time_slot': ('Splatoon2-18.bdf', 0xFFFFFF, (65, 191)),
    'text_salmon_stage': ('Splatoon2-18.bdf', 0xFFFFFF, (65, 211))
}
Tips
Try not to use more than 3 fonts for the issues noted below.
Use your image editor to help you find the coordinates of where you want to place text so that you are not just wildly guessing. Usually the pointer tool of image editing software will have its x and y coordinates displayed somewhere in the editor, most of the time in the status bar.
Issues
The more fonts you use, the longer the PyPortal takes to startup as all the fonts used are loaded up during setup.
Bitmap fonts take up lots of space and will eat into PyPortal’s onboard storage space.
You can create a fonts directory on the micro SD card and point there (eg. /sd/fonts/), but I’ve run into a weird problem where the same font will run from the onboard storage but not work from the micro SD card. I could not resolve what the issue was about loading from an SD card.
Step 4: Read on to Build Amiibtronics Display
The next bunch of steps are for building the DJ Turntable Amiibotronic stage display.
You can stop here if you just want the PyPortal for displaying the Splatoon 2 schedules.
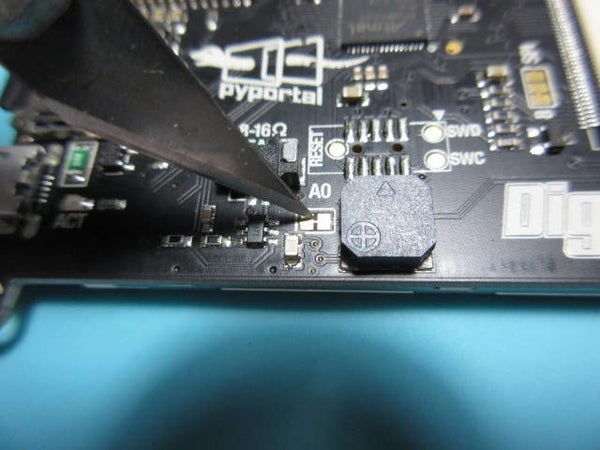
Step 5: PyPortal I2C 3.3V
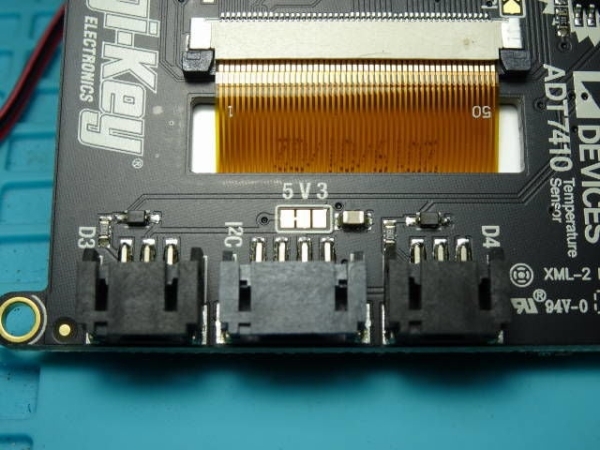
I found the onboard Real Time Clock (RTC) stops ticking if you connect a 5V I2C device. I think this is due to the RTC has pull-ups to 3.3V. Then adding a 5V I2C device that has its own pull-ups to 5V throws off the RTC.
There is a jumper near the ports on the side of the PyPortal to select the voltage output ports. See Adafruit Pinouts for reference.
Cut/scrape away the little itty bitty trace connecting the center pad to the 5V pad. ***Important*** Cut/scrape away from the ribbon cable!
Use a multi-meter to check that there is no continuity between the center pad and 5V pad. Also check that the port voltage pin has no continuity to the 5V pad.
Solder a little solder bridge from the center pad to the 3V pad.
Use a multi-meter to check the continuity of the center pad to the 3V pad. Check that there is no inadvertent connection with the 5V pad too.
Step 6: Power Connector – Wiring PyPortal
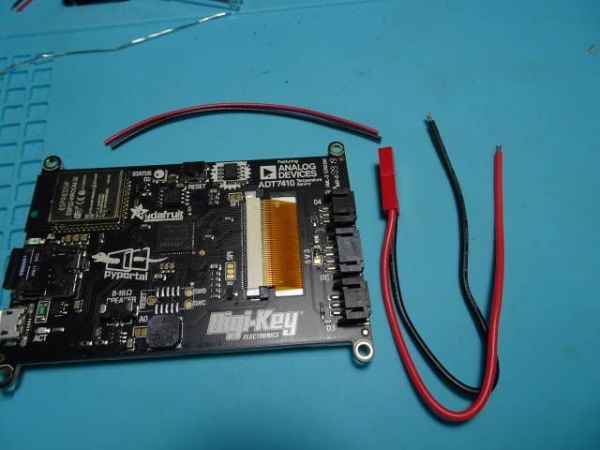
We will power the PyPortal by connecting directly to the 5V bus instead of using the PyPortal’s micro USB port.
The wire that comes with the JST RCY connector is too big to squeeze through the Adafruit PyPortal enclosure. You will need to solder smaller 24AWG wire to the PyPortal and then to the JST RCY connector. Use the conventional colors of red for positive and black for ground for the wires.
Strip and tin the ends of the 24AWG wires. Snip the end to just the size of the 5V solder pad (the pad we just disconnected in the previous step).
Tin the 5V pad and solder the red wire to the pad. Then carefully bend the wire to go between the I2C port and D3 port.
Tin the ground pin of the D3 port (the top pin) and solder the black wire to it. Bend this wire to follow the red wire.
Step 7: Power Connector – Adding Connector End
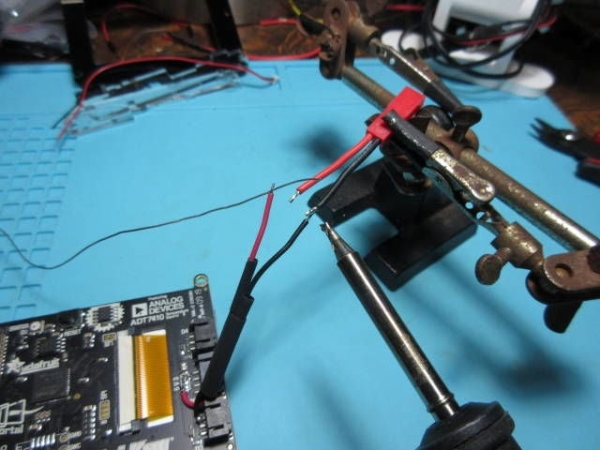
Trim the wires attached to the male end of the JST RCY to a reasonable length, like an inch or two. I chose the male end to make the connector consistent with the side ports.
Slip on head shrink tubing on the wires before solder splicing them together.
Solder the connector wires to the wires we soldered in the previous step.
Shrink the tubing into place.
Step 8: Disconnect Onboard Speaker
We will connect external speakers and need to disconnect the onboard speaker. See Speaker and Speaker Connector for reference.
There are two solder pads connected by an itty bitty trace to the left of the onboard speaker. Cut/scrape away that tiny little trace.
Use a multi-meter to check that the two pads are no longer connected to eachother.
Source: PyPortal Splatoon 2 Schedule Display