“This tutorial provides step-by-step instructions on incorporating an external programmer into Atmel Studio 7.0. By configuring the external programmer, you can conveniently program the AVR board without the need to switch to the ‘Universal_GUI.exe’ tool. This integration streamlines the workflow, enhancing the efficiency of debugging and troubleshooting processes.”
0. Download avrdude
On the school computer, avrdude is installed at
V:\avrdude\avrdude.exe
For your personal Windows PC, you can download avrdude here:
http://web.engr.oregonstate.edu/~jinyo/ece375/sw/avrdude.zip
Unzip the file and save to your preferred directory, e.g.
C:\Program Files (x86)\avrdude\avrdude.exe

1. Enable “Advanced Mode”
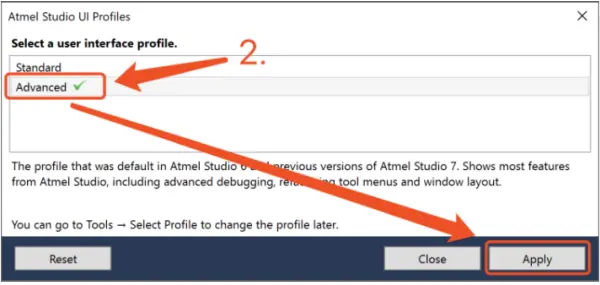
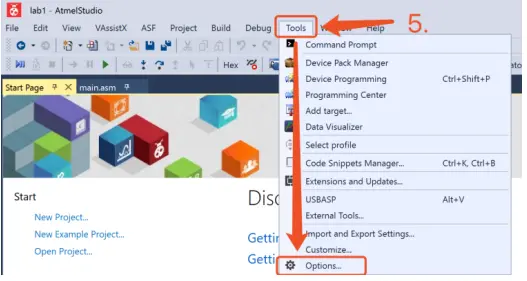
In order to setup an External programmer, Atmel Studio needs to be in ‘Advanced’ profile. This can be found under the Tools menu.
Go to > Tools > Select Profile.
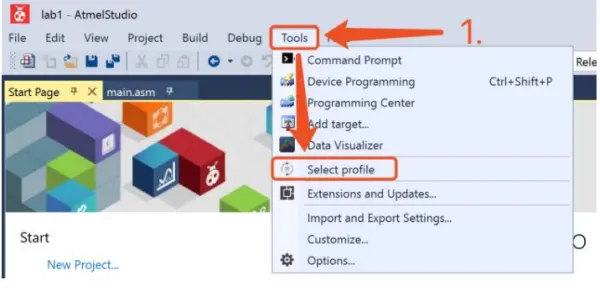
Select “Advanced” and click “Apply”.
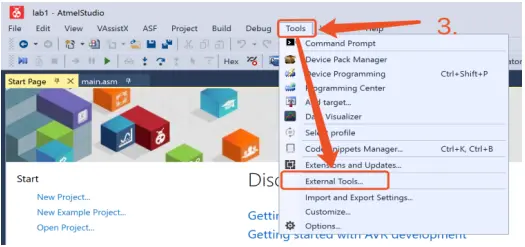
2. Add “External Tools”
Go to > Tools > External Tools.
Add new external tool
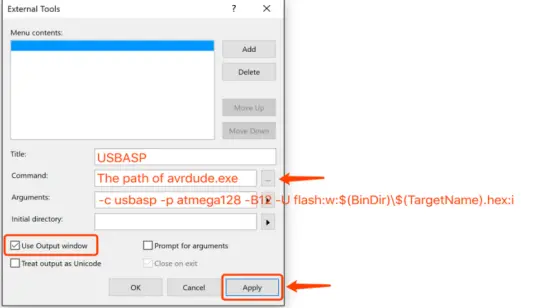
Check ???? “Use Output window”, Uncheck ☐ “Treat output as Unicode” and ☐ “Prompt for arguments”. Then, click “Apply” to save the setting.
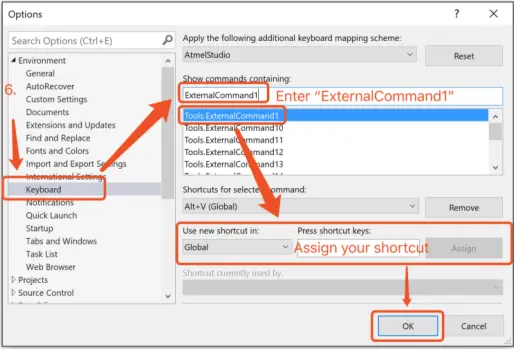
3. Setup keyboard shortcut (Optional)
This section is optional. You can skip it if you feel more clicky using the mice or touchpad. Go to > Tools > Options
Choose the “Keyboard” option, input “ExternalCommand1,” and opt for “Tools.ExternalCommand1” from the available selections. Specify your desired shortcut keys and click on “Assign” to assign them. Finally, click “Ok” to save the configuration.
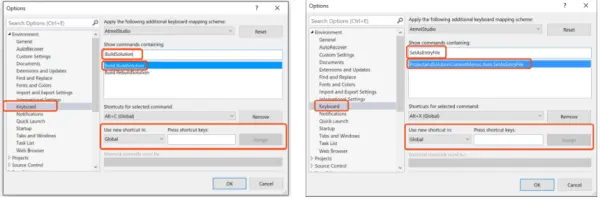
You can also assign shortcuts for other y frequent used command like “Set as Entry File” or
“Build Solution”, e.g. my choices of shortcut are:
Set as Entry File: Alt+X (Hint: X as check mark)
Build Solution: Alt+C (Hint: C as compile)
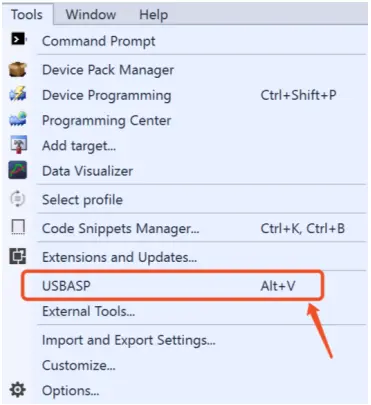
ExternalCommand1: Alt+V (Hint: well, it’s next to X and C…)
4. Flash hex file with external programmer
Before proceeding, ensure that you have successfully built your project. In the Solution Explorer, it is irrelevant which folder or file is currently selected as long as you are working within the correct project.
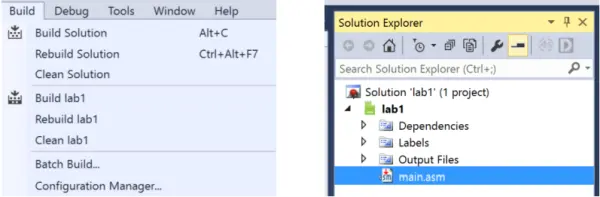
Go to > Tool > USBASP, or use the shortcut of your choice.
5. DONE!
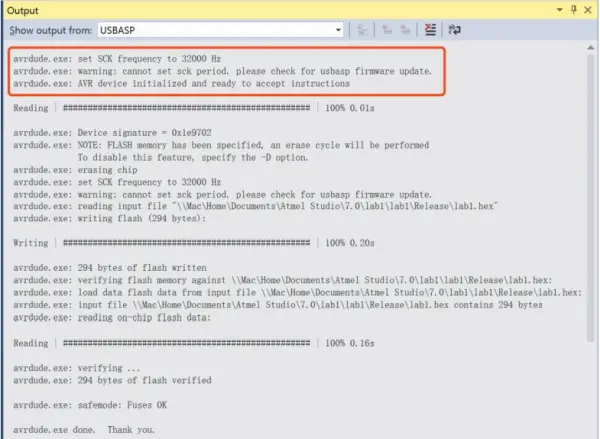
If you encounter the subsequent message, it indicates that the hex file has been successfully programmed onto the AVR board. Please note that there might be a warning displayed in the output window, but you can disregard it.