Summary of SmartLights – ESP8266 and Led Strip
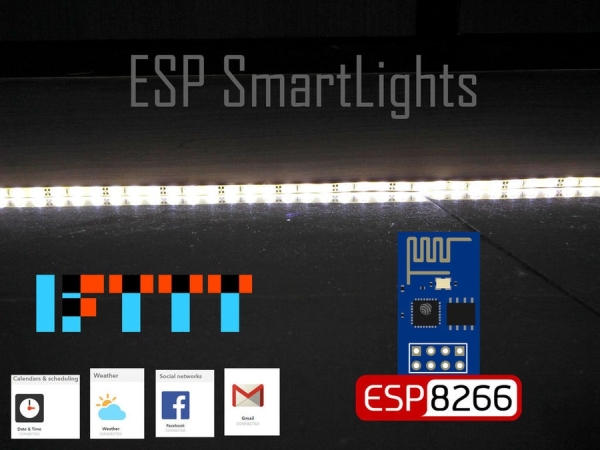
SmartLights is a cost-effective, customizable home lighting automation project using an ESP8266 microcontroller. Unlike commercial systems like Philips Hue, it allows users to set alarms, dim lights, and receive social media notifications via email or Facebook tags. The system integrates ThingSpeak for data logging and IFTTT for triggering actions based on weather, time, or app events. While it requires basic technical skills, the steps are straightforward, covering account setup, code configuration, and circuit assembly with a transistor switch.
Parts used in the SmartLights:
- ESP8266 Microcontroller
- LED Strip
- Transistor or MOSFET
- ThingSpeak Account
- IFTTT Account
- WiFi Network
- Computer for Programming
SmartLights
is a simple way to automate your home lighting.
Unlike Phillips Hue and other commercial devices, SmartLights is economical and easily customisable .
The project requires some technical skill, but they are fairly simple and can be easily followed.
Some of the Features of SmartLights —
- Alarms – you can set alarms and the lights will turn on to wake you up naturally.
- You can also set timings to dim the lights or to shut it off as a routine process.
- Can notify you about a new Facebook tag or a new email or a tweet etc..
- You can also add new features from IFTTT to create custom commands and action.
The project can be divided into 3 parts –
- Thingspeak settings
- IFTTT settings
- ESP Programming
Step 1: Setting Up ThingSpeak Account –
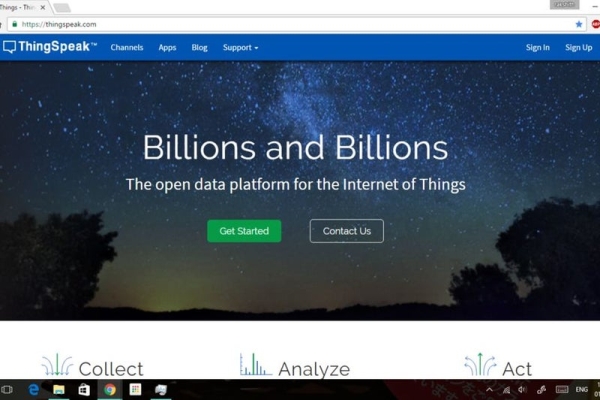
- Go to Thingspeak.
- If you don’t have an account, then signup for their services.
- Create a new channel.
- Give an name and tick the first two checkboxes. This is because we are going to use two fields in this project.
- Note down the channel id.
- You will also require Write API key and Read API key.
You are one step closer to completion..!
Step 2: Setting Up IFTTT Account –

This is a fun part. All the automation takes place here.
Steps –
- Signup or login to the IFTTT account.
- Click on search and connecte to Maker channel.
- Similarly connect to your email and facebook by authorizing the IFTTT app to access your account.
- You can also add date&time and weather channels as well.
- These are a few of the channels I’ll be using in this instructable, you can easily try out new channels and use your ideas for further development and automation. Let me know about it too.. 🙂
- Now that we have activated all required channels, lets go on start sending web requests.
- Click on your username and select new applet.
Step 3: Linking Thingspeak and IFTTT –

Now that we have both accounts up and running, we can start we the automation and control.
~> Weather channel –
- Click on the profile name and Select New applet.
- In the IF THIS section, search and Select Weather Underground.
- In choose trigger, select “Current condition changes to” and choose Rain.
- Click on Create Trigger to finalize.
- Next for +That function, Search and choose Maker.
- Select the only option “Make a web request“.
- In URL field –
"https://api.thingspeak.com/update?api_key=YOUR_WRITE_API&field1=Rain"
Replace the “YOUR_WRITE_API” with the api key you noted down from Step 1.
- Method – GET
- Content type – application/x-www-form-urlencoded.
- Save.
- Similarly follow the above procedure and choose Current condition changes to Clear.
- Select Maker for +That and choose Make a web request.
- In URL field –
"https://api.thingspeak.com/update?api_key=YOUR_WRITE_API&field1=ON"
- The rest all fields stays the same as above.
- Thats it you have created a weather based automation for the lights.
~> Clock Channel –
- Here we will create time based automation.
- Create a new applet.
- In IF This section, choose Date and time.
- Select Every day at and select the time when you want to turn on the lights in the morning. May be as an alarm.
- Set the time and Create Trigger.
- Next for +That function, choose Maker.
- In URL field –
"https://api.thingspeak.com/update?api_key=YOUR_WRITE_API&field1=ON"
- The rest all fields settings are same as previous weather automation.
Similarly create other applets to Schedule daily or periodic ON or OFF based on time and day.
~> Facebook Channel –
- Here we look for a photo tag.
- create new applet.
- In IF This section, choose Facebook.
- Choose you are tagged in a photo trigger.
- Next for +That function, choose Maker.
- In URL –
"https://api.thingspeak.com/update?api_key=YOUR_WRITE_API&field1=Facebook"
~> Gmail Channel –
- Create a new applet.
- In IF This section,choose Gmail.
- Choose New email in inbox from search. and type from:Instructables in the search for option. Now you will be notified by your SmartLights whenever you receive any new email from instructables.
- Create the trigger and in next +That function, choose Maker.
- In URL –
"https://api.thingspeak.com/update?api_key=YOUR_WRITE_API&field1=Mail"
Thats it ..! We have created some of the basic automation for our SmartLights.
Step 4: The CODE –
Enter your details in this area of the code –
const char* ssid     = "--your wifi name--";<br>const char* password = "--wifi password--";
const char* channel_id = "--your channel id--"; //you will find this id and key
const char* apiKey = "--your api key--";        // in your thingspeak account.
/////////////////////////////////////////////////////////////////////////////
- The channel_id will be assigned when you create an new channel.
- apiKey is the Read Api key you copied down from the first step.
The code is well commented and self-explanatory.
check_field1() and check_field2() are used to listen for the two fields created in the thingspeak. If you are planning on Expanding the functions, you can use the any one of the two fields or create a new one.
What the code essentially is doing is that it will be looking for Specific keywords in the fields. If that keyword is received, the assigned task is performed. You can create as many keywords as you want and assign them different functions if they are triggered.
Basic syntax for updating the keyword is —
“https://api.thingspeak.com/update?api_key=WRITE_API&field1=”
replace field1 with field2 if you want to update the second field.
You can download the Files on my github profile —
/* ~ SmartLights ~ -> ESP8266 and LED strip
╦═╗╔╗ ╦╔═
By– ╠╦╝╠╩╗╠╩╗ 2014 Rakshith BK
╩╚═╚═╝╩ ╩
- No licences no copyrights, well may be MIT.
include
//#include
//////////////////// enter your details here /////////////////////////////////
const char* ssid = “–your wifi name–“;
const char* password = “–wifi password–“;
const char* channel_id = “–your channel id–“; //you will find this id and key
const char* apiKey = “–your api key–“; // in your thingspeak account.
/////////////////////////////////////////////////////////////////////////////
const char* host = “api.thingspeak.com”;
const int httpPort = 80;
int led = 2 ; // ESP01 Pin 2 for output
String line1, line2 ;
String url1, url2 ;
int action = 0 ;
unsigned long latency = 0 ;
void check_field1() ;
void check_field2() ;
void mail();
void Strip_out();
void facebook();
WiFiClient client;
void setup() {
Serial.begin(115200);
delay(10);
pinMode(led, OUTPUT);
analogWrite(led, 0);
Serial.println();
Serial.println();
Serial.print(“Connecting to “);
Serial.println(ssid);
WiFi.begin(ssid, password);
while (WiFi.status() != WL_CONNECTED) {
delay(500);
Serial.print(“.”);
}
Serial.println(“”);
Serial.println(“WiFi connected”);
Serial.println(“IP address: “);
Serial.println(WiFi.localIP());
   url1 = "/channels/";
   url1 += channel_id;
   url1 += "/fields/1/last.txt?api_key=";
   url1 += apiKey;

   url2 = "/channels/";
   url2 += channel_id;
   url2 += "/fields/2/last.txt?api_key=";
   url2 += apiKey;
delay(1000);
check_field1() ;
Serial.println(“initializing strip..!”) ;
Strip_out() ;
}
////////////////////////////////////////////////////////////////
void loop() {
// checks online every 5 minutes
//// 60,000 x 5 = 5 minutes
if((millis() – latency > 60000*5)) {
latency = millis();
check_field2();
delay(300);
check_field1();
yield();
}
}
///////////////////////////////////////////////////////////////////////
// check_field1 -> This is for listening for basic commands from IFTTT
// These include ON, OFF and brightness controll.
// It also checks for weather and changes the lights accordingly..!
//////////////////////////////////////////////////////////////////////
void check_field1() {
client.connect(host, httpPort);
client.print(String(“GET “) + url1 + ” HTTP/1.1\r\n” +
“Host: ” + host + “\r\n” +
“User-Agent: SmartLights-ESP8266\r\n”+
“Connection: close\r\n\r\n”);
unsigned long timeout = millis();
while (client.available() == 0) {
if (millis() – timeout > 5000) {
Serial.println(“>>> Client Timeout !”);
client.stop();
return;
}
}
while(client.available()){
line1 = client.readStringUntil(‘\r’);
if(line1.indexOf(“Dim”) > 0) {
action = 1 ;
}
else if(line1.indexOf(“Bright”) > 0){
action = 2 ;
}
else if(line1.indexOf(“ON”)>0) {
action = 3 ; // turn on lights
}
else if(line1.indexOf(“OFF”)>0) {
action = 4 ; // turn off lights
}
else if(line1.indexOf(“Rain”)>0) {
action = 5 ; //slow dim-glow of strip
}
}
Strip_out() ;
}
////////////////////////////////////////////////////////////
// Check_field2 -> looks for any notification
// from connected social media.
////////////////////////////////////////////////////////////
void check_field2() {
client.connect(host, httpPort);
client.print(String(“GET “) + url2 + ” HTTP/1.1\r\n” +
“Host: ” + host + “\r\n” +
“User-Agent: SmartLights-ESP8266\r\n” +
“Connection: close\r\n\r\n”);
unsigned long Timeout = millis();
while (client.available() == 0) {
if (millis() – Timeout > 5000) {
Serial.println(“>>> Client Timeout !”);
client.stop();
return;
}
}
// Read all the lines of the reply from server and print them to Serial
while(client.available()){
line2 = client.readStringUntil(‘\r’);
if(line2.indexOf(“Mail”) > 0){
Mail();
Serial.println(“notification — mail”);
}
else if(line2.indexOf(“Facebook”)>0) {
facebook();
Serial.println(“notification — facebook”);
}
}
}
///////////////////////////////////////////////////////////////
void Mail() {
int i =0 ;
for(i=0; i<=1023; i=i+40) { analogWrite(led, i); delay(100) ; } for(i=1023; i>=0; i=i-40) {
analogWrite(led, i);
delay(100) ;
}
Strip_out();
}
///////////////////////////////////////////////////////////
void facebook() {
int i=0;
for(i=0; i<=1023; i=i+20) { analogWrite(led, i); delay(50); } analogWrite(led,0); delay(250); analogWrite(led,1023); delay(250); analogWrite(led,0); delay(250); for(i=1023; i>=0; i=i-40) {
analogWrite(led, i);
delay(100);
}
Strip_out();
}
////////////////////////////////////////////////////////////////
void Strip_out() {
while(action == 0) { //This action will be active if there is a problem
analogWrite(led, 0); //in connecting to the WiFi or the server.
delay(700);
analogWrite(led, 512);
delay(700);
analogWrite(led, 1023);
delay(700);
if( millis() – latency > 60000) {
latency = millis();
Serial.println(“Something went wrong.!”);
Serial.println(“Please check your server details.!”);
check_field1() ;
}
}
if(action == 1) {
analogWrite(led,512);// For DIM settings
}
else if(action == 2) {
analogWrite(led, 768); // For Bright settings
}
else if(action == 3) {
analogWrite(led, 1023);// For ON
}
else if(action == 4) {
analogWrite(led, 0);// For OFF
}
while(action == 5) {// For rain
int i ;
for(i=0; i<=1023; i++) { analogWrite(led, i); delay(3); } for(i=1023; i>=0; i–) {
analogWrite(led, i) ;
delay(3);
}
  if( millis() - latency > 60000) {
    latency = millis() ;
    check_field1() ;
  }
}
}
////////////////////////////////////////////////////////////////
Step 5: The Circuit
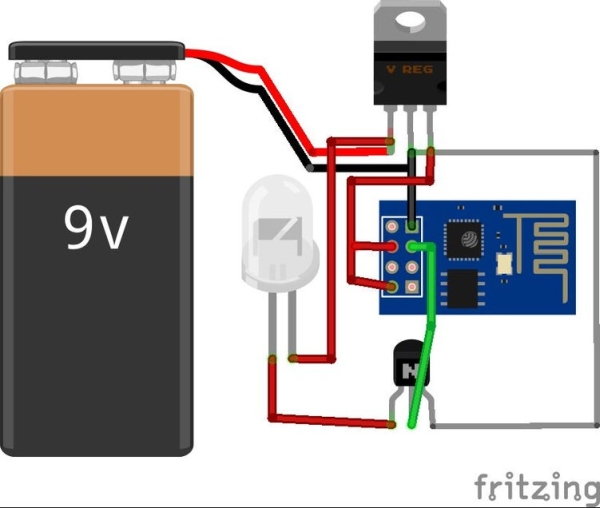
Construct the circuit as shown.
We are using a Transistor/MOSFET because the ESP cannot provide enough power to run the Led Strip.
The Transistor here acts as a Switch. When ever the Pin2 of ESP goes high, the Transistor turns on and the Strip glows. PWM is used to control the Strip brightness.
Step 6: That’s All Folks.

Congratulation..!
You have implemented basic automation with this instructable. The Light strip now has simple and elegant functionalities that will be useful in everyday life.
You can always expand the features and more automation.
Let me know if come up with any fun feature to add to the SmartLight 🙂
Source: SmartLights – ESP8266 and Led Strip
- What is the main benefit of SmartLights compared to commercial devices?
It is economical and easily customizable unlike Phillips Hue. - How can users set up light alarms with this project?
Users can set timings to turn lights on naturally to wake them up or dim/shut them off as a routine. - Can the system notify users about new emails or social media tags?
Yes, it can notify you about a new Facebook tag, new email, or a tweet. - Which two services are primarily linked to create automation?
The project links Thingspeak and IFTTT settings to control the lights. - How does the system react when the weather changes to rain?
The lights will perform a slow dim-glow effect when the condition changes to Rain. - Why is a Transistor or MOSFET required in the circuit?
The ESP cannot provide enough power to run the LED strip, so the transistor acts as a switch. - How often does the code check for updates from the server?
The code checks online every 5 minutes. - Can users add custom commands to the system?
Yes, users can add new features from IFTTT to create custom commands and actions.