Summary of USBASP Bootloading a ATMega328p with a 8mhZ internal clock
Summary: This article explains how to program an ATmega328P using a USBASP programmer and the Arduino IDE without an external crystal, by using the ATMEGA328 on a breadboard (8MHz internal clock) board definition and connecting via the 6-pin ISP header. It notes board files may need installation and provides files and links for more detail.
Parts used in the USBASP Bootloading an ATmega328P with 8MHz internal clock:
- ATmega328P microcontroller
- USBASP programmer (6-pin ISP header)
- Breadboard or AVR target board
- ISP 6-pin cable or jumper wires
- Computer with Arduino IDE installed
- Custom board files (ATMEGA328 on a breadboard 8MHz internal clock)
What are we going to do is program an ATMega328P without an external crystal by using USBASP programmer and the Arduino IDE.
Why would we want this? It uses less components and gets up closer to knowing how to program with something like WINAVR and because programming is fun an addicting. Not everything runs on Arduino, but it is a great place to start.
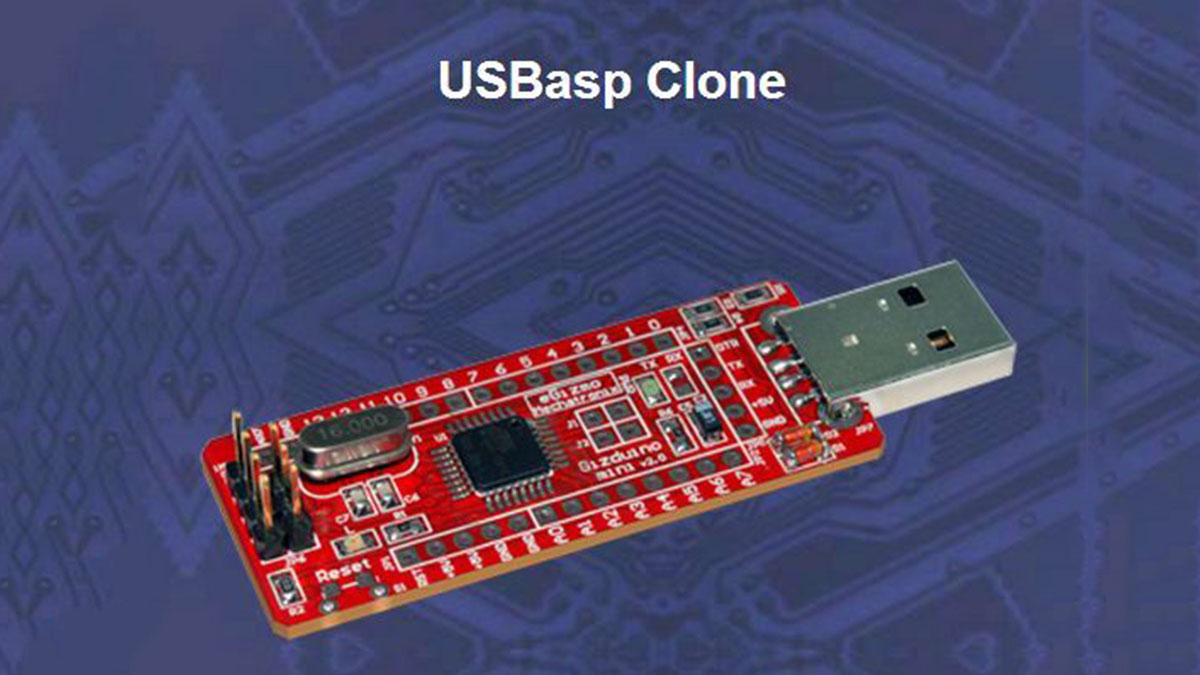
I use an USBASP clone programmer from my local electronics store. I have read this same procedure can be done on and Arduino board, but i have not been unsuccessful at making that work.
Step 1: Connections
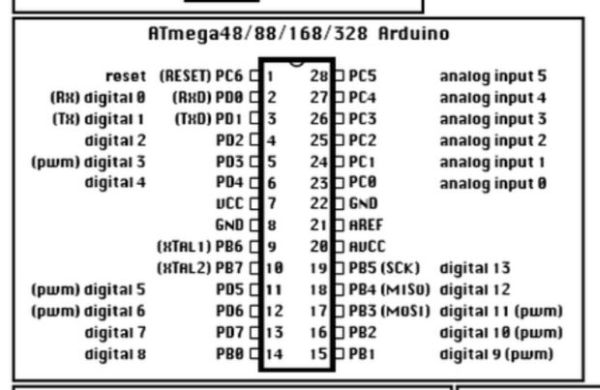
If you follow the ISP Header 6-pin and connect the
MISO to the MISO on the chip
SCK to SCK on the chip.
You get the idea.
You could do all this on a breadboard or you could use the avr target board fournd here.
Additionally you can get some good help here
The 6-Pin header is on the USBASP.
Step 2: Board Files
Even if you do have the ” ATMEGA 328 on a breadboard (8MHz internal clock) ” showing but it is not working then you need to install my files.
The only difference is the last line. atmega328bb.build.variant=arduino:standard
 Board.txt735 bytes
 Board files.rar362 bytes
- Can I program an ATmega328P without an external crystal?
Yes, the article describes programming the ATmega328P using its 8MHz internal clock without an external crystal. - What programmer is used in this procedure?
A USBASP programmer with a 6-pin ISP header is used. - How do I connect the USBASP to the ATmega328P?
Connect the 6-pin ISP header signals to the chip: MISO to MISO, SCK to SCK, and the corresponding ISP pins as described. - Do I need special board files in the Arduino IDE?
Yes, if the board selection does not show ATMEGA 328 on a breadboard (8MHz internal clock) you need to install the provided board files. - Will the provided board files fix issues even if the selection shows the 8MHz option?
Yes, the article states you should install the provided files even if the option appears but is not working. - Can this same procedure be done using an Arduino as the programmer?
The article mentions this can be done on an Arduino board but the author was unsuccessful making that work. - Where can I perform the connections besides a breadboard?
You can use a breadboard or use the referenced avr target board. - Why use the internal 8MHz clock instead of an external crystal?
The article says it uses fewer components and is closer to programming with tools like WINAVR, and that programming is engaging.