
Summary of Externally clocking (and overclocking) AVR MCUs
This article explains using external clock circuits for AVR microcontrollers when crystals are unsupported or fuses are misconfigured. It highlights the ATtiny13a and ATmega328-AU, noting their CLKI pin locations. The author shares success overclocking an ATtiny13a to 40-44MHz at 5V but notes instability at 3.3V. A warning is given about the risks of incorrect wiring, which can destroy the oscillator.
Parts used in External Clock Project:
- AVR Microcontroller (ATtiny13a)
- AVR Microcontroller (ATmega328-AU)
- External Clock Circuit (4-pin metal can oscillator)
- M-Tron 40Mhz Oscillator
- avrdude programming software
People familiar with AVR boards such as Arduinos likely know most AVR MCUs can be clocked from an external crystal connected to 2 of the pins. When the AVR does not need to run at a precise clock frequency, it is also common to clock them from the internal 8Mhz oscillator. Before CPUs were made with internal oscillators or inverting amplifiers for external crystals, they were clocked by an external circuit. Although you won’t see many AVR projects doing this, every AVR I have used supports an external clock option. One (extreme) example of a project using an external clock is Brad’s Quark85 video game platform. Some AVRs such as the tiny13a and the tiny88 do not support an external crystal, so the internal oscillator or an external clock circuit are the only options. The 4-pin metal can pictured above is a clock circuit hermetically sealed for precision and stability. They can be bought from Asian sources for under $2.
A common reason for needing an external clock for an AVR MCU is from accidentally setting the fuses for an external clock. Once the fuses are set to external clock, they cannot be reprogrammed without providing an external clock signal. Wiring the oscillator is simple; connect power and ground, then connect the output to the CLKI pin of the MCU. On the ATtiny13a, this is pin 2 (PB3). On the ATmega328-AU, this is pin 7 (PB6).Although the connection is simple, it’s not foolproof. During my experimentation, I accidentally plugged my oscillator backwards (connecting 5V to Gnd and Gnd to 5V), which quickly fried it. Now I’ll be extra careful with the M-Tron 40Mhz oscillator so I don’t kill that too!
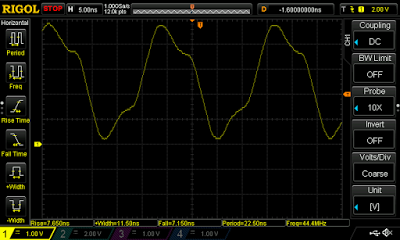
AVRs are known for being easy to overclock, but I was uncertain whether an ATtiny13a rated for 20Mhz would work when overclocked to more than double it’s rated speed. I experienced no problems flashing code with avrdude and running my bit-bang UART at either 40 or 44.3Mhz with a 5V supply. At 3.3V it crashed most of the time, only running OK occasionally.
For more detail: Externally clocking (and overclocking) AVR MCUs
- How do I connect an external clock circuit to an AVR?
Connect power and ground, then connect the output to the CLKI pin of the MCU. - What happens if I accidentally set the fuses for an external clock?
You cannot reprogram the device without providing an external clock signal. - Which pins serve as the CLKI input on specific AVRs?
The CLKI pin is pin 2 (PB3) on the ATtiny13a and pin 7 (PB6) on the ATmega328-AU. - Can an ATtiny13a run faster than its rated speed?
Yes, it successfully ran at 40 or 44.3Mhz with a 5V supply despite being rated for 20Mhz. - Does overclocking work well at lower voltages?
No, at 3.3V the chip crashed most of the time and only ran OK occasionally. - What risk exists when wiring an external oscillator?
Plugging the oscillator backwards by swapping 5V and Gnd will quickly fry the component. - Do all AVR MCUs support external crystal oscillators?
No, some models like the tiny13a and tiny88 do not support external crystals. - Where can I buy hermetically sealed clock circuits?
They can be bought from Asian sources for under $2.
