Summary of How to Flash MicroPython Firmware on a ESP8266 Based Sonoff Smart Switch
This article guides users on replacing the proprietary firmware of Sonoff Basic and Dual smart switches with MicroPython for full hardware control. It details the necessary hardware components, including the ESP8266 chip and relay, and outlines the software preparation using Python's esptool. The tutorial covers soldering pin headers, connecting via USB-UART adapters, entering Flash Mode, erasing existing flash memory, and successfully flashing the new firmware to enable custom programming.
Parts used in the Sonoff Smart Switch Project:
- ESP8266 chip with 1MB flash
- 220V AC integrated power adapter
- 10A Relay (or two in Sonoff Dual)
- Onboard LED (or two in Sonoff Dual)
- Onboard Button
- USB-UART adapter
- Soldered pin header
- Tweezers or small wire for shorting pads
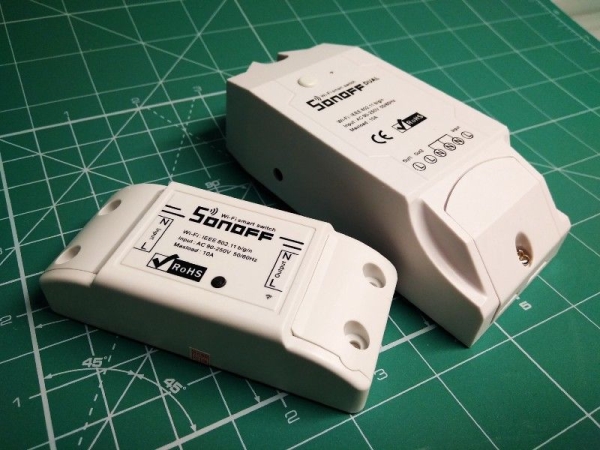
What’s Sonoff?
Sonoff is a device line for Smart Home developed by ITEAD. One of the most flexible and inexpensive devices from that line are Sonoff Basic and Sonoff Dual. These are Wi-Fi enabled switches based on a great chip, ESP8266. While the Sonoff infrastructure may work quite well for basic users, others may want to hack into that hardware and run their own code on it. The hardware of Sonoff Smart Switches is amazing, considering its low price:
- ESP8266 with 1MB flash
- 220V AC integrated power adapter
- 10A Relay (or two in Sonoff Dual)
- Onboard LED (or two in Sonoff Dual)
- Onboard Button
If you want to take a full control over this hardware using your favorite programming language, this tutorial is for you.
Step 1: Hacking the Hardware
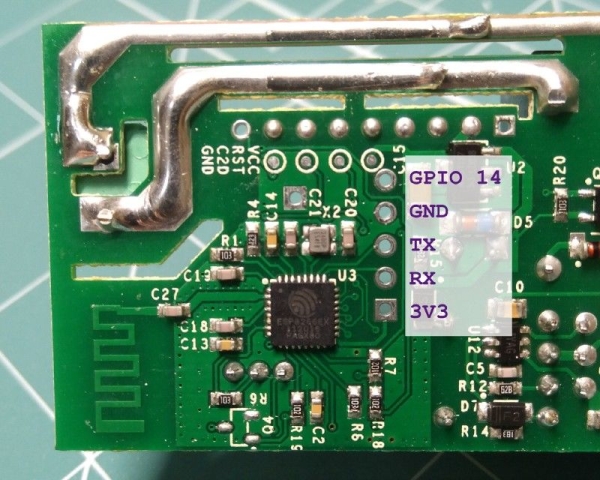
ESP8266 is programmed via the serial port. Both Sonoff Basic and Sonoff Dual have it on the PCD.
You may need to solder a pin header on the PCB to easily connect a USB-UART adapter.
Step 2: Preparing to Hacking the Software
I love Python, so I’m going to use the MicroPython firmware. You can also use any supported SDK. Let’s proceed to flashing MicroPython instead of the proprietary Sonoff firmware:
Install the esptool python package that makes flashing the ESP8266 easier:
pip install esptool
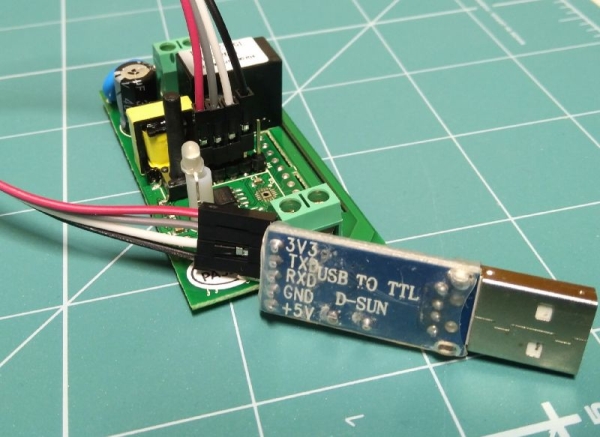
Download the latest stable MicroPython firmware from the MicroPython downloads page. Connect a USB-UART adapter to the board. For safety, it’s recommended to power the board from the adapter instead of the 220V AC socket. Note that you may only use 3.3V, if you connect the ESP8266 chip to a 5V power source, it will die.
Boot ESP8266 into the Flash Mode. You can do it by pulling down the GPIO0 pin while powering the device on:
- On Sonoff Basic, the GPIO0 is simply the button. Connect the USB-UART adapter to your PC while holding the button and you are in the Flash Mode.
- On Sonoff Dual, things are a bit harder. You need to short circuit two pads on the PCB while powering the board. The required pads are shown on the picture above. Use tweezers or solder a small wire between them.
When the ESP8266 is in the Flash Mode, the board’s LED should not flash.
Make sure that you can access the serial port opened by the the USB-UART adapter. On Linux it’s probably \dev\ttyUSB0, on Mac you should search for something like “usbserial” or “usbmodem” in the ls \dev\cu.* or ls \dev\tty.* command output, on Windows it should be COM3 or higher. Install the USB-UART adapter drivers if necessary.
Erase the flash using the esptool. Replace the /dev/ttyUSB0 for your port if required:
esptool.py --port /dev/ttyUSB0 erase_flash
You may need to run esptool.py as a superuser to access the serial port.
Step 3: Flashing
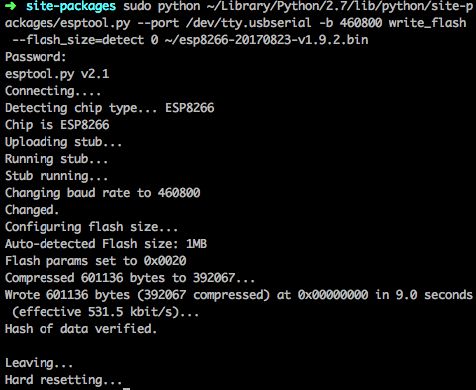
If the erasure was successful, cut the board’s power, boot the ESP8266 in the Flash Mode again, and flash your firmware:
esptool.py --port /dev/ttyUSB0 --baud 460800 write_flash --flash_size=detect 0 esp8266-20170823-v1.9.2.bin
If the flashing was successful, cut the board’s power, connect it again without pressing the button, and open the serial port in a terminal. On Linux and Mac you can use screen /dev/ttyUSB0 115200 (replace the /dev/ttyUSB0 for your port if required), on Windows you can use PuTTY (the default baud rate is 115200). Once you connect, press Enter, and if you see three angle brackets of Python shell, than everything works!
>>>
>>> help()

Welcome to MicroPython!

For online docs please visit http://docs.micropython.org/en/latest/esp8266/  .

For diagnostic information to include in bug reports execute 'import port_diag'.

Basic WiFi configuration:

import network
sta_if = network.WLAN(network.STA_IF);
sta_if.active(True)
sta_if.scan() # Scan for available access points
sta_if.connect("<AP_name>", "<password>") # Connect to an AP
sta_if.isconnected() # Check for successful connection
# Change name/password of ESP8266's AP:
ap_if = network.WLAN(network.AP_IF)
ap_if.config(essid="<AP_NAME>", authmode=network.AUTH_WPA_WPA2_PSK, password="<password>")

Control commands:
CTRL-A -- on a blank line, enter raw REPL mode
CTRL-B -- on a blank line, enter normal REPL mode
CTRL-C -- interrupt a running program
CTRL-D -- on a blank line, do a soft reset of the board
CTRL-E -- on a blank line, enter paste mode

For further help on a specific object, type help(obj)
>>>
In the next instructable, we will describe how to interact with the Cloud4RPi platform via an MQTT protocol.
Source: How to Flash MicroPython Firmware on a ESP8266 Based Sonoff Smart Switch
- What are the main hardware components of a Sonoff Basic switch?
The device includes an ESP8266 with 1MB flash, a 220V AC integrated power adapter, a 10A Relay, an onboard LED, and an onboard button. - How do you prepare the Sonoff hardware for hacking?
You may need to solder a pin header on the PCB to easily connect a USB-UART adapter to the serial port. - Can I use any programming language to control this hardware?
The author uses MicroPython firmware, but the text notes you can also use any supported SDK. - How do you safely power the board during the flashing process?
It is recommended to power the board from the USB-UART adapter instead of the 220V AC socket to avoid damage. - How do you put the Sonoff Basic into Flash Mode?
You must hold down the onboard button while powering the device on to pull down the GPIO0 pin. - How do you enter Flash Mode on a Sonoff Dual?
You need to short circuit two specific pads on the PCB with tweezers or a small wire while powering the board. - What command is used to erase the flash before flashing new firmware?
The command esptool.py --port /dev/ttyUSB0 erase_flash is used to clear the existing data. - How can you verify that MicroPython is running successfully after flashing?
If you see three angle brackets of a Python shell when opening the serial port, everything works.