
Summary of Micro:bit – Micro Drum Machine
This article details the construction of a micro:bit-powered drum machine that physically strikes surfaces using solenoids. The project avoids external power sources or relays, utilizing a TIP120 transistor and specific capacitors to drive the mechanism. While inspired by the micro:bit orchestra, the circuit complexity makes it unsuitable for middle school students. The build involves soldering a custom circuit on a perf board, laser-cutting plywood components, and assembling the unit with bolts, nuts, and glue.
Parts used in the Micro Drum Machine:
- micro:bit
- 4 mm plywood
- M3 bolts
- M3 nuts
- TIP120 darlington transistor
- 1k ohm resistor
- 10 uF electrolytic capacitors
- 47 uF electrolytic capacitor
- TO220-3 voltage regulator
- Rubber band
- 9 volt battery
- 9 volt battery clip
- Switch
- Diode
- 5 volt solenoid
- Wire
- Perf board
- Wood glue
- Hot glue
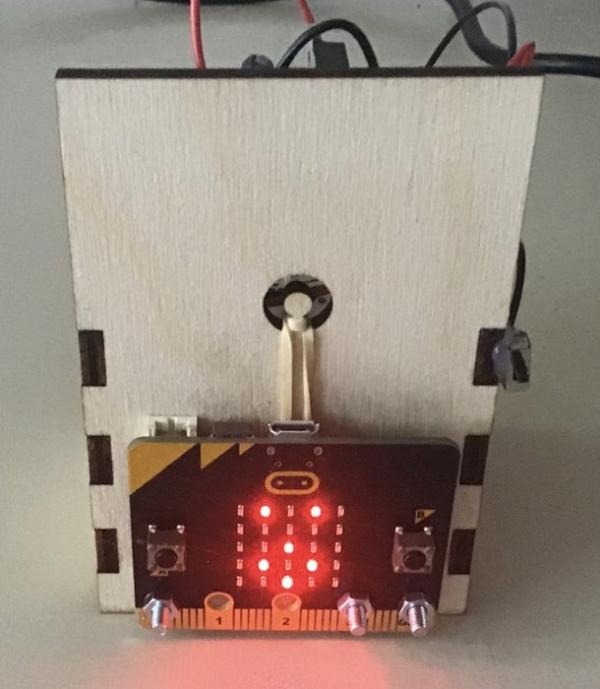
This is a micro:bit micro drum machine, that instead of just generating the sound, actuelly drums. It is heavy inspired by the rabbits from the micro:bit orchestra.
It took me some time to find some solenoids that were easy to use with the mocro:bit, since I didn’t want to use alternstive power sources or relays.
The circuit is a bit more complicated than my other projects, and though it is not that hard, it is properly not a project for middle school students.
Supplies:
Materials:
1 x micro:bit
4 mm plywood
3 x M3 bolts
12 x M3 nuts
1 x TIP120 darlington transistor
1 x 1k ohm resistor
2 x 10 uF electrolytic capacitors
1 x 47 uF electrolytic capacitor
1 x TO220-3 voltage regulator
1 x rubber band
1 x 9 volt battery
1 x 9 volt battery clip
1 x Switch
1 x Diode
1 x 5 volt solenoid
A few meters of wire.
It is good if you have different colours
Some perf board
Wood glue
Hot glue
Tools:
Soldering tools
Lasercutter
Wirecutter
Hot glue gun
Step 1: Solder the Circuit
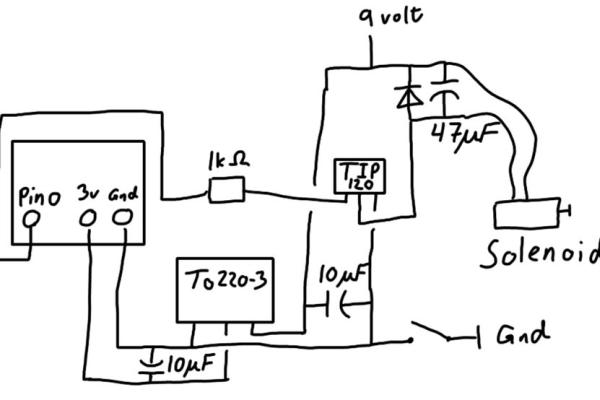
Solder the circuit on the drawings. You shouldn’t solder anything to the micro:bit since we are going to connect it with bolts and nuts. Just leave some wire there. I soldered the 1k ohm resistor into the wire.
When I made this first I didn’t realise that a switch was needed, so I added it later, but you should properly learn from my mistake and add it now.
Step 2: Lasercutting
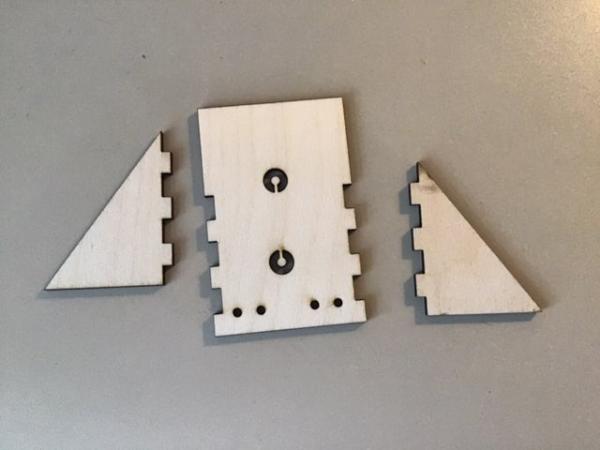
Download the files and cut them out of 4 mm plywood.
Step 3: Add Battery
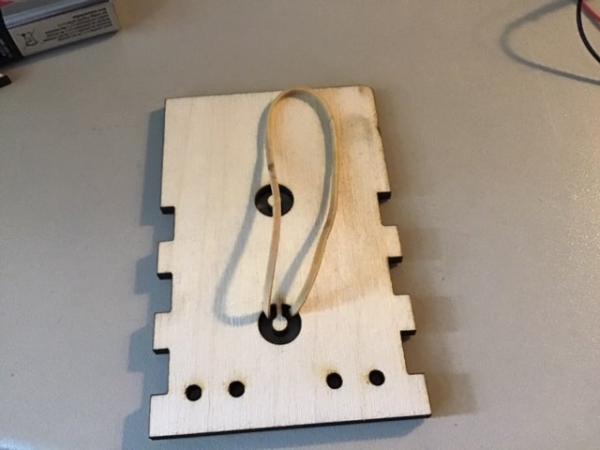
First attach the rubber band, then strap in the battery.
Step 4: Attach Circuit
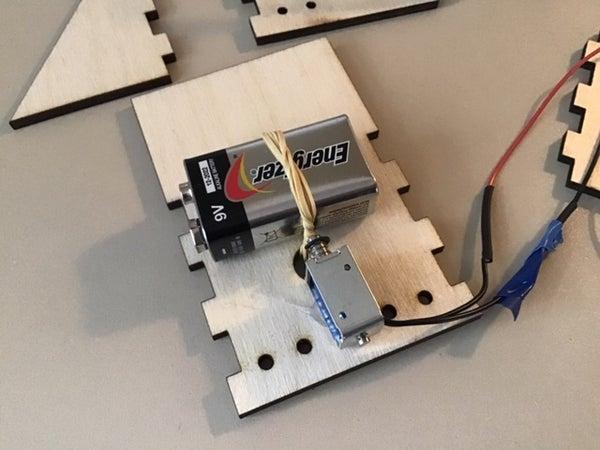
Use hot glue to attach the circuit and solenoid. Use plenty of hot glue. You will be able to recover the solenoid for another project if you want to, since hot glue doesn’t stick that well to metal.
Step 5: Glue It Together
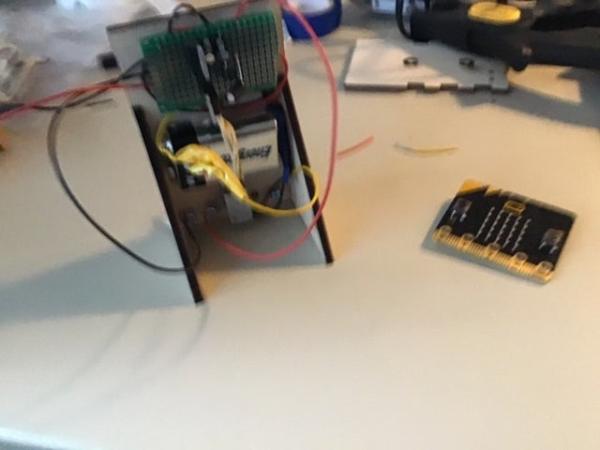
Use woodglue to glue the two sides on. Wait a bit before you continue working.
Step 6: Add Bolts
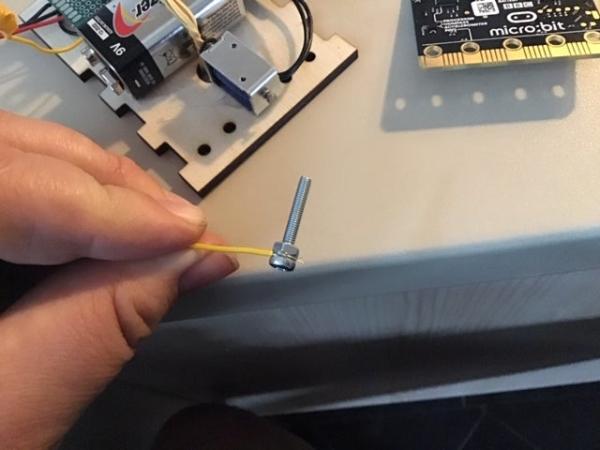
Now take one of the M3 bolts, wrap the data wire you want to connect to the micro:bit around it and keep it in place with one of the nuts. Do the same for the ground and 3.3 V wire.
Then put the screws through the holes. Gnd through the left most hole, 3.3 V through the second most to the left and data throught the right most hole. Use two nuts on each to keep them in place. We use two instead of one,because we also need to creat some distance for when we connect the micro:bit.
Step 7: Add the Forgotten Switch(Optional)

If you forgot to add a switch like me, then this is when I added it. Without the switch to turn of the circuit it will be very hard to get the micro:bit in place, because the solenoid will randomly turn on and off, until the micro:bit is properly set. Cut the ground wire from the battery clip, solder on the switch and glue it on with hot glue.
Source: Micro:bit – Micro Drum Machine
-
How does this drum machine generate sound?
It actually drums by using solenoids to physically strike surfaces instead of just generating digital sound. -
Can I use alternative power sources or relays for this project?
No, the author specifically avoided using alternative power sources or relays to keep the design simple. -
What is the best way to connect the micro:bit without soldering?
You should wrap data wires around M3 bolts and secure them with nuts rather than soldering directly to the micro:bit. -
Does the project require a switch?
Yes, a switch is needed to turn off the circuit so the solenoid does not randomly activate while placing the micro:bit. -
How can I recover the solenoid if I need to reuse it later?
You can use hot glue to attach the circuit since hot glue does not stick well to metal, allowing for easy removal. -
What materials are required to build the casing?
The casing requires 4 mm plywood cut with a lasercutter and assembled using wood glue and hot glue. -
Is this project suitable for middle school students?
No, the circuit is considered too complicated for middle school students despite not being overly difficult. -
What happens if I forget to add the switch before connecting the micro:bit?
The solenoid will randomly turn on and off until the micro:bit is properly set in place.
