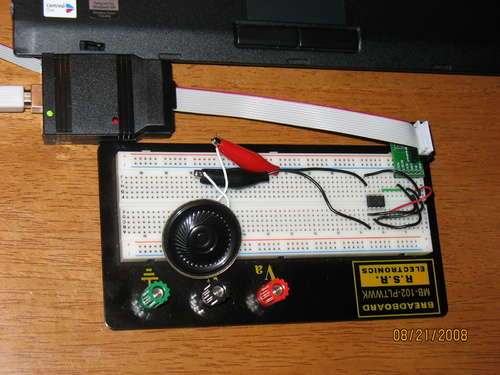
Play a prank on your friends (enemies?) by hiding a high-pitched beeper which sounds off at random time intervals. This instructable uses minimal parts. All that is required is:
- battery
- microcontroller
- speaker
Why don’t I just use a 555 timer chip? You certainly could. I like this method because:
1. The ability to beep at random intervals
2. Minimal parts needed (simplicity/elegance of design)
3. I wanted to use a microcontroller (because I recently started the journey of learning about microcontrollers)
This project was inspired by an article in MAKE magazine about making a similar device with a 555 timer chip.
After making my prototype, I searched instructables.com and found the Raven, which is a similar beeping thing using a microcontroller. I decided to add my instructable because it uses less parts and has random intervals.
Step 1Parts Required
- ATtiny13 microcontroller (Sparkfun.com)
- AA batteries (3)
- Battery Holder with switch (Digikey part # SBH-331AS-ND)
- 8-pin socket for microcontroller
- Speaker (small 8 Ohm or piezoelectric buzzer)
- Silicon adhesive (RTV)
You can make this project with almost any battery, microcontroller, speaker combination. The pictures for this step show parts I had around the house.
I made this entire project from parts I had in the house. You can use almost any battery(s) that has a voltage within the microcontroller’s range (1.8-5.5 Volts for the ATtiny13). The higher the voltage, the louder the beep.
Almost any small speaker will work. You may want to experiment with different small speakers. I chose the speaker with the plastic membrane because it didn’t make a click noise at the end of the beep like some other small speakers.
You can adapt the source code for other microcontrollers. It would potentially only require a change to the timer register settings.
Skills Required:
- Basic soldering skills – Soldering Tutorial
- Programming microcontroller – AVR Tutorial
Step 2 Prototyping
The easiest way to test your circuit is to use a prototyping breadboard. You can also program the microcontroller while on the breadboard. Once it was working, I put it on a tiny breadboard so I could take it to work and try it out.
Connect the speaker to the ATtiny13: Pins 4 & 5
Connect the battery to ATtiny13: Pin 8 (+) & Pin 4 (-)
So Pin 4 has the negative battery terminal and one speaker wire (doesn’t matter which one). Pin 5 connects to the other speaker wire, and pin 8 connects to the positive side of the battery.
I realize that the reset pin (pin1) should be pulled high, but it works without doing that, and this project makes no attempt to be formally correct.
Note that if you wanted better quality sound, you could put a resistor-capacitor low-pass filter on the output pin inline with the speaker. But for this project, we want an annoying sound anyway.
The prototype made me realize that the sound was not very loud. It still might work well for you in a quiet environment (office?). To increase the volume, I changed the battery from 3V (CR2032) to 4.5 volts (3 AA).
For more Detail: Annoying Beeper using Microcontroller ATtiny13

