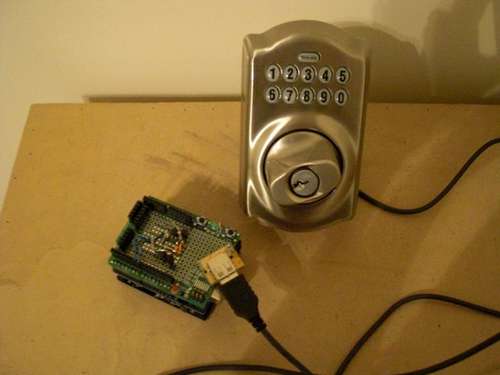
Summary of Control a Schlage electronic deadbolt with an arduino!
This article details how to dismantle and hack a Schlage electronic deadbolt for Arduino control. The lock consists of three main parts: the outside portion with a key cylinder, knob, and keypad; the inside portion containing another knob, battery housing, and usage switch; and the deadbolt mechanism. Instructions include removing six Phillips screws from the outside portion's faceplate and then two T10 Torx screws from an intermediary plate to access the internal components for further modification.
Parts used in the Schlage Electronic Deadbolt Arduino Hack:
- Schlage electronic deadbolt lock
- 9V battery
- Phillips #2 screws (6)
- T10 Torx screws (2)
- Arduino (for controlling the lock)

Step 1 Purchase the lock and unpack it
I got mine on sale for $99 at Lowe’s.
Remove it from the box and take a look at what’s there. The construction of the lock is really great. Anywhere that could even remotely see any moisture is surrounded with rubber sleeving or a rubber o-ring. The lock has 3 basic parts:
outside portion: This portion has a regular key cylinder, a knob for the deadbolt similar to what you normally see inside of a house, and a keypad for entering the code.
inside portion: This portion has a knob to operate the deadbolt, a housing for a 9v battery, and a switch to tell the electronics in the front of the lock when the lock is in use.
deadbolt mechanism: This portion is similar to any other deadbolt on the market.
Step 2 Take the faceplate off of the lock
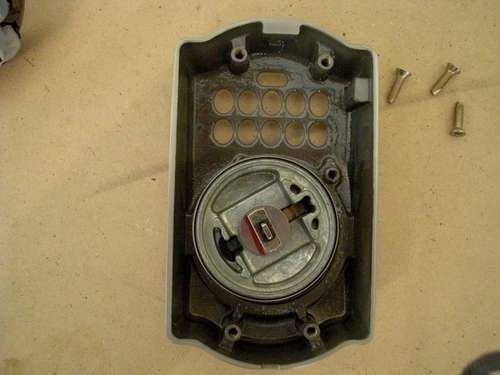
Turn the outside portion over and you’ll see 6 #2 phillips screws. Remove them and you should see something like the second picture.
Step 3 Take the intermediary plate off

remove 2 T10 Torx screws seen in the second picture and you’ll have something like what’s in the third and forth pictures.
For more Detail: Control a Schlage electronic deadbolt with an arduino!
