Summary of Garduino: Gardening + Arduino
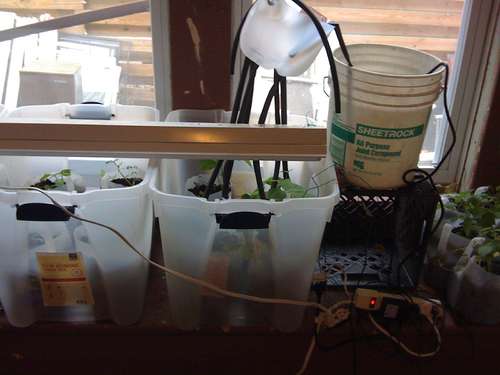
The Garduino project is an Arduino-based automated gardening system that waters plants based on soil moisture, controls grow lights considering natural sunlight to ensure a 15-hour light cycle, and alerts if temperatures drop below 50°F. It includes sensors for soil moisture, light, and temperature, and uses relays to control water pumps and lighting. The system leverages recycled materials and costs under $100. Future plans include using solar power, improving lighting efficiency, and monitoring soil pH and CO2 levels.
Parts used in the Garduino project:
- Omron G5LE-1 relays (2 units)
- 1N4004 diodes (2 units)
- A.C. extension cord
- A.C. power cord
- A.C. outlet
- Tiny clean-water pump
- Plastic milk jug
- Old road bike tubes (~2)
- Milk crate
- String
- 4' fluorescent light fixture
- "Plant type" fluorescent bulb (e.g., Ott-Lite)
- Galvanized nails (2, 1-4" length)
- Photocell (light sensor)
- LED (for temperature alert)
- 10k-ohm thermistor (temperature sensor)
- Variety of seeds (e.g., swiss chard)
- Plastic milk jugs (around 30 for planting)
- 28-gallon clear plastic storage containers
- Red bricks (~5 per container)
- Mel's Mix soil mixture (peat moss, coarse vermiculite, mixed compost)
- Multimeter
- Wire stripper
- Solder
- Electrical tape
- 10k-ohm resistors (3)
- 210-ohm resistor (for LED)
- 22-gauge wire (several feet)
- Arduino board (e.g., Duemilanove)
- Protoshield (Ladyada’s model)
- Mini circuit board
- Hot glue gun with glue

-Waters my plants whenever their soil moisture level drops below a predefined value.
-Turns on grow lights, but only when it’s dark out and only long enough to make the plants get 15 hours of total light (sunlight + supplemental light) daily.
-Alerts me if the temperature around the plants drops below 50 degrees.
This is the first grow-light and auto-water setup i know of that takes into account natural sunlight received and soil moisture level before turning on water / light.
This and other projects I’ve built are available as kits / products at my website.
I heavily relied on knowledge / inspiration / encouragement from:
–Mikey Sklarand his many green-tech projects
–Selwyn Pollit’s permaculture knowledge
–Mitch Altman, for giving me a long-overdue lesson on how to properly solder
Future expansions might include:
-Teaching my Garduino to brew his own compost tea from greywater.
-Using pulsed, red-and-blue LED grow lights (like Mikey Sklar’s setup) to significantly increase efficiency.
-Adding a solar panel and batteries to remove any need for a power grid.
-Testing for soil ph level and air CO2 content.
Step 1 Obtain Your Materials
I built this using recycled / free materials wherever I could think to. It cost significantly less than $100 in total. Here’s what I used:
The relays:
2 http://www.jameco.com/webapp/wcs/stores/servlet/ProductDisplay?jameco_page=42&langId=-1&productId=187151&catalogId=10001&freeText=omron+g5le-1&storeId=10001&search_type=all&ddkey=http:StoreCatalogDrillDownView
Omron G5LE-1 relays]
2 http://www.jameco.com/webapp/wcs/stores/servlet/ProductDisplay?langId=-1&storeId=10001&catalogId=10001&productId=1537918&
1N4004 diodes]
1 A.C. extension cord
1 A.c. power cord
1 A. C. outlet
The watering system:
1 Tiny clean-water pump
1 Plastic milk jug
~2 Old road bike tubes
1 Milk crate
String
The lighting system:
1 4′ fluorescent light fixture
1 “plant type” fluorescent bulb (I used the Ott-Lite, but any bulb marketed as for plants should be fine)
The soil moisture sensor:
2 galvanized nails, 1-4″ in length
The light sensor:
1 photocell
The temperature sensor / alert:
1 LED (any you’d use with an Arduino will do)
1 10k-ohm thermistor
The plants and holders:
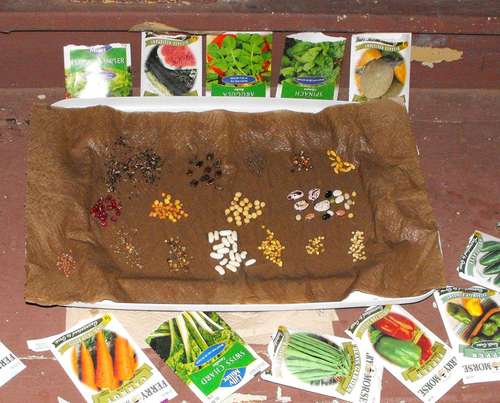
A variety of seeds, preferably that’ll grow into things you’d like to eat. Everywhere, I hear people recommend swiss chard as an easy starter plant…
Planting containers:
As many plastic milk jugs as you’d like. I used ~30.
28-gallon clear plastic storage containers. You’ll need one for every 6 milk jugs.
~5 red bricks for each storage container, or anything else that will allow the milk jugs to stand at least an inch off the bottom of the container.
Soil mixture:
I used Mel’s Mix, the mixture recommended in “The Square Foot Gardener.” It consists of 1/3 peat moss, 1/3 coarse vermiculite, and 1/3 mixed compost, with the mixed compost coming from at least 6 different sources. I’ve heard lots of people bash peat moss and vermiculite’s sustainability (not to mention vermiculite’s obscenely-high price), so definitely explore your options here. As I understand it, you want something w/:
-lots of plant nutrients (the mixed compost)
-water retention (peat moss / vermiculite)
-‘fluffiness:’ soil should be light so plants can easily grow their roots through and you can easily remove plants from it (vermiculite / peat moss)
Tools / Miscellaneous
Multimeter
Wire stripper
Solder
Electrical tape
3 ~10k-ohm resistors
1 ~210-ohm resistor (for the LED)
several feet 22-gauge wire
1 Arduino (in my case a Duemanilove, but any should work)
1 Protoshield (Ladyada’s model)
1 mini circuit board
Hot glue gun, with glue
Step 2 Sprout Your Plants

If you’re smarter than me, you’ll label your seed grid so that you can remember what is growing in the different areas of your sprouter. Below is my attempt at this, rendered useless when I planted the plants in random disorder.
Step 3 Build Your Relays
This was a lot more difficult before Sparkfun released their guide; y’all have it easy now:)
I used Omron G5LE-1 relays, attaching wires with solder for the electrical connections and then adding hot glue around them for some structural integrity.
As per this guide, you should make sure to run the white wire directly to the outlet / end of extension cord and the black wire through the relay. For this to be useful, you’ll also need to make sure you plug your creation into the wall corectly: black wire to small slot…
See photo 3 for a view of how you place the diode.
Obviously, you’re now dealing with more potential to hurt yourself: AC does not feel good!
Oh, and there’s no reason you can’t use outlets or extension cords for both of these. I just switched it up for variety:)
Step 4 Build Your Moisture Sensor
Your moisture sensor consists of galvanized nails some distance apart from each other in the same milk jug of soil. When the soil is more moist, the sensor will report a lower resistance.
Solder a wire to the head of each nail, and be generous: this will be a structural connection as well as electrical. One nail wire gets connected to +5v on the Arduino, and the other goes to both an analog input and a resistor (then ground)
Step 5 Add temperature and light sensors
The temperature and light sensors are easy: connect one end of each sensor to +5v on the arduino and the other end to both an analog i/o on the arduino and a 10k resistor. Then, connect the other end of the resistor to arduino ground and revel in your sensor-building skills.
For more Detail: Garduino: Gardening + Arduino
