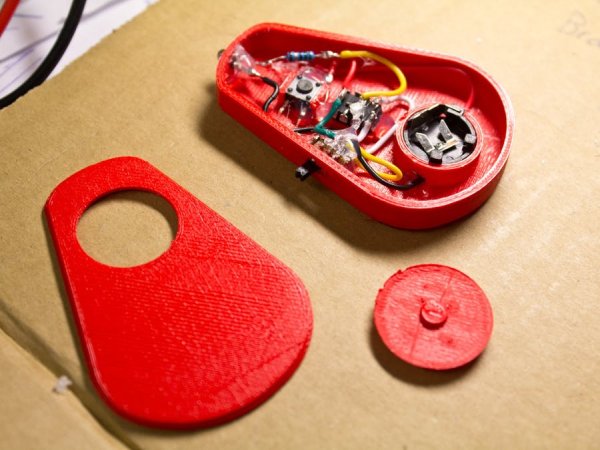
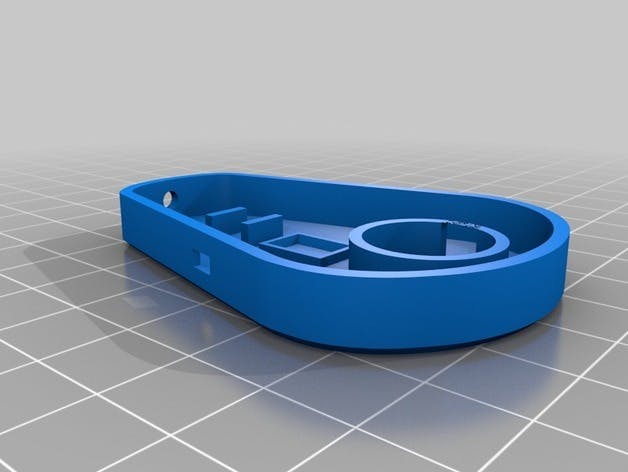
This article details the construction of a DIY infrared remote trigger for Canon SLR cameras. The project replaces expensive commercial remotes by generating specific IR signals using an ATtiny13a microcontroller. It includes instructions on protocol timing, 3D-printed casing design, and energy-efficient software configuration to send two bursts of 16 pulses each.
Parts used in the DIY Canon IR Remote:
Atmel ATtiny13a
Osram SFH409 IR Diode
Battery holder CR1220
Coin Cell Battery CR1220 3V
Push Button
Resistor 15Ω
Micro Slide Switch SK12D07
Hardware components:
Atmel ATtiny13a
CHF 1.25
×
1
Osram SFH409 IR Diode
CHF 0.75
×
1
Battery holder CR1220
CHF 0.65
×
1
Coin Cell Battery CR1220 3V
×
1
Push Button
CHF 0.25
×
1
Resistor 15Ω
CHF 0.07
×
1
Micro Slide Switch SK12D07
CHF 0.28
×
1
Hand tools and fabrication machines:
Soldering iron (generic)
3D Printer (generic)
Story
Introduction
Canon SLR cameras have two ways of remote triggering: Either via wire, or via infrared.
A wire based remote trigger is very easy to build, you simply need a cable with a 2.5″ jack connector and shortcut two of the three contacts. More details on blog.dbrgn.ch.
The other method – triggering via infrared – is a bit more challenging. There are a lot of cheap remote controls from China for around 10$, but building your own remote is muc more interesting…
First you need to find out how the protocol for the IR control works. Fortunately there’s a post on doc-diy.net that describes the RC-1 protocol in detail. Summary: Send two bursts of 16 pulses each and get the timing right.
I am an experienced technical writer holding a Master's degree in computer science from BZU Multan, Pakistan University. With a background spanning various industries, particularly in home automation and engineering, I have honed my skills in crafting clear and concise content. Proficient in leveraging infographics and diagrams, I strive to simplify complex concepts for readers. My strength lies in thorough research and presenting information in a structured and logical format.
This website uses cookies to improve your experience. We'll assume you're ok with this, but you can opt-out if you wish.ACCEPTPrivacy Policy
Manage consent
Privacy Overview
This website uses cookies to improve your experience while you navigate through the website. Out of these, the cookies that are categorized as necessary are stored on your browser as they are essential for the working of basic functionalities of the website. We also use third-party cookies that help us analyze and understand how you use this website. These cookies will be stored in your browser only with your consent. You also have the option to opt-out of these cookies. But opting out of some of these cookies may affect your browsing experience.
Necessary cookies are absolutely essential for the website to function properly. This category only includes cookies that ensures basic functionalities and security features of the website. These cookies do not store any personal information.
Any cookies that may not be particularly necessary for the website to function and is used specifically to collect user personal data via analytics, ads, other embedded contents are termed as non-necessary cookies. It is mandatory to procure user consent prior to running these cookies on your website.