
Summary of DIY SMD LED heart
This article describes a DIY LED heart gift for Valentine's Day, built using an Atmega8 microcontroller and SMD components. The author assembled the circuit on a custom PCB, soldered wires for firmware programming via the SPI interface, and housed the electronics in a wooden frame decorated with ladybugs.
Parts used in the LED Heart:
- Microcontroller Atmega8
- 1K resistor
- SMD resistors (size 1206)
- SMD diodes (size 1206)
- LEDs
- Wooden frame
- Two small ladybugs
- Wires for SPI interface
In this article I will try to tell you about the gift I made for my girlfriend!
I got here is a LED heart.
I apologize for my bad English!
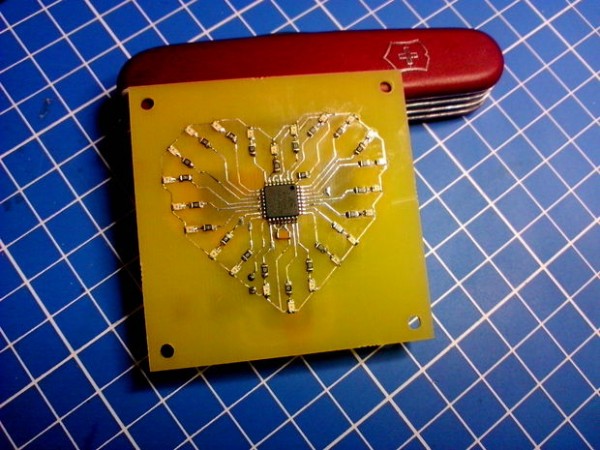 The basis of the scheme is a microcontroller Atmega8, 1K resistor, selected in such a way as not to overload the microcontroller ports. SMD resistors and diodes, size 1206.
In order to fill in the microcontroller firmware, you need to solder the wires to the pads on the board. Around the microcontroller pins are derived for spi interface (MOSI MISO SCK RESET). The firmware can be downloaded here.
To formalize the a scheme which I soldered, I placed it in a wooden frame, and make the background and glued two small ladybugs. Valentine’s Day is approaching, a gift sure to enjoy your loved ones people!
Download files PCB and firmware for the microcontroller can be here!
For more detail: DIY SMD LED heart
- What is the basis of the scheme?
The basis of the scheme is a microcontroller Atmega8. - How do I fill in the microcontroller firmware?
You need to solder wires to the pads on the board around the microcontroller pins. - Which interface is used for downloading firmware?
The firmware can be downloaded using the spi interface (MOSI MISO SCK RESET). - Where can I download the files?
Download files PCB and firmware for the microcontroller are available at the provided link in the article. - What material was used to formalize the scheme?
The scheme was placed in a wooden frame. - What decorations were added to the project?
The author glued two small ladybugs onto the background. - What resistor size is specified for the project?
SMD resistors of size 1206 are used. - Why was a 1K resistor selected?
It was selected so as not to overload the microcontroller ports.
