
Summary of ESP32-CAM Video Surveillance Smart Camera
This project details an ESP32-CAM based video surveillance robot featuring pan and tilt capabilities, controllable via an iPhone app over the internet. The build involves assembling a mobile platform using 18650 batteries for power, two SG-90 servos for movement, and an MB102 power module. Users must install the ESP32 add-on in Arduino IDE, upload specific code files, and retrieve the device's IP address via the Serial Monitor to access the camera feed remotely.
Parts used in the ESP32-CAM Video Surveillance Robot:
- ESP32-CAM
- FT232RL FTDI Mini USB
- 18650 Battery Holder
- 18650 Battery (x2)
- Mini Pan/Tilt Platform w/ 2 SG-90 Servos
- MB102 Breadboard Power Supply Module
- iRobbie-A iOS App
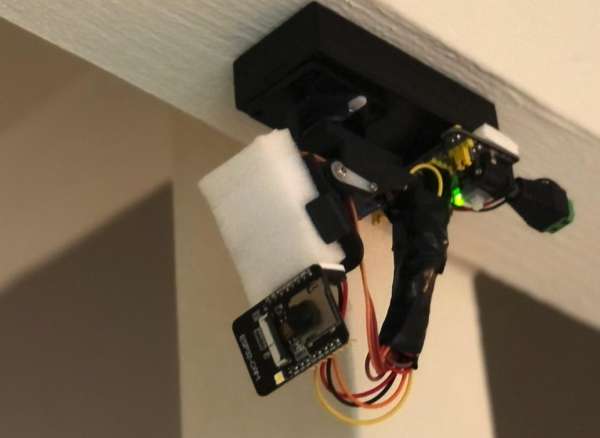
Description
This project is a development of our ESP32-CAM Video Surveillance Robot project. Eventually we got a video surveillance pan & tilt camera that can be controlled with an iPhone through Internet
Step 1:
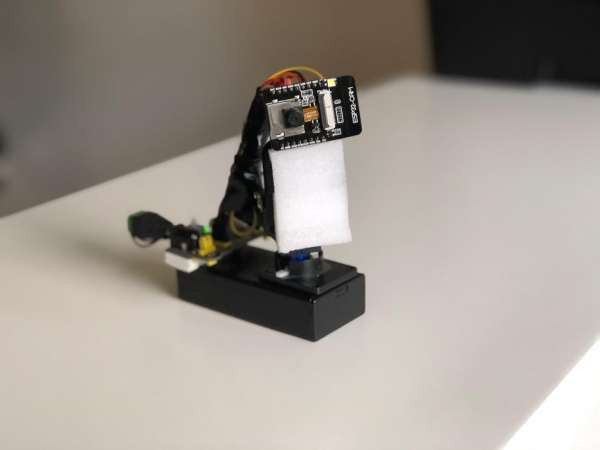
Parts List:
ESP32-CAM x1
FT232RL FTDI Mini USB x1 – for uploading a code to the ESP32-CAM
18650 Battery Holder x1 1
8650 Battery x2 (as an alternative four AA batteries and its holder can be used instead of 18650 batteries)
Mini Pan/Tilt Platform w/ 2 SG-90 Servos x1
MB102 Breadboard Power Supply Module x1
Step 2:
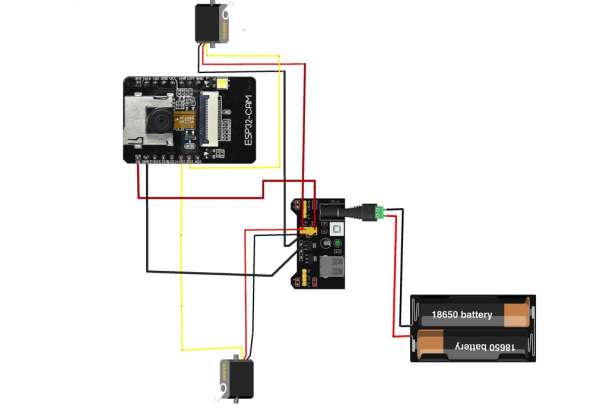
Connect wires as shown on the schematic. Make sure that the Tilt servo is connected to the pin #IO2 and the Pan servo to #IO14.
Step 3:
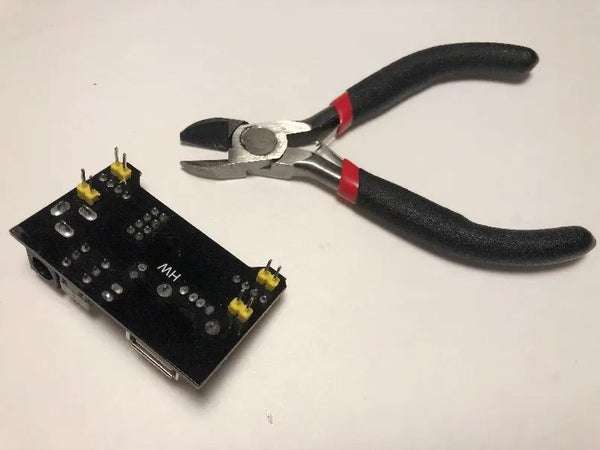
In order to attach the MB102 module to the 18650 Battery Holder, I removed the pins on the bottom of the MB102. Then, I attached it to the cover of the 18650 Battery Holder with double sided mounting tape.
Step 4:
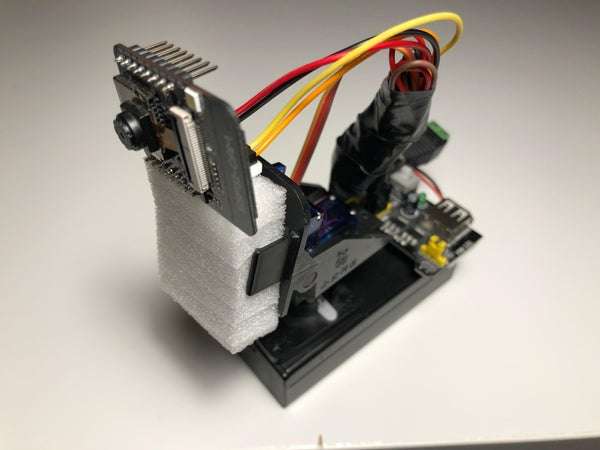
Connect all parts using the schematic. Use a piece of foam and double sided mounting tape to attach the ESP32-CAM to the Pan/Tilt platform. Attach the Pan/Tilt platform to the cover of the 18650 Battery Holder with double sided mounting tape.
Step 5:
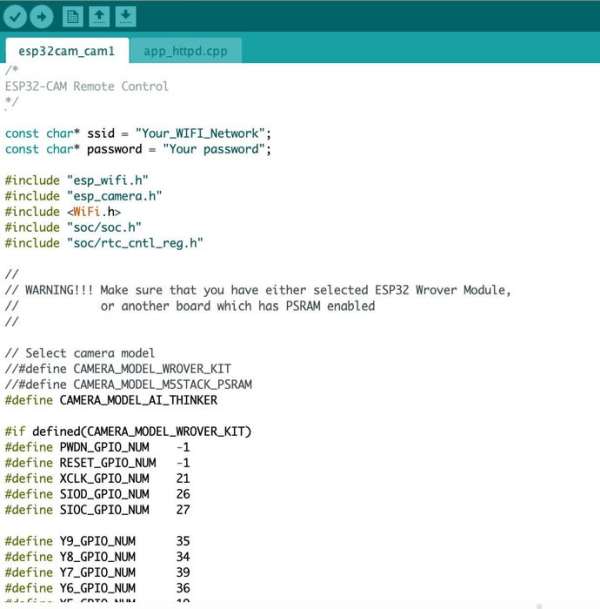
Install the ESP32 Add-on on Arduino IDE:
Follow one of the next tutorials to install the ESP32 add-on, if you haven’t already: Installing the ESP32 Board in Arduino IDE (Windows instructions) Installing the ESP32 Board in Arduino IDE (Mac and Linux instructions) Download the code from here Make sure that you have two tabs with code in the Arduino IDE: esp32_cam_cam1 and app_httpd.cpp as shown on the screenshot.
Step 6:
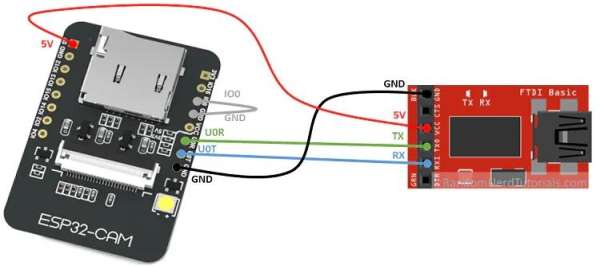
After uploading the code, disconnect GPIO 0 from GND.
Open the Serial Monitor at a baud rate of 115200. Press the ESP32-CAM on-board RST button. The ESP32-CAM IP address should be shown in the Serial Monitor.
Source: ESP32-CAM Video Surveillance Smart Camera
- How do I connect the servos to the ESP32-CAM?
The Tilt servo connects to pin IO2 and the Pan servo connects to pin IO14. - Can I use AA batteries instead of 18650 batteries?
Yes, four AA batteries and their holder can be used as an alternative to the 18650 batteries. - What is the best way to attach the MB102 module to the battery holder?
Remove the pins on the bottom of the MB102 and attach it to the cover of the 18650 Battery Holder with double sided mounting tape. - Does the iRobbie-A iOS App control the robot?
Yes, the robot is a video surveillance pan and tilt camera that can be controlled with an iPhone through the Internet using this app. - What baud rate should I use for the Serial Monitor?
You should open the Serial Monitor at a baud rate of 115200. - How do I find the ESP32-CAM IP address?
Press the ESP32-CAM on-board RST button after disconnecting GPIO 0 from GND, then check the Serial Monitor. - Which tabs must be open in the Arduino IDE before uploading?
You must have two tabs with code named esp32_cam_cam1 and app_httpd.cpp. - How do I attach the ESP32-CAM to the platform?
Use a piece of foam and double sided mounting tape to attach the ESP32-CAM to the Pan/Tilt platform.
