Summary of Firmware Upgrade for USBASP Clone – Fixing Error Setting USBASP ISP Clock
USBASP clone programmers can show Error Setting USBASP ISP Clock; upgrading firmware from Thomas Fischl’s site fixes this. Procedure: set jumpers (JP1 default 5V, JP3 open, short JP2 for self-programming), connect two USBASPs (one to PC), identify the board/chip, download appropriate hex from fischl.de, back up original flash (use khazama safer), load new firmware and flash/verify, then swap connections and test; repeat for the second unit.
Parts used in the USBASP Firmware Upgrade Project:
- USBASP clone(s) (two units)
- PC with USB port
- USB cable(s)
- Paperclip or tweezers (to short JP2)
- Software: khazama
- Software: eXtreme Burner (optional)
- Firmware files from http://www.fischl.de/usbasp/ (usbasp.2011-05-28 firmware hex files)
- Archive extraction tool (to extract usbasp.2011-05-28.tar.gz)
USBASP is one of the most popular programmer for AVR Microcontroller by Thomas Fischl.
It is one of the oldest programmer for AVR. And very common being used with AVRdude software.
There are many GUI based on AVRDude, such as:
- embedXcode
- AVR8 Burn-O-Mat
- AVRDUDESS
- BitBurner
- avrdude-gui
- khazama
- eXtreme Burner
- and many more
In this tutorial we focus on the easiest one: khazama, and fairly complex one (eXtreme Burner).
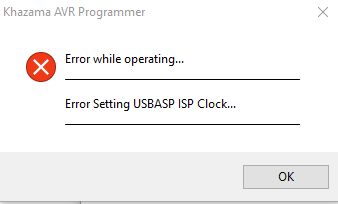
In case you bought a USBASP clone, you might encounter with this problem:
Fixing Error Setting USBASP ISP Clock.
Although some USBASP can read/write flash, this error is rather annoying.
The steps of upgrading is very simple but you will need to have 2 of them and upgrade all of them one by one.
What a heck, the price is cheap anyway.
Step 1: Place the Jumper and Hook Em Up
USBASP clone has jumper JP1, JP2, JP3 or J1, J2, J3. These jumper is hardware operation setting.
Let JP1 default to 5V both. JP3 is default open. JP2 is to enable self programming mode.
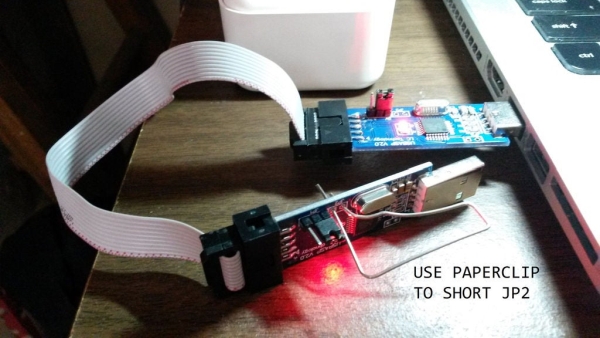
For JP2 or J2 and use paperclip (or tweezers or whatever) to short this jumper. during the write or read operation on target USBASP.
Now connect the cable to both USBASPs. Connect the one without jumper into PC USB. See the image above.
Step 2: Check Your USBASP and Download Latest Firmware
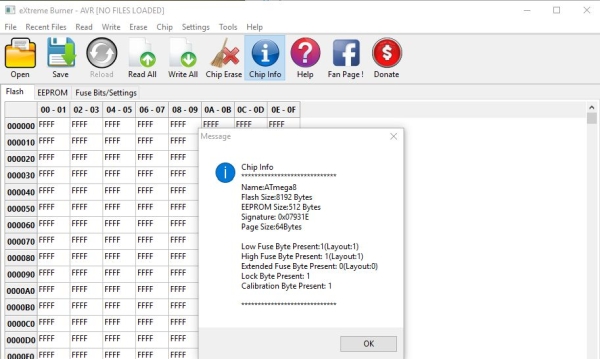
Before continuing, better check which USBASP chip in your board. This information is useful to determine which Laterst firmware for particular board.
In the picture above, we can use eXtreme burner to get this information.
Now go to http://www.fischl.de/usbasp/ and download the latest firmware (usbasp.2011-05-28.tar.gz). Extract this and go to usbasp.2011-05-28\bin\firmware.
There are 3 hex files, use the correct one according to chip information.
Step 3: Backup Your Original Firmware
This step is needed in case you want to use the old firmware back or something wrong happened.
You can use eXtreme burner or khazama to do this. Khazama has fewer “dangerous” button for this operation. There is no erase, fuse or whatever button in UI that can cause problem. So it safer to use khazama for the first time.
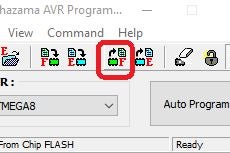
- Click the Read flash (F) button (shown the picture above). If operation is successful, flash data will be read into memory.
- Select File -> Save Buferas file -> select directory and type filename.
Step 4: Flash It.
Now let’s flash it.
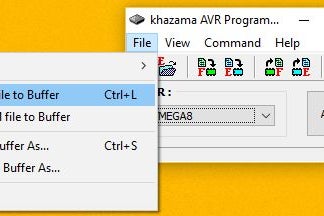
- Select menu File -> Load flashfile to buffer.
- Select the correct firmware hex file.
- Click on flash F button (with arrow down) and to flash it (shown in 3rd picture).
- Select menu command->verify flash ->If everything OK it will show verify ok.
Step 5: Switch the USBASP Target and Test It
- Now you can unplug the JP2 (paperclip) on target board.
- Unplug the programmer and switch the target one to PC as programmer.
- Now the flashed one is become programmer.
- And put back JP2 (paperclip on the other board). The one that is not connected to PC.
- If upgrade is successfull you will not see error in setting ISP clock again.
- Do the same with the other board back from Step 2.
Source: Firmware Upgrade for USBASP Clone – Fixing Error Setting USBASP ISP Clock
- How do I fix Error Setting USBASP ISP Clock?
Upgrade the USBASP firmware using the correct hex from fischl.de following the described flashing steps. - Can I use khazama to back up my original firmware?
Yes, khazama can read flash and save it to a file and is considered safer for backup. - What jumpers need to be set on the USBASP clone?
JP1 should default to 5V, JP3 default open, and JP2 is shorted using a paperclip to enable self-programming during target operations. - How many USBASP units are required to perform the upgrade?
You need two USBASP units to upgrade one by using the other as the programmer. - Where do I download the latest firmware for USBASP?
Download the firmware package usbasp.2011-05-28.tar.gz from http://www.fischl.de/usbasp/ and use the appropriate hex file. - How do I identify which firmware hex to use?
Check the USBASP chip information on your board (eXtreme Burner can display this) and choose the matching hex file from the firmware folder. - What is the recommended software to flash the firmware?
You can use eXtreme Burner or khazama; khazama has fewer risky buttons, while eXtreme Burner can show chip info. - What steps are involved in flashing the firmware?
Load flashfile to buffer, select correct hex, click Flash, then use command->verify flash to confirm verify ok. - What should I do after flashing to test the upgraded USBASP?
Unplug the JP2 short, disconnect and switch the flashed unit to PC as programmer, reapply JP2 on the other board, and check that the ISP clock error is gone.