This project uses green surface-mount LED’s along with an AVR ATTiny45 microcontroller to simulate the behavior of fireflies in a jar.
(note: the firefly behavior in this video has been greatly sped up in order to be easier to represent in a short film. The default behavior has significantly more variance in its brightness and delay between plays.)
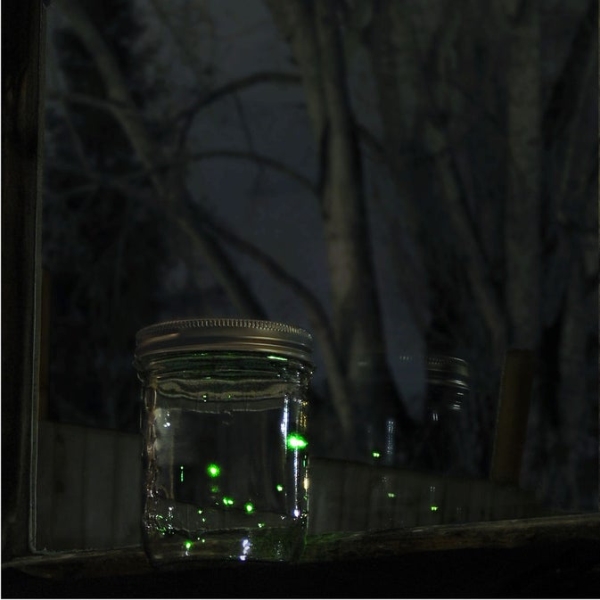
Step 1: About This Project
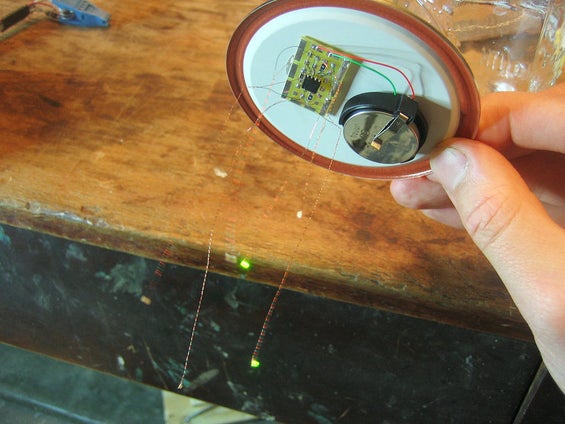
The inspiration for this project comes from having never lived in an area where fireflies were common and being deeply fascinated whenever I encounter them in my travels.
The flash patterns have been digitized from firefly behavioral research data found online and were modeled in Mathematica so that variations of speed and intensity could be generated. The final output was transformed by a lightness function and written into header files as 8-bit PWM data.
The software is written in avr-gcc C and source code is provided along with a pre-compiled .hex for convenience. The code has been significantly optimized for efficiency and to minimize power consumption. Crude runtime estimates predict a 600mAh 3V CR2450 battery should last between 4 to 10 months, depending on the song pattern used. RIght now the source comes with two patterns, song1 and song2, with song2 as default. Song2’s estimated runtime is 2 months, song1’s is 5 months.
This project involves a fair amount of surface-mount level soldering. However the circuit design is trivial and the fact that we’re able to use an off-the-shelf SMD prototyping board rather than having a custom PCB made greatly saves on cost. It would be very simple to create a non-surface mount version using the PDIP version of the ATTiny45 and through-hole LED’s.
The cost of the electronic components comes in at around $10-$15 (after shipping) or so and assembly time is on the order of 2 hours.
Step 2: Parts
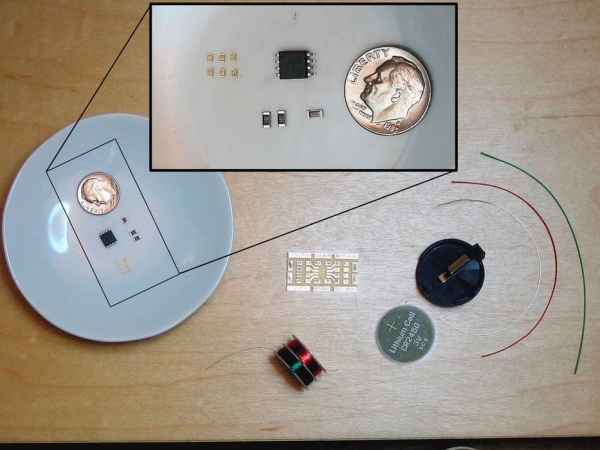
In this section I list the parts I used in the construction of this project. In many cases, the exact part is not required and a substitute will suffice. For instance, it isn’t required that you use a CR2450 battery to power the circuit, any 3V power supply will suffice and CR2450’s just happened to be the cheapest battery that I found which fit the size and capacity requirements I was looking for.
– 1 AVR ATTiny45V microcontroller, 8-pin SOIC package (DigiKey part# ATTINY45V-10SU-ND) (see note 1)
– 1 Surfboard 9081 SMD prototyping board (DigiKey part# 9081CA-ND)
– 6 Green LED’s (DigiKey Part# 160-1446-1-ND) (see note 2)
– 1 22.0K Ohm 1206 resistor (see note 3)
– 2 100 Ohm 1206 resistors (see note 2)
– 1 CR2450 battery holder (DigiKey Part# BH2430T-C-ND)
– 1 CR2450 battery (any 3V power supply will do)
– 1 spool of #38 Magnet wire (Ngineering.com Part# N5038)
– 6 inches or so of bare thin wire, I used stripped wirewrapping wire but about anything will do
Notes:
#1 – The difference between an ATTiny45V and an ATTiny45 is that the ATTiny45V is spec’d to run on voltages between 1.8V – 5.5V while the ATTiny45 wants 2.7V – 5.5V. For this project, the only implication is that the ATTiny45V can possibly run for just a little bit longer as the battery dies. In reality this probably isn’t the case and the ATTiny45 can be considered interchangable with the ATTiny45V (guess which one I happened to have on-hand when I started?). Use whatever one you can get your hands on. Also, the ATTiny85 will work just fine too for a little bit more money.
#2 – Substituting a different model of LED with different current-draw characteristics will have implications on what resistor you use. See the Circuit Schematic section for more information and check the spec sheet for your LED’s.
#3 – This is only a pull-up resistor, the specific value is not important. It just needs to be ‘big enough’ without being ‘too big’. See the Circuit Schematic section for more information.
Step 3: Tools

These are the tools I used:
Radio Shack #270-373 1-1/8″ Micro Smooth Clips
“clip-on-a-stick” – One of the Micro Smooth Clips mounted on a nail or other sort of stick.
Temperature-Regulated Soldering Iron with a fine tip (I use the Weller WD1001 digital soldering station with 65 watt iron and 0.010″ x 0.291″L micro tip). On a budget however, a 15-watt Radio Shack style soldering iron should be fine.
Helping Hands
Multimeter (for circuit testing)
Wire shears
Flux (I like the Kester Water-Soluble Flux-Pen, available at HMC Electronics (part# 2331ZXFP))
Solder (the thinner the better)
Tweezers
Exacto Knife / Razor blade
Step 4: Circuit Board Assembly – Part 1 of 3
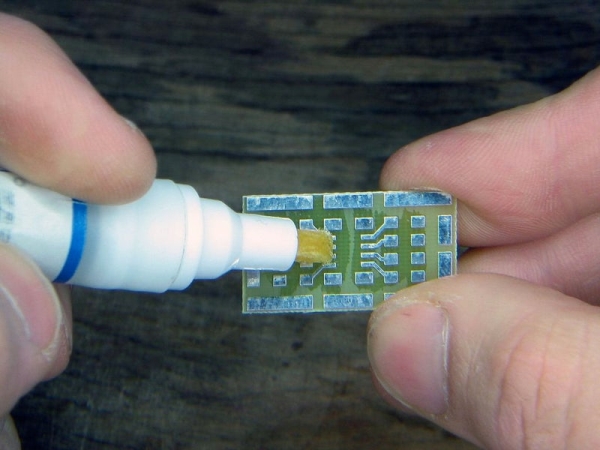
Preparing the circuitboard and attaching the resistors –
Flux the pads –
I tend to flux everything, even when using solder that already contains flux. This is especially true when I’m using the water-soluable flux-pen since cleanup is so easy and the pen makes it easy to not get flux everywhere.
Solder jumper wire across pads as illustrated –
The consequence of not having our own PCB made for this project is that we have to add our own bus wires. Also note the bus wires on PIN_C, PIN_D, and PIN_E. These are not strictly necessary but it looks cleaner this way and also gives us some elbowroom when attaching a clip to the microprocessor for programming.
Solder resistors to the board –
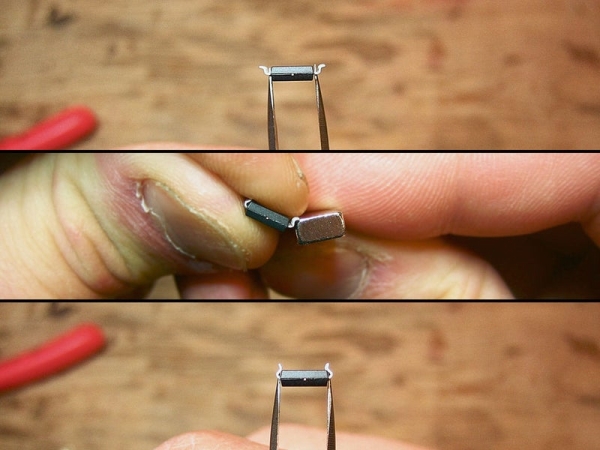
There are a number of good guides on the internet with examples of how to solder surface mount components. In general, you want to start by puting a little bit of solder on one pad. Holding the component in a pair of tweezers, heat the solder and hold one side of the component in the solder until it flows onto the pin. You want to keep the component flush with the board while you’re doing this. Then, solder the other side. See the pic.
Step 5: Circuit Board Assembly – Part 2 of 3
Soldering the microcontroller to the board –
Bend pins on the microcontroller –
Another consequence of not having our own PCB made is that we have to deal with the unusual width of the ATTiny45 chip which happens to be slightly wider than will comfortably fit on the Surfboard. The simple solution is to bend the pins inwards so that the chip stands on the pads instead of sitting on them.
Solder microcontroller to board –
Again, there are many SMD soldering guides out there but the executive summary is this:
– Flux the pins of the chip (I find this makes it *much* easier to get a good solder joint, especially with the weird surface topology of these bent pins)
– Hold the chip to the pad and draw solder down from the square pad and onto the first pin of the chip (add more solder if there isn’t enough on the square pad but you’ll typically have enough already).
– Make sure that the solder actually flows up and *onto* the pin. The soldering motion is sort of like “pushing” the solder onto the pin.
– Once the first pin is soldered, go to the pin on the opposite corner of the chip and solder that down as well. Once those two corners are tacked down, the chip should remain firmly in place and the remaining pins become simple to complete.
Also, be very careful that you solder the chip to the board in the correct orientation! If you look closely on the chip you’ll see a little round indentation on the top in one of the corners. That indentation marks pin #1 which I’ve otherwise marked as the “reset’ pin on the chip (see diagram). If you solder it down in the wrong orientation, I promise you that it won’t work 😉
Step 6: Circuit Board Assembly – Part 3 of 3
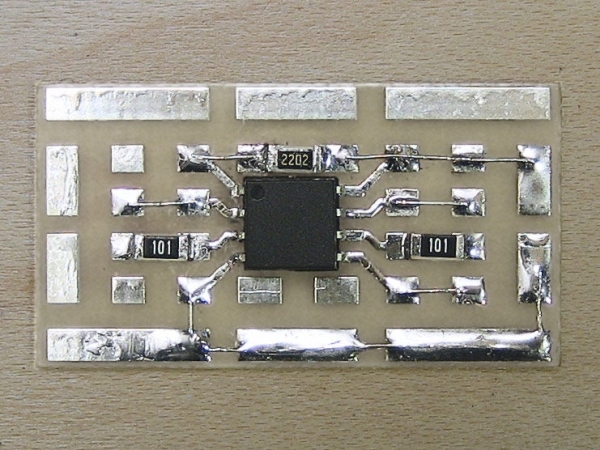
Test all connections –
Since everything is fairly small here, it’s quite easy to make a bad solder joint that looks fine to the eye. That’s why it’s important to test everything. Use a multimeter and test all of the pathways on the board for connectivity. Make sure to test everything, for instance don’t touch the probe to the pad that the pin of the chip looks soldered onto, touch the pin itself. Also test the resistance values of your resistors and make sure they match with their expected values.
A small problem now is easy to correct but becomes a big headache if discovered after all the LED strings have been attached.
Step 7: Making a Firefly LED String – Part 1 of 4
Prepare the wires –
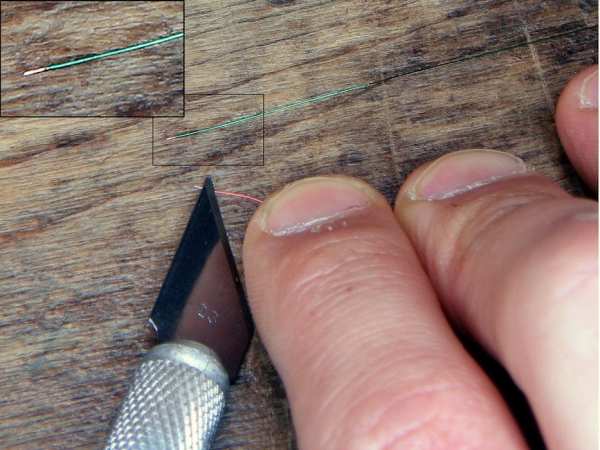
Ngineering.com has a good writeup of how to work with this magnet wire and covers tinning as well as twisting it which are two steps of making a firefly LED string. However I’ve never been satisfied with the results of burning away the insulation as they describe in the guide and have instead settled on gently scraping the insulation away with a razor. It’s quite possible that I simply wasn’t doing the tinning steps right (despite many attempts) and your own mileage may vary.
Cut red and green wires to desired length of string. I prefer to use different lengths of wire for each firefly string so that once assembled they don’t all hang at the same “altitude”. Generally I calculated the lengths that I was going to use by figuring out the shortest string (based on measuring the jar I was going to use), the longest string, and dividing the interval between them equally into 6 measurements. The values I ended up with for a standard widemouth jelly jar are: 2 5/8″, 3″, 3 3/8″, 3 3/4″, 4 1/8″, 4 5/8″.
Strip one end of each wire exposing a millimeter or less. Using the razor method, gently scrape the insulation away by softly dragging the blade over the wire. Turn the wire and repeat until the insultation has been removed. Using this method I find it hard to only strip a millimeter of wire so I simply cut off the excess.
Step 8: Making a Firefly LED String – Part 2 of 4
Preparing the LED –
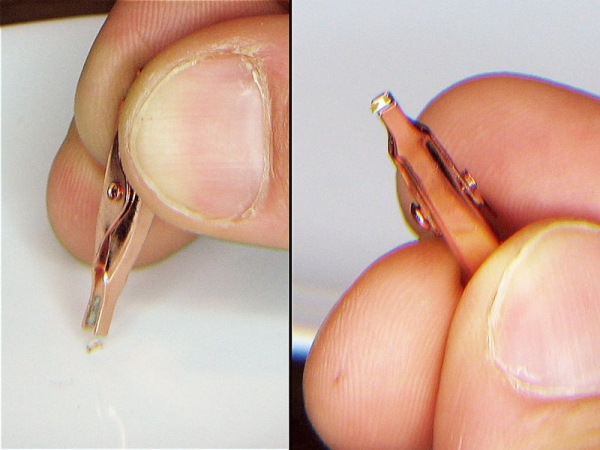
Using a microclip, pick up an LED so that the bottom side is facing out, exposing the pads.
Mount microclip + LED in the helping-hands and apply flux to the pads on the LED.
Step 9: Making a Firefly LED String – Part 3 of 4
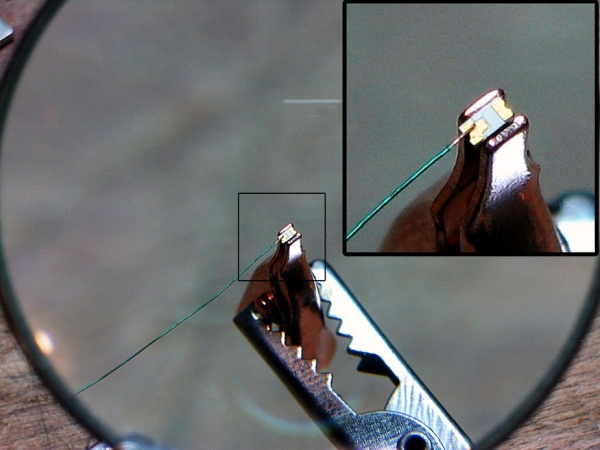
Soldering the LED –
Using another microclip, pick up the green wire first and mount it in the helping-hands.
Now comes the hardest part of the project, soldering the LED. Manipulate the helping hands so that the exposed part of the green wire is resting gently on the cathode pad of the LED. This is the time-consuming part that requires patience and cannot be rushed. Plan your moves in advance and act slowly and with deliberation. This is basically ship-in-a-bottle type delicate work and shouldn’t be underestimated. However you don’t have to be the favorite son of a watchmaker in order to pull this off either, it *is* within the realm of mortals. I find it considerably easier to manipulate the arms of the helping hands rather than the wire itself or the microclip.
Rest the exposed part of the wire on the cathode pad and arrange your mangifying gear and lighting to make sure you can perfectly see what you’re doing in preperation for soldering.
Using a soldering iron set to around 260 degrees C, pick up a very small blob of molten solder onto the tip of the iron and, very gently, touch the tip of the iron to the cathode pad on the LED. A small amount of solder should instantly run off of the tip and onto the pad (thanks to the flux), securing the wire to the pad in the process. Be careful not to burn the LED by holding the iron to the pad too long (3 seconds max, when done right you need less than 0.10 seconds of tip contact, it’s very fast).
Unfortunately what tends to happen here is that you knock the wire off the pad with the tip of the iron, forcing you to go through setting it all up again. For that reason you have to be *very* slow and gentle with the iron. I tend to place my elbows on the workbench on either side of the helping-hands and hold the iron with both hands in a seppuku type grip, gently bringing the iron down towards the pad. This grip is sometimes the only way I can get enough control. Another tip: don’t drink a pot of coffee before attempting this.
This does get easier with practice.
(Very gently) tug on the green wire to test that it’s firmly secured. Release the wire from the microclip and, without changing the orientation of the LED, repeat the process with the red wire, only this time soldering it to the anode pad of the LED. Since the red wire will be flying over the cathode (green) pad, it’s important to not have too much exposed red wire, lest it come down in contact with the cathode pad and create a short.
Source: Jar of Fireflies
