Summary of Micro Controlled Firework Rocket Launcher…
This article details a DIY safety rocket launcher project using an Arduino and Bluetooth module to remotely ignite fireworks, aiming to reduce accidents caused by careless handling. The guide outlines the necessary components, assembly steps for the circuit and heating coil, wiring instructions, and software setup via a custom Android app. It emphasizes safety by allowing remote control of the ignition process while providing flexibility for users to modify features like battery types or code parameters.
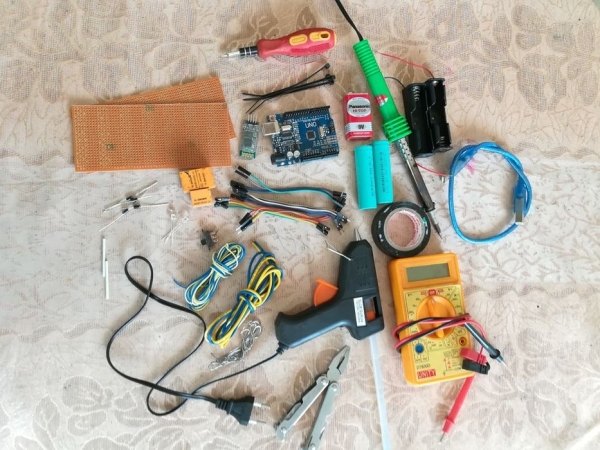
Parts used in the Arduino Bluetooth Firework Rocket Launcher:
- Arduino UNO / Arduino pro mini
- HC-06 Bluetooth Module
- 2pcs of 5V Relays
- 2pcs of 1N4004 Diodes
- 2pcs of Red LEDs
- 2pcs of 100ohms resistors
- Soldering wires
- Switch
- 9V Battery / 2pcs of 3.7V 18650 Batteries
- 12v Battery
- Jumper Cables
- Nichrome Wire
- Connecting wires
- Copper rods
- Dot Boards
- Hot melting glue gun
- Soldering Iron
- Tapes
- PVC T socket (optional)
- Aluminum Pipe (optional)
Nowadays so many people, specially children just enjoy with the fire works carelessly
so, I decided to create safety rocket launcher to minimize those damages instead of suggesting them
Here I am showing how to make a cheap Arduino bluetooth
Firework Rocket Launcher
It’s simple to make and so easy to program. A unique design make it different from that of other Arduino bluetooth launchers.
Hope you like this idea and after this instructable, you can upgrade and change the features or anything else!
Step 1: Parts, Materials and Tools
- Arduino UNO / Arduino pro mini
- HC-06 Blutooth Module
- 2pcs of 5V Relays
- 2pcs of 1N4004 Diodes
- 2pcs of Red LEDs
- 2pcs of 100ohms resistors
- Soldering wires
- Switch
- 9V Battery / 2pcs of 3.7V 18650 Batteries( to power up the Arduino Board & attachments)
- 12v Battery ( to heat up the coil)
- Jumper Cables
- Nichrome Wires
- some Connecting wires
- A few Copper rods
- 2pcs of Dot Boards
- Hot melting glue gun
- Soldering Iron
- Some tapes
- PVC “T” socket ( optional)
- Aluminum Pipe (optional)
Step 2: Assemble the Main Circuit…
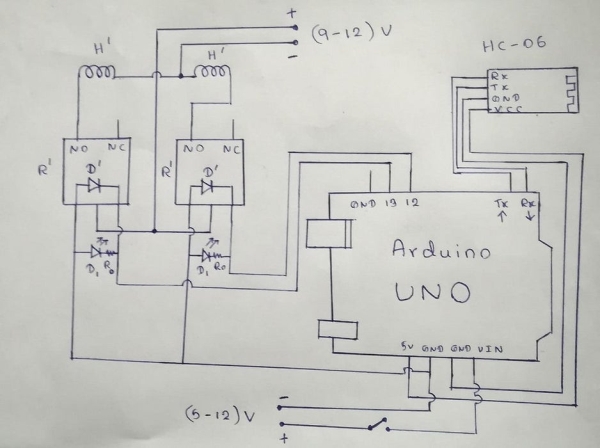
First you need to make the circuit as shown in the diagram.
R’ – 5v relays
D’ – 1N4004 diodes
D1 – Red LEDs
R0 – 100ohm resistors
H’ – Heating Coil
when you making this circuit you can mix your own ideas with this For example: you can use 2pcs of 18650 batteries instead of 9v battery and also you can use Arduino pro mini board ( its just need very little space )
Wiring Instructions –
Bluetooth module
– “TX of Bluetooth Module” goes to “RX of Arduino”
– “RX of Bluetooth Module” goes to “TX of Arduino”
– “VCC of Bluetooth Module” goes to “5v of Arduino”
– “GND of Bluetooth Module” goes to “GND of Arduino”
– The State & Key pins of the BT modules are unused.
After making the circuit please make sure all the components well in order
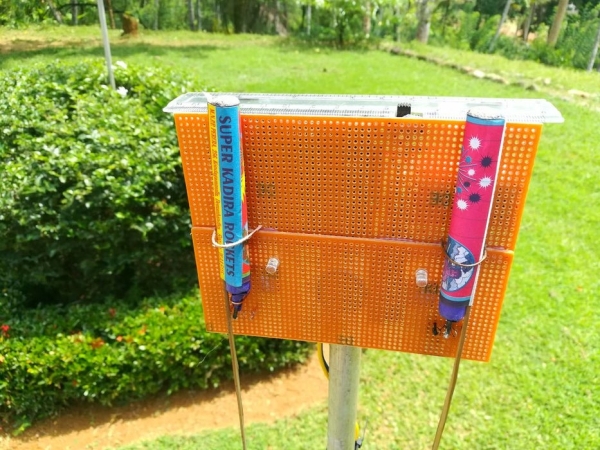
Step 3: Making the Heating Coil

You just need to buy a Nichrome coil from your local electronic shop or easily get it from old burn out soldering iron
then place some copper rods like that to attach those coils, after that take a little rounded rod and make 3 or 4 turns
by using it, Finally attach those coil into that copper rods very tightly
Step 4: Soldering Wires & Attach Relays…
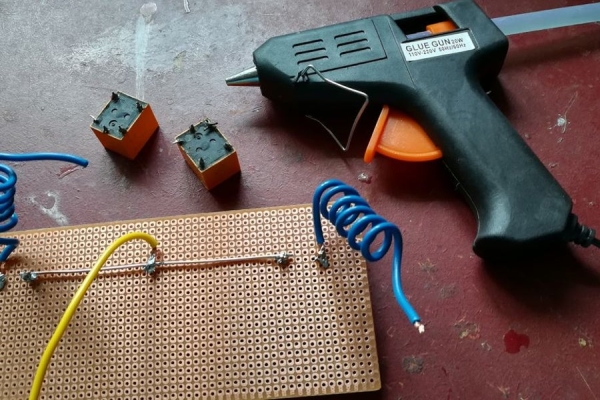
After making the coil you need to solder wires as shown in the picture , then solder those wires to relay coils
next you need to add 1N4004 diodes to relays ,finally add some jumper cables to them
Step 5: Attach Components With Arduino Board…

After making the coil & relay circuit you need to attach Blutooth module and other things with Arduino board as shown in the pictures
Step 6: Application & Code..
You can use the below link to download the free application
Click here to download the Android Apllication
Then Power up the circuit
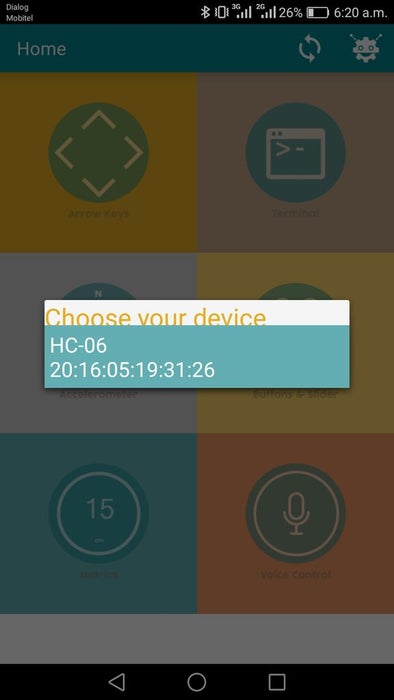
After that enable Bluetooth and establish connection with BT module.
(ex. HC-06, password 1234)
You can use the code witch attach with this page
Now you can feel free to control it your self
in this program i just use #1 for heat up the first heating coil & #2 for cut off the power
#3 for heat up the other heating coil & #4 for cut off the power ( you can change the values in your own by changing the code )
Note- Please dont power up the heating coil more than 5 seconds it may damage your battery
Source: Micro Controlled Firework Rocket Launcher…
- How do I connect the Bluetooth module to the Arduino?
The TX pin of the Bluetooth module connects to the RX of the Arduino, the RX pin connects to the TX of the Arduino, VCC goes to 5V, and GND connects to GND. - What is the best way to power the Arduino board and attachments?
You can use a 9V battery or two 3.7V 18650 batteries to power up the Arduino Board and attachments. - Can I use an Arduino Pro Mini instead of an Arduino UNO?
Yes, you can use an Arduino Pro Mini because it requires very little space. - Where can I get the Nichrome wire for the heating coil?
You can buy a Nichrome coil from a local electronic shop or easily get it from an old burn-out soldering iron. - Does the project require a specific password to connect via Bluetooth?
Yes, when establishing a connection with the BT module such as HC-06, the password is typically 1234. - What function does the number 1 key serve in the application?
In this program, pressing #1 heats up the first heating coil. - Can I change the button values assigned to different functions in the code?
Yes, you can change the values in your own by modifying the code provided. - How long should I power up the heating coil?
Please do not power up the heating coil more than 5 seconds as it may damage your battery.