
Hey fellow DIY’ers. Have you ever found your house door open after returning from a long trip? Me neither. But it is always good to have a safety system in our houses. I’m not talking about the old school projects like a laser trip wire, no no, that’s boring. This is something from the future. Okay I’m exaggerating :p
With concerns growing for the safety of people who live solitary lives(especially women), this innovation will be of great aid to them. I’m currently living in hostel and half my stuff has been flicked already….just kidding 😛
This device works as an alert-notification system wherein a notification is sent to your smartphone when the door is open. The refresh period is 15 seconds. So if you don’t get a notification every 15 seconds, the door is closed. Trust me, it is a pretty simple and inexpensive project.
Let’s not make the intro any longer lol. Just sit back and enjoy the making!
Supplies:
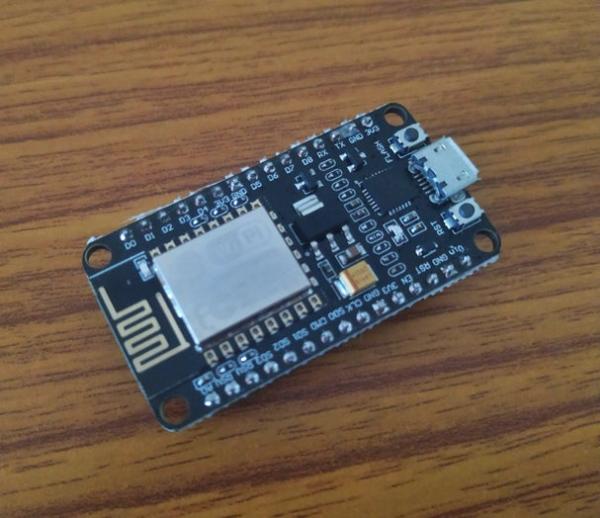
NodeMCU (esp8266) microcontroller: https://www.amazon.com/KeeYees-Internet-Developmen…
5V power supply: https://www.amazon.com/MUZOCT-Supply-Charger-Adapt…
Magnets
Reed switch (optional) https://www.amazon.com/Cylewet-Normally-Magnetic-I…
Jumper wires
Cardboard
LED
Step 1: Making the Reed Switch
Ok. To make a door open detector, firstly you need a door :P. Apart from that you need something that can detect the door state. For that we will be making a something called a reed switch.
Reed switches are easily available online but I tried to keep this project cost effective. Also I was lazy to go buy a reed switch XD . In case you want to buy one, I’ve provided purchasing link in the supplies section. If you’re like me and want to DIY it, this is my approach.
A reed switch is basically a switch that turns on when a magnet is brought near it. One of the parts should move when the magnet is brought near it and should come in contact with a fixed part and hence the circuit is complete.
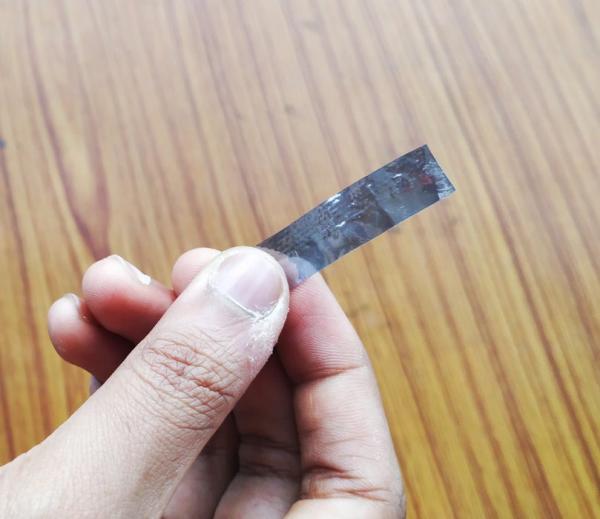
Making the moving part:
I used a hard plastic strip to make the moving part as it retains its original position after deflection by the magnet. I fixed a small Neodymium magnet to one end of it. I then attached a wire to the magnet.
Making the fixed part:
I used a piece of cardboard and stuck a thin coiled copper wire to it.
In essence, the moving part is attached to the fixed part such that the magnet of the moving part lies directly over the copper coil of the fixed part. Now, if another magnet is brought near it, there would then be contact between the two parts. Finally, connect a female jumper to the copper wires of each part so that we can later connect it to the NodeMCU.
This completes the reed switch. Wohoo!
Here’s the DIY reed switch in action!
Step 2: Programming the NodeMCU
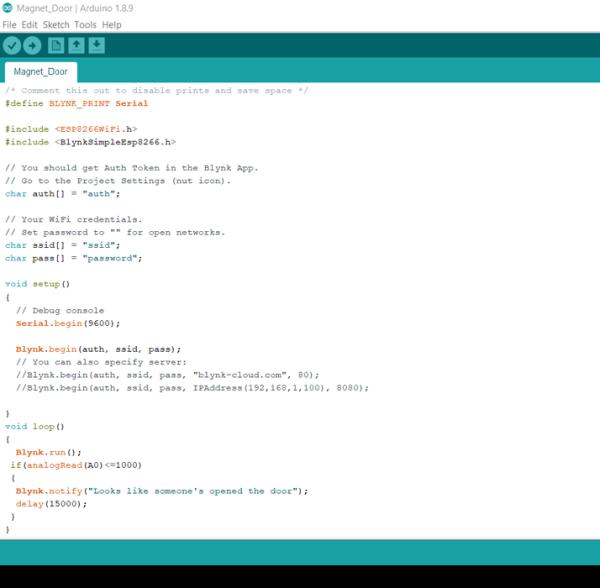
Ok so this step is complicated… Nah just kidding :P. You can directly upload the code provided in this step. But if you want to know how the code works and maybe tweak it to your liking, I’ve done a code walk through at the end of this instructable, check that out.
All you have to do is replace the part that says “ssid” with your WiFi user id and the part that says “password” with your WiFi password. Don’t worry, I won’t stalk you XD.
Step 3: Configuring Blynk App
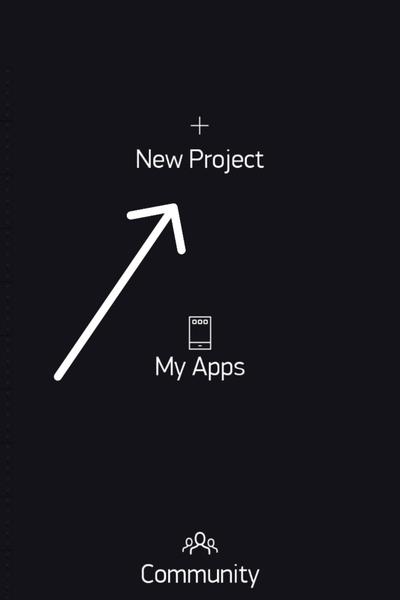
Install the Blynk app by clicking here.
First, create a new project and then an authentication token will be mailed to you. This token should be copied and pasted in the “auth” part of the code provided in the previous step.
In Blynk, tap anywhere on the project screen and a widget box will appear and scroll down to find the notification widget. Tap on it and it will be placed on the project screen.
YAYY!! We’re done configuring Blynk.
Step 4: Making the Cardboard Enclosure

I used a spare cardboard which i found lying around in the hostel for the enclosure. The box can be done however to your liking. Ensure that the dimensions with which you construct your enclosure are in accordance with the gap between the door and the wall and can accommodate the components.
Make three cut-outs to place the reed switch, LED and the USB cable that will power the NodeMCU.
Step 5: Making the Connections
Connect one of the jumpers from the reed switch to the 3V pin of the NodeMCU and the other jumper to the A0 pin.
I also connected an LED to the 3V pin of the NodeMCU which indicates that the device is currently on… and it also looks cool 🙂
Step 6: Installing the System

Finally, the last step!
I used a double sided tape to stick the cardboard against the frame of the door and I have attached a magnet at the appropriate distance such that the reed switch is activated when the door is closed.
Now every time the door is opened, the reed switch is deactivated because the magnet moves away from it. So the Nodemcu asks Blynk to send you a notification saying that your door has been opened. You will receive this notification every 15 seconds until the door is closed again.
Hope you find this project useful.Thank you for viewing my innovation. I hope you enjoy making it as much as I did 🙂
Source: MODAS: Magnetic Open Door Alert System