Summary of Program Artou ATmega32 Development Board
This article details programming an ATmega32 development board without local software installation by using the online XpressIDE compiler and portable AVRdudess. The process involves creating a C project in the browser, generating a hex file, and uploading it to the board via a USBasp programmer connected to the ISP port.
Parts used in the Artou ATmega32 Development Board:
- ATmega32 processor
- Four bright LEDs
- USB connector
- ISP programming port (10pin header)
- JTAG programming port
- USBasp programmer device
- XpressIDE web platform
- AVRdudess portable executable
Program an AVR development board without installing any software. ExpressIDE and AVRdudess.
Story
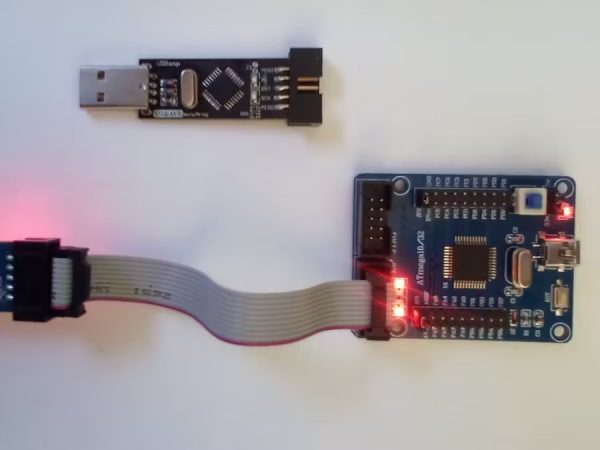
ATmega32 Board
Artou makes a development board with the ATmega32 processor. Like an Arduino Uno but this processor adds a PORTA that is not on the ATmega328p.
We will toggle the four bright LEDs next to the programming ports. Since they are connected to PORTA pins 4, 5, 6, 7 so the code we use in this project will not compile for a Uno. The compiler will stop with error messages.
Arduino IDE needs add-ons from MightyCore to program this processor. So, let’s use XpressIDE from MicroChip, the manufacturers of the chip.
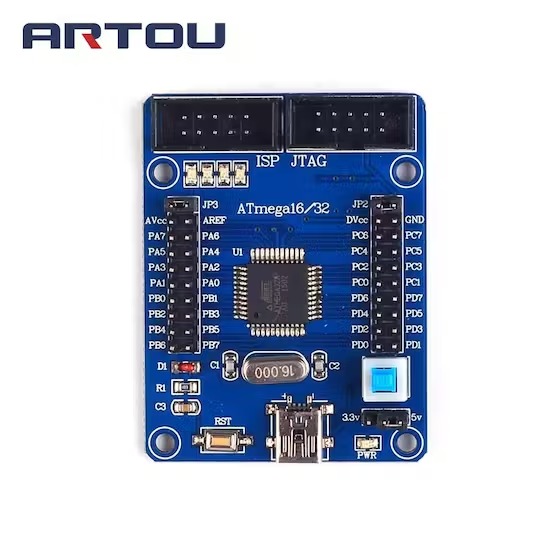
Image from vendor
The USB connector does not program the device. It can power the board. We will use power from our USBasp programmer.
External Programmer
The board has both ISP and JTAG programming ports. We will use an economically priced USBasp programmer device so we plug the cable into the 10pin header ISP port. Careful! The box connector is keyed to go in one way.
Later in the project you can look at a list of programmer devices.
XpressIDE
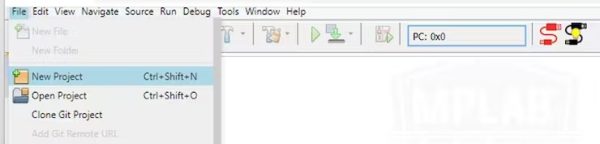
Log in to XpressIDE online and create a new project. Click on menu File -> New Project or type Ctrl+Shift+N on your keyboard.
Select Microchip Embedded – Standalone Next.
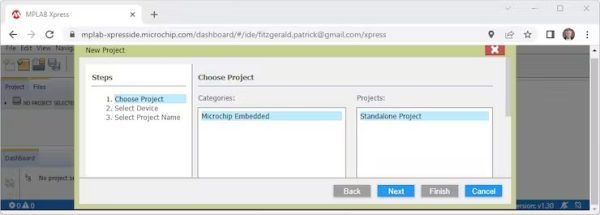
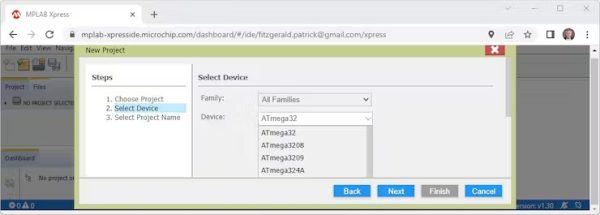
Select device ATmega32 Next.
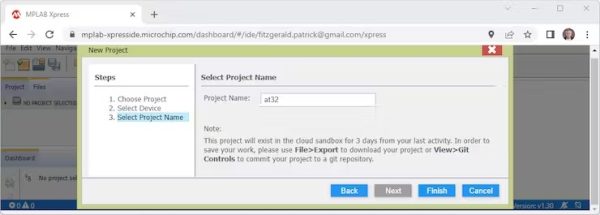
Project Name at32 Finish.
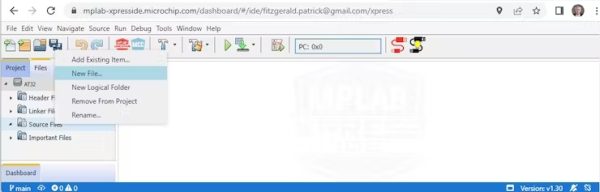
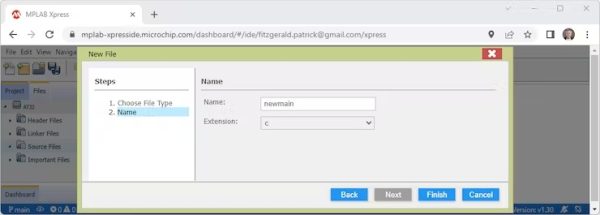
Look in the Source Files folder and we have no files. We need to create what is called a main file. The file can be any name but it needs to have a main function in the code.
Click directly on the Source Files folder New File. If you muff it up you can come back, later, and use Add Existing Item.
XC8 Compiler – C Main file Next. The compiler is on servers at MicroChip.
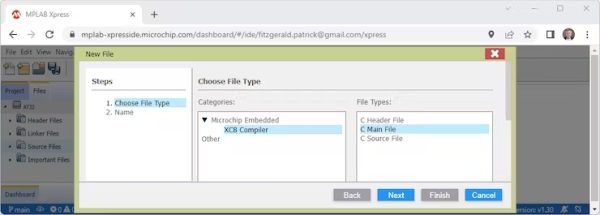
Leave name newmain.c. Finish.
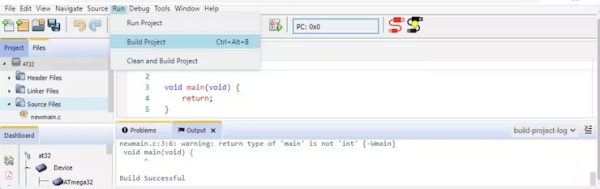
Default code will compile but not perform any function. Click the Run menu and Build Project or type Ctrl+Alt+B on your keyboard. Build Successful because the default code is grammatically correct.
Replace with our code
// toggle IOs on output ports
#define F_CPU 16000000
#include <avr/io.h>
#include <util/delay.h>
int main(void)
  { DDRA=0xFF; DDRB=0xFF; DDRC=0xFF; DDRD=0xFF;  // all ports as output
while(1)
  { PORTA++; PORTB++; PORTC++; PORTD++;   // binary count
    _delay_ms(50); }}
// ATmega32 has a PORTA
We will use the menus across the top. Icons for useful commands.
Run Project generates a hex file in your Downloads folder. Build Project command checks that your code compiles. Clean and Build Project ensures a fresh rebuild of all code.

After we click Build Project we will see an Output screen with text information about our build. Look closely and you see the build commands and parameters.
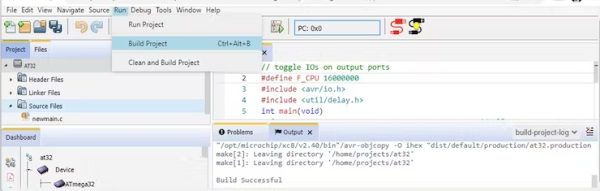
Build successful we are ready.
Run Project
Run menu click Run Project. We now have a new file in our download folder. Look at the bottom of the screen.
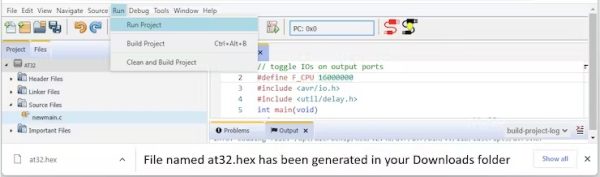
You may see at32(1).hex if there is an older file there. You need to delete old hex files or they will accumulate. They are all valid programs.
Downloads
Look in downloads. This is the hex file generated by the XPressIDE webpage and delivered to your computer. We now have to upload to our board.

Upload
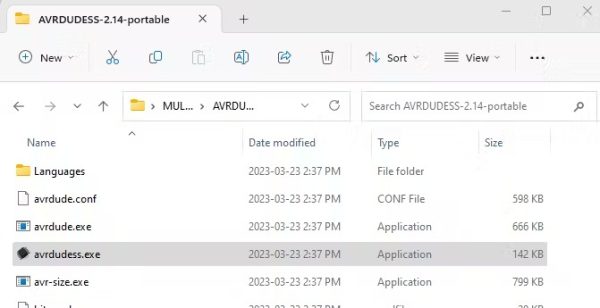
We are going to use portable AVRdudess from a USB key. Find the avrdudess.exe executable and double click to open.
At the top of the AVRdudess screen use the Programmer(-c) menu to select usbasp on the usb port. Select MCU(-p) ATmega32 and click Detect. Use the box with dots… in the Flash menu to navigate to our downloaded hex file located in Downloads.

Look at the bottom of the screen below the word Program!
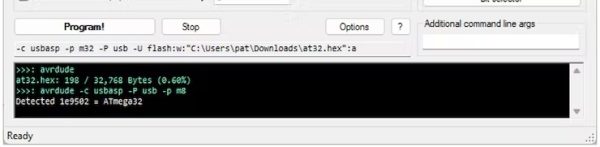
This is good. The program has checked the MCU connected through the usbasp and sees that it is an ATmega32 device. We have located a hex file and can upload just by clicking Program!.
AVRdudess is ready to execute the terminal command avrdude.exe-c usbasp -p m32 -P usb -U flash:w:”C:\Users\user\Downloads\at32.hex”:a. If you type avrdude commands in the dos window you know this is what we want to do.
Source: Program Artou ATmega32 Development Board
- Why can't I use the Arduino IDE for this board?
The code will not compile because the ATmega32 has PORTA which is not on the ATmega328p found in Uno boards. - How do I access the compiler without installing software?
You must log in to the XpressIDE website online to create and build your project. - Does the USB connector program the device?
No, the USB connector only powers the board; you must use a separate programmer like the USBasp. - Which port should I use for the USBasp programmer?
You should plug the cable into the 10pin header ISP port. - What command checks if the code compiles correctly?
You use the Build Project command or type Ctrl+Alt+B to verify the code builds successfully. - Where is the generated hex file saved?
The Run Project command generates the hex file in your computer's Downloads folder. - How do I select the correct device in AVRdudess?
Select usbasp for the programmer, ATmega32 for the MCU, and click Detect to confirm the connection. - What happens if old hex files remain in the downloads folder?
Old files will accumulate, so you may need to delete them before running new projects.