Summary of Programming ATMEGA32 (or Any Other AVR) Using Arduino IDE
The article explains how to use an Arduino as a programmer/debugger to flash ATMEGA32 (40-pin PDIP) microcontrollers via the Arduino IDE. It covers loading the ArduinoISP sketch onto an Arduino, adding board support by merging a downloaded boards.txt snippet and copying a variants/mega32 folder into the Arduino hardware/arduino/avr directory, then selecting the ATMEGA32 board in Tools > Board to program the chip directly.
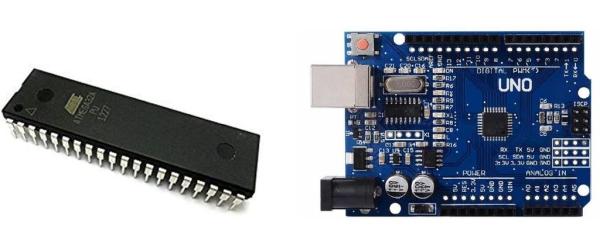
Parts used in the ATMEGA32 Programming with Arduino:
- Arduino development board (example: Arduino UNO)
- ATMEGA32 microcontroller (40-pin PDIP)
- USB cable for Arduino
- ArduinoISP sketch (software)
- boards.txt modification file/snippet
- variants folder containing mega32 variant files
- AVRISP mkII (optional, used to program UNO in example)
- Breadboard or prototype board (implied for ATMEGA32 placement)
The Arduino is a very cool development board where you could create hundreds of projects. But it doesn’t mean that for every project you create, you would need an Arduino board dedicated to that project alone. A hundred projects and a hundred Arduinos? That’s a waste of money! Depending upon the requirements of your project, you could choose from a wide array of microcontrollers – try AVRs from Atmel (now Microchip, yes the maker of the PIC). One microcontroller which is very tinkerer-friendly is the ATMEGA32, which is offered in a 40-pin PDIP package. This makes it very easy to be incorporated in prototype board and breadboard set-ups. In this ‘ible, ATMEGA32 will be used but the same flow applies to other AVRs.
Step 1: Convert Your Arduino Into a Debugger/programmer
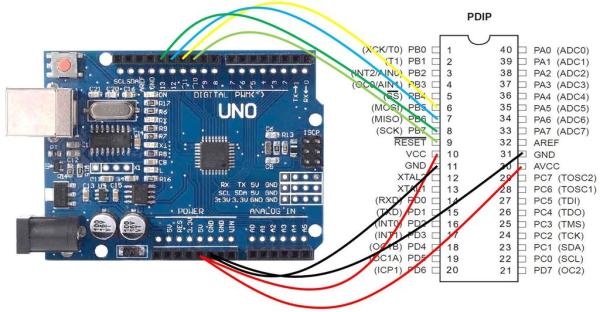
There’s a sketch that you could load to your Arduino which can transform this development board into a debugger or programmer. This means we can use the Arduino to load a program to another microcontroller – in this case, the ATMEGA32. Programs (yes, sketches) can be created and compiled using the Arduino IDE then flashed to the ATMEGA32. If things go well, you can eliminate the Arduino development board from your project and the ATMEGA32 does all the work from that point on. Go to Examples and find the ArduinoISP sketch. Make sure everything is set up correctly. In my case, I’m using an UNO board and to program the sketch to my UNO board, I’ll use the AVRISP mkII (my default). Go to Sketch then click Upload.
Unzip. Inspect the files. The things we need are the “boards.txt” and the contents of the “variants” folder. Open your Arduino folder in Program Files. Go to hardware>arduino>avr. You will see the “board.txt” file. This file lists all boards available for use on your Arduino. We need to add boards for ATMEGA32 into this file. To do this,append the contents of the downloaded board.txt file to the original board.txt file. CAUTION: You need not include the first few lines (see image).
Next, go to hardware>arduino>avr>variants. Copy into this folder the contents of the downloaded “variants” folder. It is named mega32.
Now, check to see that ATMEGA32 boards are now available for use in the Arduino IDE. Go to Tools>Board.
Read More: Programming ATMEGA32 (or Any Other AVR) Using Arduino IDE
- How do I turn my Arduino into a programmer or debugger?
Load the ArduinoISP sketch from Examples into the Arduino IDE and upload it to your Arduino board. - Can I program an ATMEGA32 using the Arduino IDE?
Yes, after adding ATMEGA32 board support to boards.txt and copying the mega32 variant folder into hardware/arduino/avr, select the ATMEGA32 board in Tools > Board. - What files do I need to add ATMEGA32 support to the Arduino IDE?
You need the boards.txt contents for ATMEGA32 and the contents of the variants folder named mega32. - Where do I place the downloaded boards.txt contents?
Append the downloaded boards.txt contents into the Arduino installation hardware/arduino/avr/boards.txt file, omitting the first few lines as instructed. - Where do I put the variants folder for ATMEGA32?
Copy the downloaded variants folder contents named mega32 into hardware/arduino/avr/variants in the Arduino installation directory. - Do I need a separate programmer to upload the ArduinoISP sketch to my Arduino?
In the example, the author used an AVRISP mkII to program the UNO, but you can upload the sketch via standard Arduino upload methods if available. - After programming the ATMEGA32, do I still need the Arduino board in my final project?
No, if programming succeeds you can remove the Arduino; the ATMEGA32 runs the project independently.