Let’s go through a classic beginner projec that combines circuits, code, and fun: Simon Says. Building your own Simon Says game can be a great way to quickly dive deep into the awesome world of tinkering. You get experience with building some simple circuits (buttons and LEDS) and also some exposure to code that can border on advanced at times. Grab a LinkIT ONE and let’s get started!
Step 1: Supplies
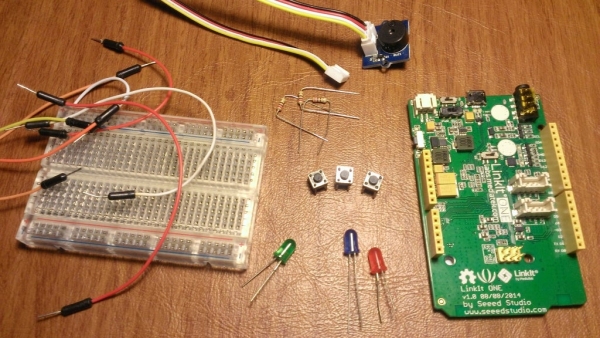
Even though this a beginner project, we’ll need quite a few things. Don’t worry though, all of these things are relatively simple to find at Sparkfun or your local electronics store.
- LinkIT ONE Board
- Red LED
- Green LED
- Blue LED
- 330 ohm resistors (3x)
- Buttons (3x)
- Grove Buzzer
- Jumper Wires
- Breadboard
Step 2: Hooking Up Your Circuit
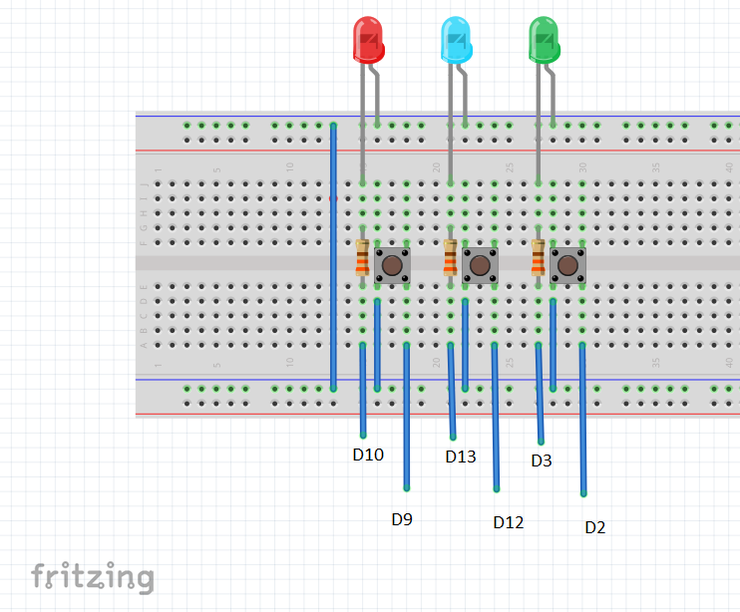
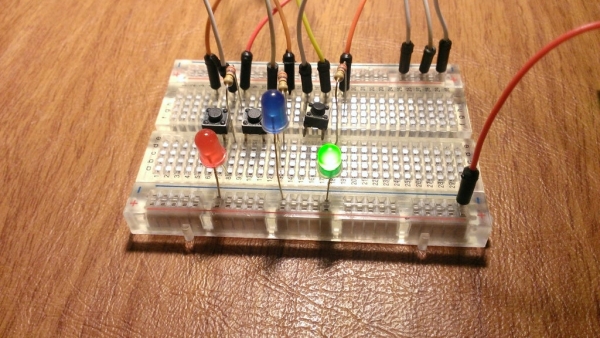
Next, we’ll need to hook up our button and LED circuit. This is a fairly simple circuit that combines elements of a basic button, and of an LED.
Remember, a button circuit looks for a ‘HIGH’ signal, AKA, that the circuit is actually completed (which happens when you press a button down. For more info, check out the this resource.
The LED is a basic circuit, and only lights up when we send a high signal. Including a 330 ohm resistor in between is a good idea. This prevents you from overloading your LED and burning it out.
Set up the circuit just like the diagram and picture above!
Step 3: Hooking Up the Buzzer (Optional)
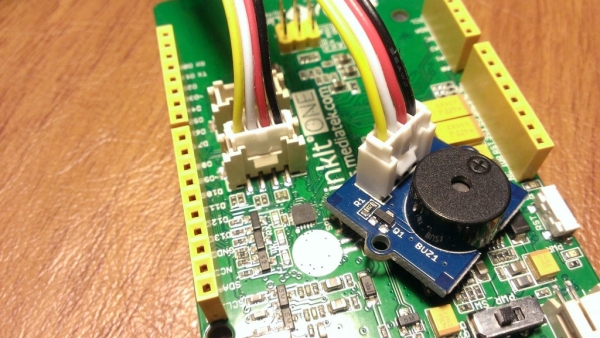
I added a Buzzer with my Grove Buzzer just because I had it laying around and I thought it would add a fun extra element to the game. You’re in no way required to do so, and not doing it won’t affect your game at all.
That being said, a buzzer adds a pretty cool element to the game. I had it buzz when users failed, and also when users won. Audible feedback can make it really fun!
All you have to do for this step is hook up the Grove sensor to one of the Grove pins on your LinkIT ONE. This is one of the great things about the LinkIT ONE, you get grove slots baked right in! How awesome is that?
Step 4: Deploying the Code

Now for the tough part. The code for this project can balloon in complexity quite easily. Yes, it really is just a bunch of button and LED logic, but adding in the random generator (along some something to store it) can get difficult quickly.
In the interest of making this a simple guide, rather than a full out textbook, let’s treat the code as a bit of a black box for now. The code we will use is based off of code from a Sparkfun Repo, so it is very well commented and easy to understand. Hopefully reading through it, you are able to pick up on what exactly is going on. Take note that modifications have been made in order to make it work on the LinkIT ONE.
Download the code and deploy it to your LinkIT ONE.
Step 5: Completion!
You’ve done it! You now have a fully operational Simon Says Game to play with!
I Really think the best part about this project is that it combines a lot of great electronics and code together to form a great beginner project for people interested in tinkering. Hopefully this project has provided that you and given you a great platform to go forward on! Happy Making!
Source: Simon Says With LinkIT ONE