
Summary of A very simple DIY solar-powered USB charger
This article details a simple DIY solar-powered USB charger built to charge a TP-Link 10400mAh power bank. The project uses a 6V/3.5W solar panel connected directly to a TD1410-based 5V buck converter module, requiring only two wires for assembly. The author notes the setup costs under $8 and highlights the module's built-in polarity protection and plastic enclosure.
Parts used in the DIY Solar-Powered USB Charger:
- TP-link 10400mAh USB Power Bank
- 6V/3.5W solar panel
- TD1410-based 5V buck converter module
- Two connecting wires
- Plastic enclosure (included with the module)
Yesterday, I built a very simple DIY solar-powered USB charger for my TP-link 10400mAh USB Power Bank. All I needed was a 6V/3.5W solar panel and the TD1410-based 5V buck converter module. I bought both of them on Aliexpress for less than $8.
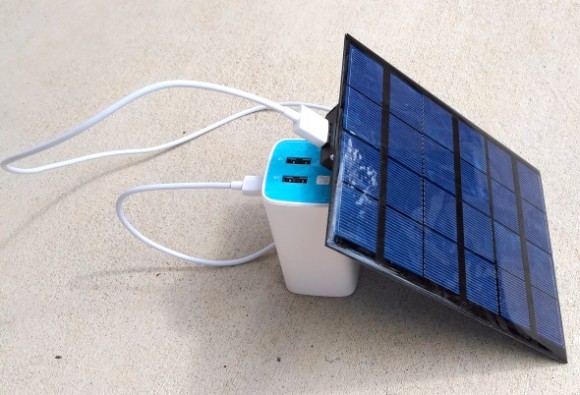
It was one of the easiest projects I built. All I needed to do was to connect the input of the 5V step-down buck converter to the output of the solar panel using two wires.
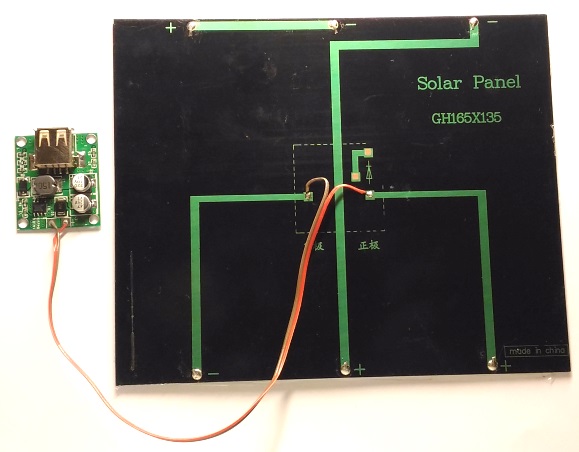
From TD1410 datasheet,
The TD1410 is a 380 KHz fixed frequency monolithic step down switch mode regulator with a built in internal Power MOSFET. It achieves 2A continuous output current over a wide input supply range with excellent load and line regulation. The device includes a voltage reference, oscillation circuit, error amplifier, internal PMOS and etc.
For 5V output from TD1410, the input voltage can range from 5.5V to 20V (from the datasheet). I measured the solar panel open-circuit voltage under sunny conditions to be ~ 6.5V. Under the load of 200 mA, the solar panel output voltage was reduced to ~6.0V. The TD1410-based 5V buck converter module that I purchased on Aliexpress already has a diode at its input for polarity protection. So I didn’t need any extra diode for the solar panel output as it directly goes to the input of the buck converter. The nice thing about this buck converter is it has a USB-A female port for output, which is same as found in standard USB chargers. It also comes with a plastic enclosure (see pictures below).
For more detail: A very simple DIY solar-powered USB charger
-
What components are required to build this charger?
You need a 6V/3.5W solar panel, a TD1410-based 5V buck converter module, and two wires. -
How much did the parts cost?
The solar panel and buck converter were purchased on Aliexpress for less than $8. -
Does the buck converter require an extra diode for the solar panel?
No, the module already has a built-in diode at its input for polarity protection. -
What is the input voltage range for the TD1410 to output 5V?
The input voltage can range from 5.5V to 20V according to the datasheet. -
What was the measured voltage of the solar panel under load?
Under a 200 mA load, the solar panel output voltage reduced to approximately 6.0V. -
Does the buck converter module include a standard USB port?
Yes, it features a USB-A female port for output similar to standard chargers.
