
Summary of Soldering an SMT MOSFET Driver with a hotplate using microcontroller
This article explains how to easily solder Surface Mount Device (SMD) components at home using a hotplate instead of a traditional iron. The process involves cleaning pads, applying minimal solder paste, carefully placing components with tweezers, and reflowing the solder for 5-7 minutes. This method reduces fume exposure and effort compared to manual soldering.
Parts used in the SMD MOSFET Driver Kit:
- PCB
- Solder paste
- SMD components
- Hotplate
- Isopropyl
- Flux
- Tooth pick
- Tweezers
- Magnifying ring or head mounted magnifying goggles
Soldering SMD components isn’t as hard as you might think. In fact it’s easy.
If you follow this instructables you’ll soon see just what great results you can obtain at home using just a hotplate.
It’s not just being able to make small circuit boards that makes SMT soldering so good it’s also a nicer way to solder. All the ‘hard’ work is in placing the components. You then only need to reflow the solder for about 5-7 minutes and your done.
No more long soldering sessions spent hunched over a hot soldering iron breathing in all those fumes.
All you need is the PCB, some solder paste, the SMD components and a hotplate.
If you’d like a kit that includes the PCB, components and solder paste then follow this link
SMD MOSFET Driver Kit
More information is available at
www.CarbonFrog.com
Step: 1 Gather all the parts
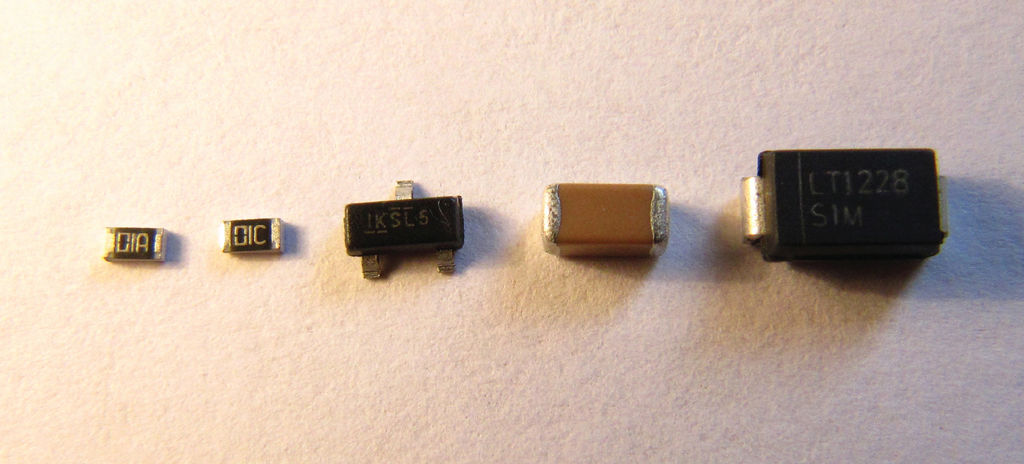
Gather and identify all the parts, remove packaging and lay out ready to be placed on the board.
Make sure you know which resistor is which, they are each marked as shown.
Also ensure that the diode will go in the correct way round. The cathode, the end you want connected to the positive rail, is marked with a line.
Step: 2 Prepare the PCB
Clean the boards’ pads, preferably with isopropyl and put some flux on each of the pads. Also make sure the legs of the components are clean.
Step: 3 Apply Solder Paste
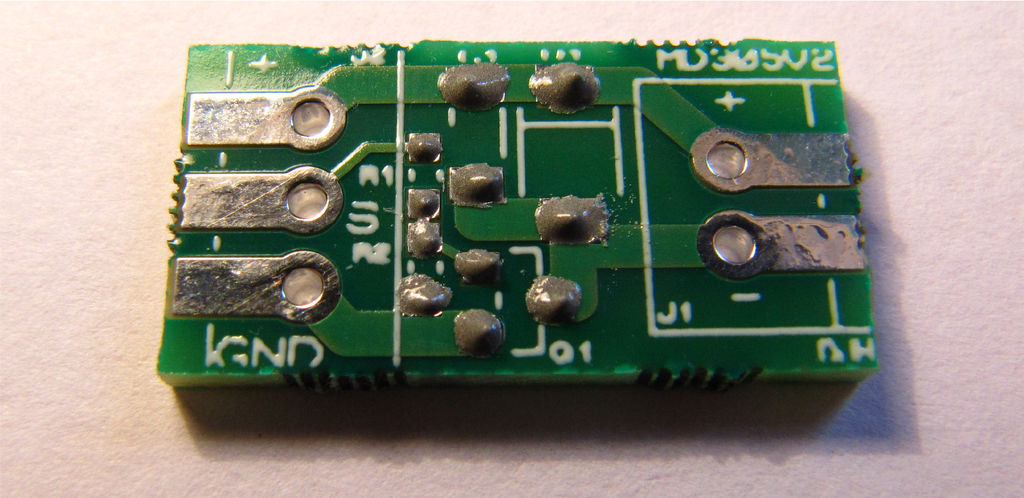
Using a tooth pick put a dot of solder paste on each pad. Don’t use too much and avoid splats and bridges. Less is more with solder paste.
Step: 4 Place Components
Carefully position each component (starting with the smallest) using a pair of tweezers. At this point a magnifying ring or head mounted magnifying goggles can really help.
WARNING! Make sure the diode is the correct way round and that the two resistors are in their correct positions.
For more detail: Soldering an SMT MOSFET Driver with a hotplate using microcontroller
-
What equipment is required to solder SMD components at home?
You need the PCB, some solder paste, the SMD components, and a hotplate. -
How long does the reflow process take?
You only need to reflow the solder for about 5 to 7 minutes. -
How do you identify the correct orientation for the diode?
The cathode end connected to the positive rail is marked with a line. -
What should be done to prepare the PCB pads before applying paste?
Clean the boards pads preferably with isopropyl and put some flux on each pad. -
What tool is recommended for applying solder paste?
Use a tooth pick to put a dot of solder paste on each pad. -
Which components should be placed first during assembly?
Start by positioning the smallest components carefully using a pair of tweezers.
