Summary of Temperature Sensor Using ATmega8 and display using LCD(16×2)
This article outlines a project to measure temperature using an LM35 sensor with an ATmega8 microcontroller and display the results on a 16x2 LCD. The process involves creating a circuit diagram, compiling code via Codevision AVR, and burning the hex file into the microcontroller, emphasizing the need for common grounds.
Parts used in the Temperature Sensor Using ATmega8 Project:
- ATmega8 Microcontroller
- LM35 Temperature Sensor
- 16x2 LCD Display
- Codevision AVR Compiler
STEP 1: Circuit Diagram
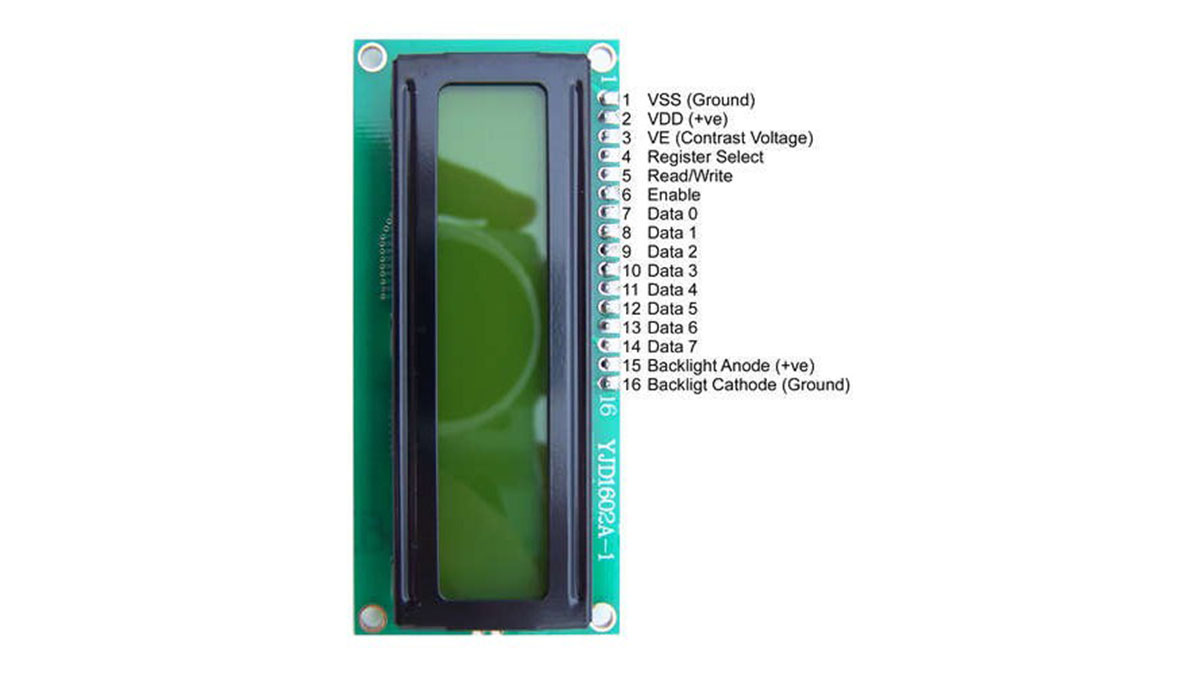
LCD other Pin’s 1,2,3,15,16 as usual not shown.
Temperature Sensor (LM35) Circuit
STEP 2: Programming Code Compile Using Codevision AVR
STEP 3: Burn The Hex In ATmega8
View Hex Code
(Make Sure grounds are common otherwise it will not work)
::::::For Any Help Write In Our BLOG::::::::
For more detail: Temperature Sensor Using ATmega8 and display using LCD(16×2)
- How do I compile the programming code?
Use Codevision AVR to compile the C code. - What must be done after compiling the code?
Burn the generated hex file into the ATmega8 microcontroller. - Why is grounding important in this circuit?
Grounds must be common otherwise the system will not work. - Which pins of the LCD are usually not shown in the diagram?
Pins 1, 2, 3, 15, and 16 are treated as usual and often omitted from the detailed view. - Can I use other compilers instead of Codevision AVR?
The article specifically states to compile using Codevision AVR. - Where can I find more details about this project?
More detail is available at the blog post titled Temperature Sensor Using ATmega8 and display using LCD(16×2). - Does the project require specific software to run?
Yes, it requires Codevision AVR for compilation. - What happens if grounds are not common?
The project will not function correctly.