Summary of The Lightning Simulator/Breathalyzer/Graphic Equalizer – Using Arduino Powered
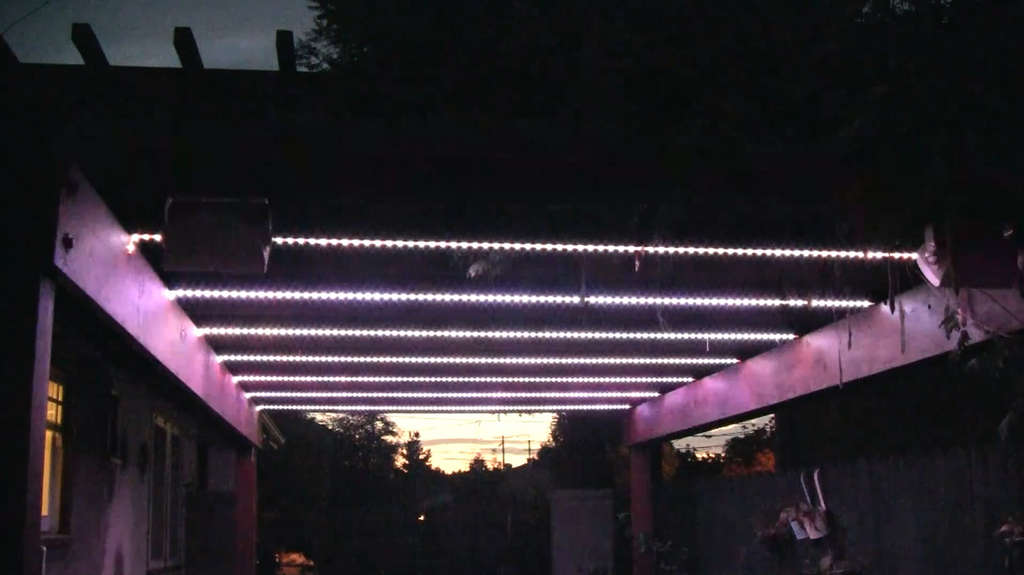
This project involves creating an outdoor LED light display mounted on a trellis, serving as a lightning simulator, breathalyzer, and music-synced graphic equalizer. It uses eight 10ft waterproof RGB LED strips, controlled by an Arduino Mega with custom wiring and audio integration via an Adafruit WaveShield and a home audio system. Power and audio signals are carefully run underground and shielded for noise reduction. The LED strips are mounted with silicone for weatherproofing. The system includes various sensors and amplifiers to enable interactive and dynamic lighting effects.
Parts used in the Outdoor LED Trellis Light Display Project:
- 8 12v RGB Waterproof Flexible LED Strips (10ft each)
- 8 RGB 4A/Channel Amplifiers
- 8 RGB 4A/Channel Amplifiers with TTL input
- RGB Controller 8 Key Touch (Wall Plate)
- Arduino Mega
- Arduino Mega ProtoShield
- Adafruit WaveShield
- Electrical panel enclosure (for housing Arduino and amps)
- 18-4 cable (for wiring LED strips)
- Two 12V 48W 4A Power Supplies
- 5VDC Power Supply
- Waterproof Butt Connectors
- Standard CAT5 wire
- Two pairs of Audio Baluns
- Molex connectors and crimping pins
- Alcohol Sensor
- Various switches and two 10K potentiometers
- Other sensors (optional)
- Speakers
- Audio Amplifier or Whole House Audio System
- Electro-Seal by Ducky (waterproof, flexible rubber coating, optional)
- 100% Silicone (for mounting LED strips)
- Caulking gun (for applying silicone)
The LED strips are mounted on an outdoor trellace which functions as a lightning simulator, outdoor breathalyzer, graphic equalizer synced to music, and a few other effects with sound.
Materials:
8 12v RGB Waterproof Flexible LED Strips 10ft long (usledsupply.com) – $800
8 RGB 4A/Ch Amps (usledsupply.com) – $200
8 RGB 4A/Ch Amps with TTL input (usledsupply.com) – $200
RGB Controller 8 Key Touch (Wall Plate) – $25
1 Arduino Mega – $60
1 Arduino Mega ProtoShield – $15
1 AdaFruit WaveShield – $22
1 Electrical panel enclosure to house the Arduino and LED Strip amps – $30
18-4 cable for wiring the LED strips – $30
2 Power Supply 12v 48W 4A
1 5VDC Power Supply
Waterproof Butt Connectors
Standard CAT5 wire
2 pairs of Audio Baluns
Molex connectors and crimping pins
Alcohol Sensor
Various switches and two 10K potentiometers
Other sensors of your choice
Speakers
Audio Amplifier or Whole House Audio System
Electro-Seal by Ducky (waterproof, flexible rubber coating) – Optional
Step 1: The Schematic & Audio Solution
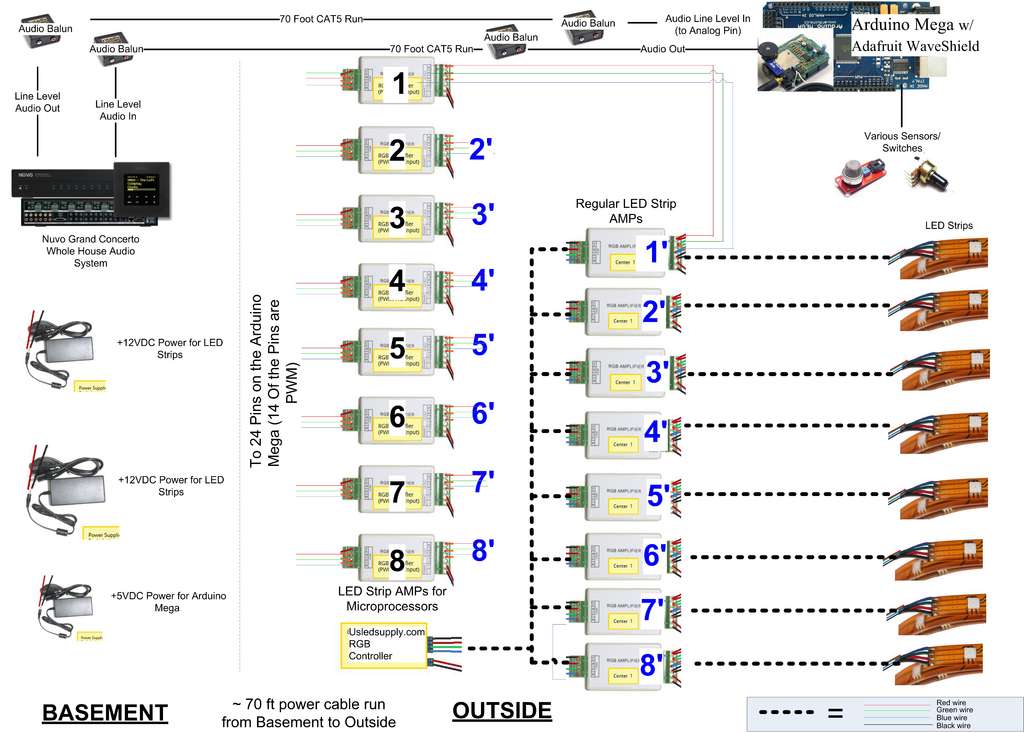
usledsupply.com had an off the shelf LED controller for controlling the colors, dimming, flashing, etc. So I wanted to be able to use this controller along with the Arduino Mega for the lightning simulator/breathalyzer/graphic equalizer functions. The way this works is you simply turn on the controller you want and turn the other one off.
A higher resolution pic of the schematic
Step 2: Digging the Trenches & Running the Power & Audio
Step 3: Mounting the LED strips
Mounting the LED strips was pretty easy although time consuming. Mount them using a caulking gun with a tube of 100% Silicone from your local home improvement store.
Lay down a bead of the Silicone and then attach the strips. You’ll need to secure them with staples or in my case, painter’s tape until the Silicone has dried and hardened.
It’s also a good idea to power at least one of the strips so you know you’ve got your wiring right and the strips are not defective before permanently attaching them.
For more detail: The Lightning Simulator/Breathalyzer/Graphic Equalizer – Using Arduino Powered


