Summary of Weight Sensor Coaster
This Instructable guides users in building a smart drink coaster equipped with a weight sensor and WiFi connectivity. The device measures liquid levels in a glass, transmits data to a webpage, and features RGB LEDs that change color based on the volume of liquid. While functional, the current design assumes constant glass weight, requiring future modifications for improved accuracy.
Parts used in the Weight Sensor Coaster:
- Particle Photon microcontroller
- 3D-printed shell
- Breadboard
- 5kg Load cell
- HX711 ADC Converter
- Particle PWRSHLD Photon Power Shield
- Adafruit 24 RGB LED Neopixel Ring
- YDL 3.7V 250mAh Lipo battery
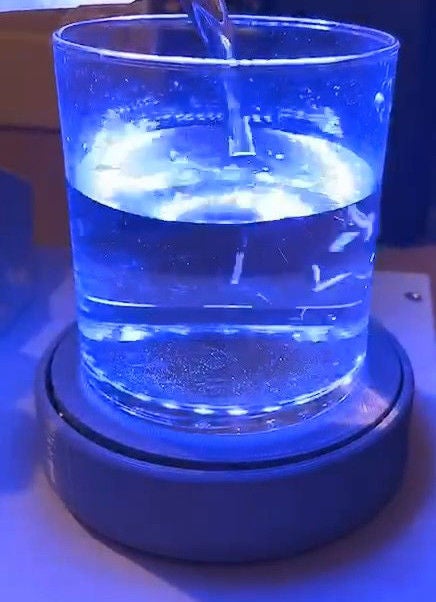
This Instructable will allow you to build a drink coaster with a weight sensor in it. The sensor will determine the amount of liquid in the glass placed on the coaster and send this information through WiFi to a webpage. Additionally, the coaster have LED lights installed that will change color depending on the amount of liquid.
The current limitation in this design is that it assumes the weight of the glass and the liquid is constant. Further modifications need to be made to address these limitations.
The repository with all the code and files needed to complete can be found at:
https://github.com/JoseReyesRIT/HCIN-WeightSensing…
Note: This Instructable was created as a project for a class. Results may vary.
Supplies:
- Particle Photon microcontroller (Particle Maker Kit)
- 3D-printed shell
- Breadboard
- 5kg Load cell + HX711 ADC Converter
- Particle PWRSHLD Photon Power Shield
- Adafruit 24 RGB LED Neopixel Ring
- YDL 3.7V 250mAh 502030 Lipo battery Rechargeable Lithium Polymer ion Battery Pack with JST Connector
Step 1: Make Sure the Particle Photon Is Set Properly
Before beginning to assemble the weight sensing coaster, you must make sure the Particle Photon microcontroller is properly set and working in the Particle website, The includes creating an account that allows you to:
- Claim the Particle Photon as your own.
- Write code using the Web IDE in the website
- Flash the code into your device.
The specifics on how to properly set up and ensure your Particle Photon is working are beyond the scope of this Instructable.
Step 2: Create the Circuit
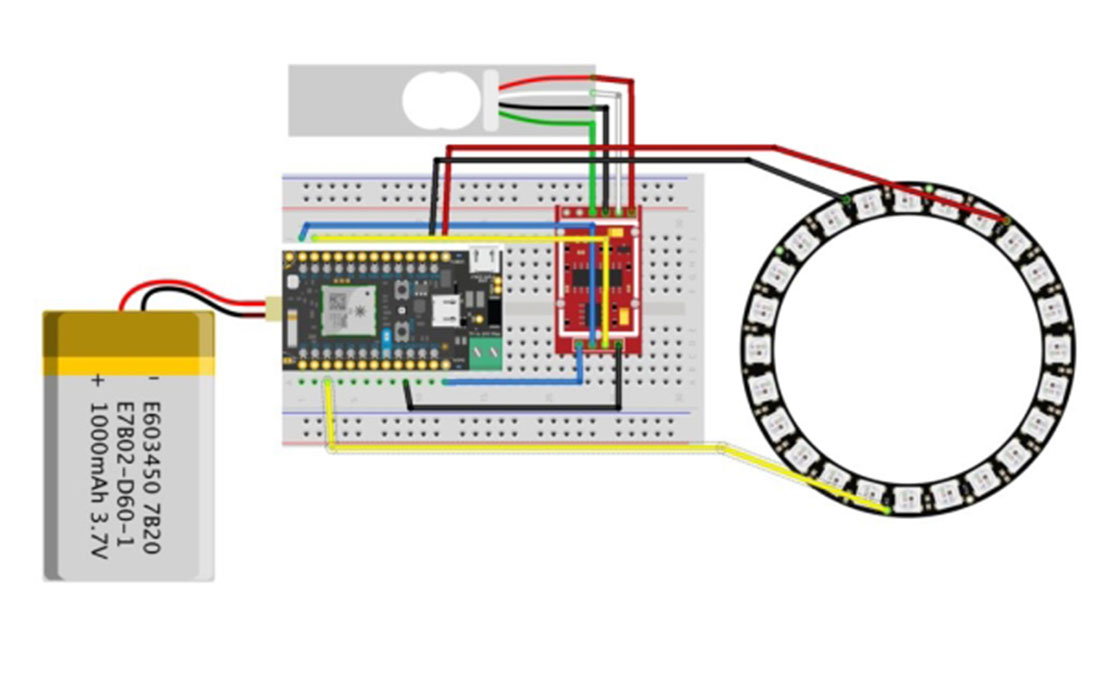
Create the circuit in your breadboard. This will allow you to ensure that all the components of the coaster are working as intended before committing to soldering them. Using the schematics pictured above as reference, follow these instructions:
- Assemble the Photon and Photon Power Shield together with the Photon’s USB slot pointing in the opposite direction of the LiPo battery slot, and place them on the breadboard.
- Connect the 3.7v LiPo battery to the Power Shield. The battery can be charged through the USB port on the power shield. The Photon will work while charging.
- Connect the RGB LED Neopixel Ring to the Photon as follow: (LED → Photon pins)
- Data Input → D2
- VDD → VIN
- GND → GND
- Connect the Load Cell and HX711 ADC Converter to the Photon as follow: (ADC Converter → Photon pins)
- DT→ A1
- SCK → A0
- VCC → 3V3
- GND → GND.
Step 3: Test Code
Access the Web IDE in the Particle website and create a new app. Copy the code in hereinto the new app main file. Flash the code into your Photon Particle.
After the code is flashed, the RGB LED Ring should turn on. When pressure is applied to the Load Cell, the LED should change color correspondingly.
Step 4: 3D Print Enclosure
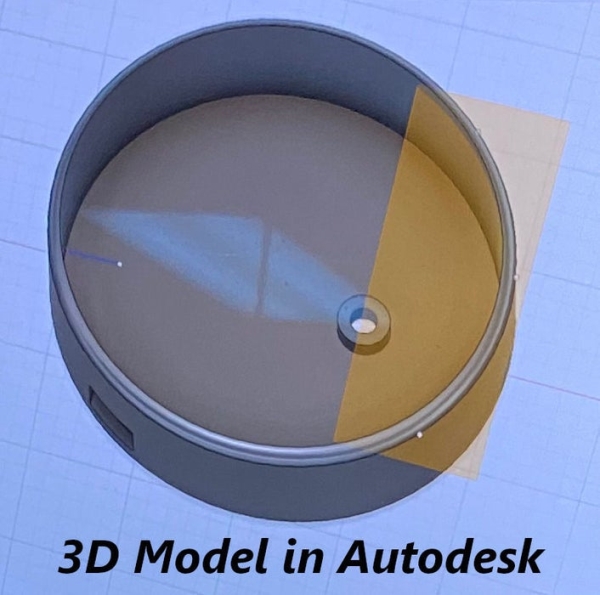
Using the models located here, print the outer shell that will house your circuit and serves as a coaster.
Step 5: Laser Cut Plastic Cover
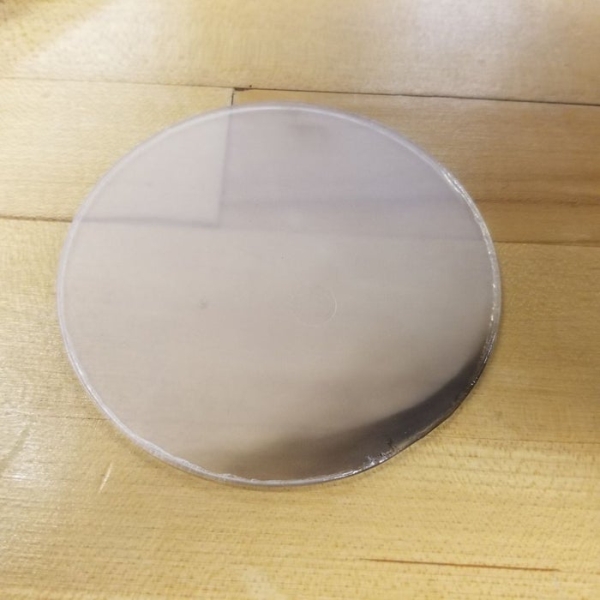
Laser cut a circle with a diameter of 97mm using a semi-transparent material. This will be the cover for the coaster. It serves two purposes: it protects the case from the liquid generated by the glass through condensation and it helps reduce the brightness of the RGB LED lights
Step 6: Solder Circuit and Assemble
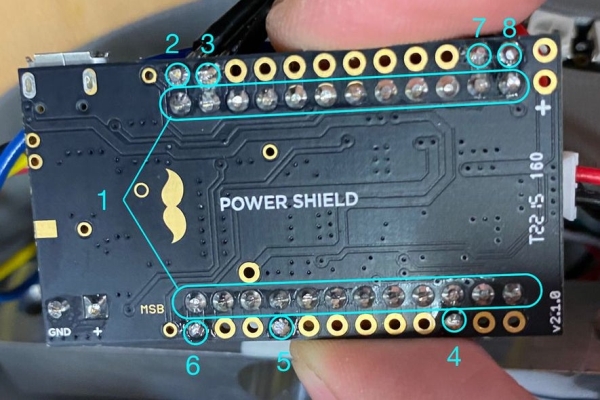
Following the instructions below and using the above image as reference, solder the circuit together and place it inside the 3D printed enclosure.
- Cut the headers on the back side of the Power Shield (Area 1).
- Solder the RGB LED Neopixel Ring as follow:
- VDD → 2
- GND → 3
- Data Input → 4
- Solder the HX711 ADC as follow:
- GND → 5
- VCC → 6
- DT → 7
- SCK → 8
- Assemble the circuit in the 3D printed case as shown in the images above. You can use a glue gun to hold the battery and the circuit.
- Assemble the top lid and connection.
Step 7: Host Website
Using the code files located in here, host a website that will allow you to keep track of the current state of the coaster The website visualizes the amount of liquid inside the glass that sits on the coaster. Depending on the level of liquid in the glass, the visualization simulates an orb being filled and changes colors as follows:
- Red: The glass is nearly empty.
- Yellow: The glass is approximately halfway full.
- Green: The glass is nearly full.
Step 8: Done!
Your coaster is ready to be used.
Source: Weight Sensor Coaster
- How does the coaster determine the amount of liquid?
The sensor determines the amount of liquid by measuring the weight of the glass and the liquid placed on it. - Can the coaster send data to a webpage?
Yes, the sensor sends information through WiFi to a webpage. - What happens when pressure is applied to the Load Cell?
The RGB LED changes color correspondingly when pressure is applied. - Does the LED light change color based on liquid level?
Yes, the LED lights change color depending on the amount of liquid. - How can I charge the battery while using the device?
The battery can be charged through the USB port on the power shield while the Photon works. - What is the purpose of the laser-cut plastic cover?
The cover protects the case from condensation and helps reduce the brightness of the RGB LED lights. - What color indicates the glass is nearly empty?
Red indicates the glass is nearly empty. - What color indicates the glass is nearly full?
Green indicates the glass is nearly full.